
In the modern computing landscape, the Graphics Processing Unit (GPU) has evolved from a simple tool for rendering desktop windows into a powerhouse capable of complex 3D simulation, high-resolution video editing, and advanced artificial intelligence processing. Whether you are a creative professional using the NVIDIA Studio suite or a high-end gamer leveraging the latest ray-tracing technologies, your hardware is only as capable as the software that instructs it. This software—the driver—acts as the essential translator between the Windows operating system and the silicon of your NVIDIA GeForce, Quadro, or RTX card. Keeping these drivers updated is not merely a recommendation; it is a fundamental requirement for maintaining system security, unlocking new features, and ensuring peak computational efficiency.

Why Keeping NVIDIA Drivers Updated is Crucial for Modern Computing
The architecture of a modern NVIDIA GPU, such as the Ada Lovelace or Ampere series, relies on a complex interplay of hardware and software. Every time a new major software title or professional application is released, it introduces new ways of utilizing the GPU’s CUDA cores, Tensor cores, and RT cores. Without an updated driver, the hardware may not know how to efficiently allocate resources to these new instructions, leading to suboptimal performance or system crashes.
Performance Optimization and Frame Rates
For gamers, the most visible benefit of updating drivers is the optimization for “Day 0” game releases. NVIDIA works closely with developers to ensure that Game Ready Drivers are available before or on the day of a major game launch. These drivers include specific profiles that adjust how the GPU handles the game’s unique engine requirements. By updating, users often see immediate increases in frame rates, reduced micro-stuttering, and better utilization of technologies like Deep Learning Super Sampling (DLSS). In some cases, a single driver update can result in a 10% to 20% performance uplift in specific titles by streamlining the rendering pipeline.
Security Patches and System Stability
Beyond performance, drivers are a critical component of digital security. Because the GPU has deep access to system memory and hardware resources, vulnerabilities in driver code can potentially be exploited by malicious actors to gain unauthorized access or cause system instability. NVIDIA regularly releases security bulletins and incorporates patches into their driver updates to close these loopholes. Furthermore, as Windows receives “Quality Updates” and “Feature Updates,” the interaction between the OS and the driver can become strained. Regular updates ensure that the driver remains compatible with the latest Windows kernel changes, preventing the dreaded Blue Screen of Death (BSOD) and other fatal system errors.
Support for New Software and AI Features
The rise of AI-driven applications has made driver updates more important than ever. Technologies like Broadcast, Canvas, and the NVIDIA AI Workbench require the latest versions of the driver to access the specialized Tensor cores found in RTX hardware. Similarly, professional software such as Adobe Premiere Pro, Blender, and Autodesk Maya frequently update their hardware acceleration requirements. An outdated driver may prevent these applications from utilizing the GPU for rendering or video encoding, forcing the system to rely on the much slower CPU.
The Automated Path: Using NVIDIA GeForce Experience
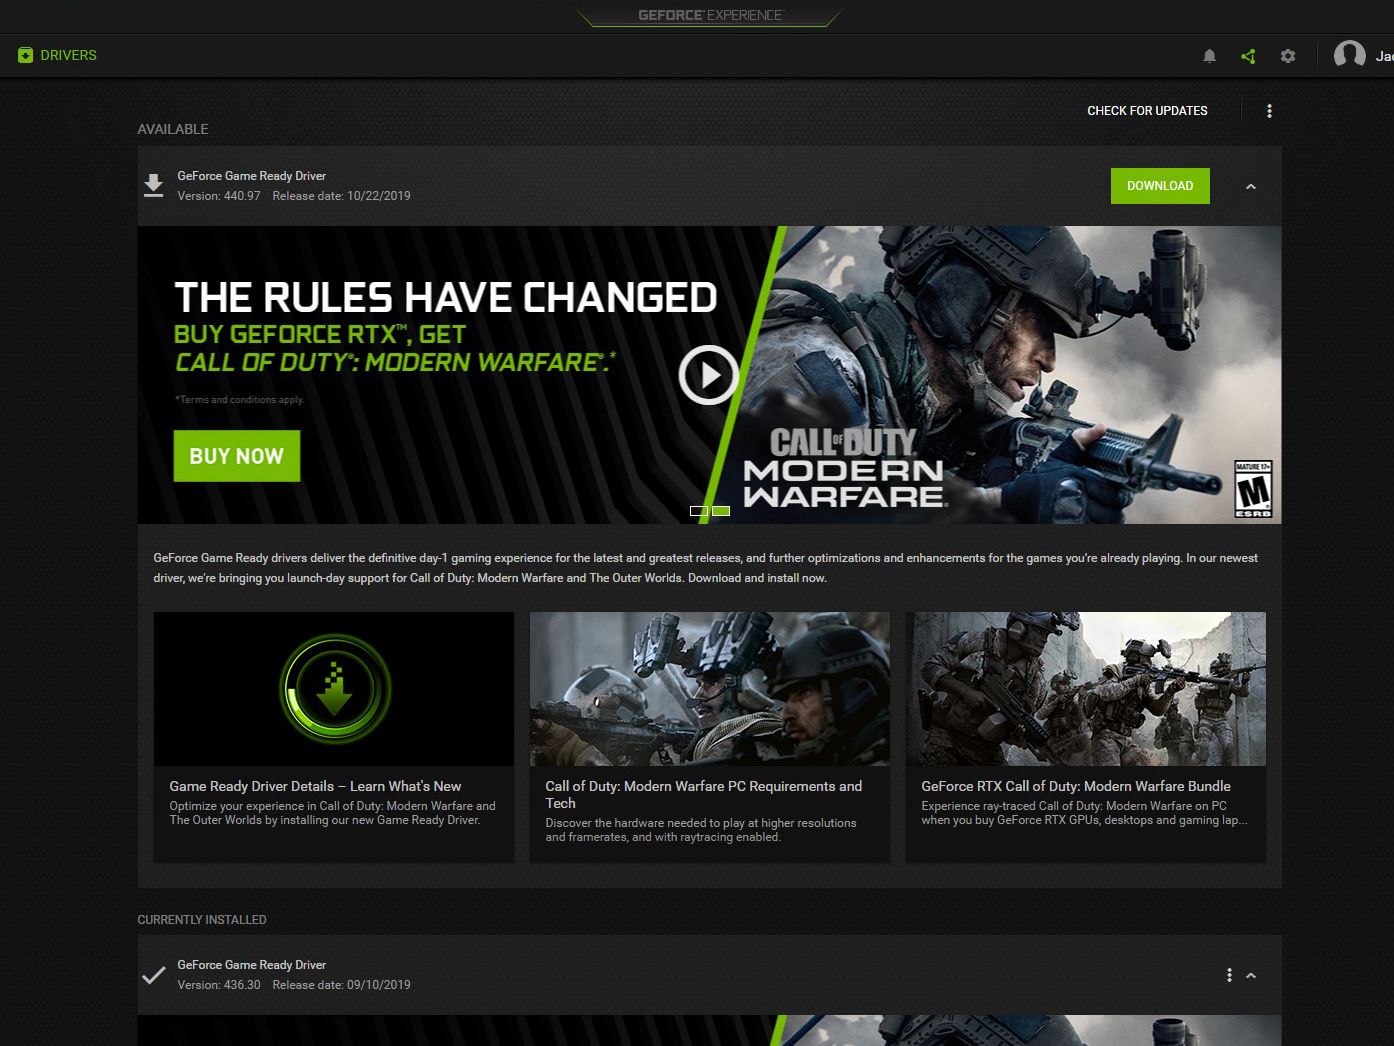
For the vast majority of users, the most efficient way to manage driver updates is through NVIDIA GeForce Experience. This application serves as a centralized hub for driver management, game optimization, and social features like ShadowPlay. It simplifies the update process by monitoring your hardware and automatically notifying you when a new software package is available.
Initial Setup and Account Creation
To begin, you must have GeForce Experience installed on your system. Most modern pre-built systems and laptops come with this pre-installed, but it can also be downloaded directly from the NVIDIA website. Once installed, the application requires a login. This account allows NVIDIA to save your hardware profile and game settings to the cloud, ensuring that your optimizations are preserved even if you move to a new machine. While some users prefer not to use an account, it is a prerequisite for the automated update feature.
Checking for Updates and Express vs. Custom Installation
Inside the GeForce Experience interface, navigating to the “Drivers” tab will display your current version and any available updates. Clicking “Check for Updates” forces the application to poll NVIDIA’s servers. Once a new version is detected, you will be presented with a “Download” button.
After the download is complete, you are given two choices: Express Installation and Custom Installation.
-
Express Installation: This is the recommended route for most users. It replaces the current driver files while keeping all your previous settings and configurations intact.
-
Custom Installation: This allows you to choose which specific components to install. If you do not use the HD Audio driver (because you have a dedicated sound card) or the PhysX System Software, you can uncheck them here. More importantly, this menu provides the “Perform a Clean Installation” checkbox, which wipes previous driver settings to prevent software conflicts.
Managing Game Settings and Overlays
GeForce Experience does more than just update the core driver files. It also updates the “Optimal Playable Settings” database. This feature scans your system’s hardware configuration and compares it to thousands of tested benchmarks to suggest the best graphical settings for your specific CPU and GPU combination. By updating your drivers through this portal, you ensure that these optimization profiles are always current, allowing you to get the best visual fidelity without manual experimentation in every game’s settings menu.
The Precision Approach: Manual Driver Installation
While automated tools are convenient, many power users, system administrators, and creative professionals prefer the manual approach. Manual installation offers greater control over which driver branch is installed and avoids the need for additional background software like GeForce Experience.
Identifying Your Hardware Specifications
Before downloading a driver manually, you must know exactly which GPU you are using. If you are unsure, you can right-click the Start button, select “Device Manager,” and expand the “Display adapters” section. This will list your specific model, such as the “NVIDIA GeForce RTX 3080.” Additionally, you need to know your operating system type (e.g., Windows 10 64-bit or Windows 11) to ensure the driver package is compatible with your system’s architecture.
Navigating the NVIDIA Download Portal
NVIDIA’s official download page provides a series of dropdown menus to filter their massive library of drivers. You will need to select the Product Type, Product Series, Product, Operating System, and Download Type. It is vital to select the correct “Product Series” for mobile devices; for instance, a laptop with an RTX 4070 requires the “(Notebooks)” version of the driver series to account for the specific thermal and power management firmware used in portable hardware.
Game Ready Drivers vs. NVIDIA Studio Drivers
During the manual selection process, you will be asked to choose between “Game Ready Drivers” (GRD) and “Studio Drivers” (SD).
-
Game Ready Drivers: These are prioritized for gamers who want support for the latest titles, patches, and DLCs the moment they are released. They are updated frequently and focus on frame rate stability and low latency.
-
NVIDIA Studio Drivers: These are designed for content creators. While they still support gaming, they undergo more extensive testing against professional creative applications like the Adobe Creative Cloud, DaVinci Resolve, and Cinema 4D. If your primary use for your PC is video editing, 3D modeling, or graphic design, the Studio Driver is the superior choice due to its focus on long-term stability and workflow reliability.
Troubleshooting and Advanced Techniques: Performing a Clean Install
Occasionally, driver updates can go wrong. This is often due to residual files from previous versions or conflicts with third-party software. If you experience flickering, unexpected crashes, or the “NVIDIA Installer Failed” error, a more aggressive approach is required.
Using the “Perform a Clean Installation” Toggle
The simplest way to resolve minor conflicts is the “Clean Installation” option mentioned previously in the Custom Installation menu. This process resets all NVIDIA settings to their factory defaults and removes existing profiles. It is a highly effective first step when troubleshooting performance regressions after an update.
Using Display Driver Uninstaller (DDU) for Critical Errors
For persistent issues that a standard clean install cannot fix, the tech community relies on a third-party utility called Display Driver Uninstaller (DDU). This tool is designed to be used in Windows Safe Mode. It thoroughly scrubs every trace of the NVIDIA driver from the Windows Registry and the system folders. Once the system is completely “clean” of GPU drivers, you can restart and perform a fresh installation of the latest driver package. This is often considered the “nuclear option” but is the most reliable way to fix corrupted driver environments.
Rolling Back Drivers via Windows Device Manager
Sometimes, a new driver version may introduce a bug that specifically affects your unique hardware configuration. In such cases, you may need to go back to a previous version. This can be done through the “Roll Back Driver” feature in the Device Manager. By right-clicking your GPU, selecting “Properties,” and navigating to the “Driver” tab, you can revert to the previously installed version. If this option is grayed out, you will need to manually download the older version from the NVIDIA “Beta and Older Drivers” archive.
Optimizing the NVIDIA Control Panel After the Update
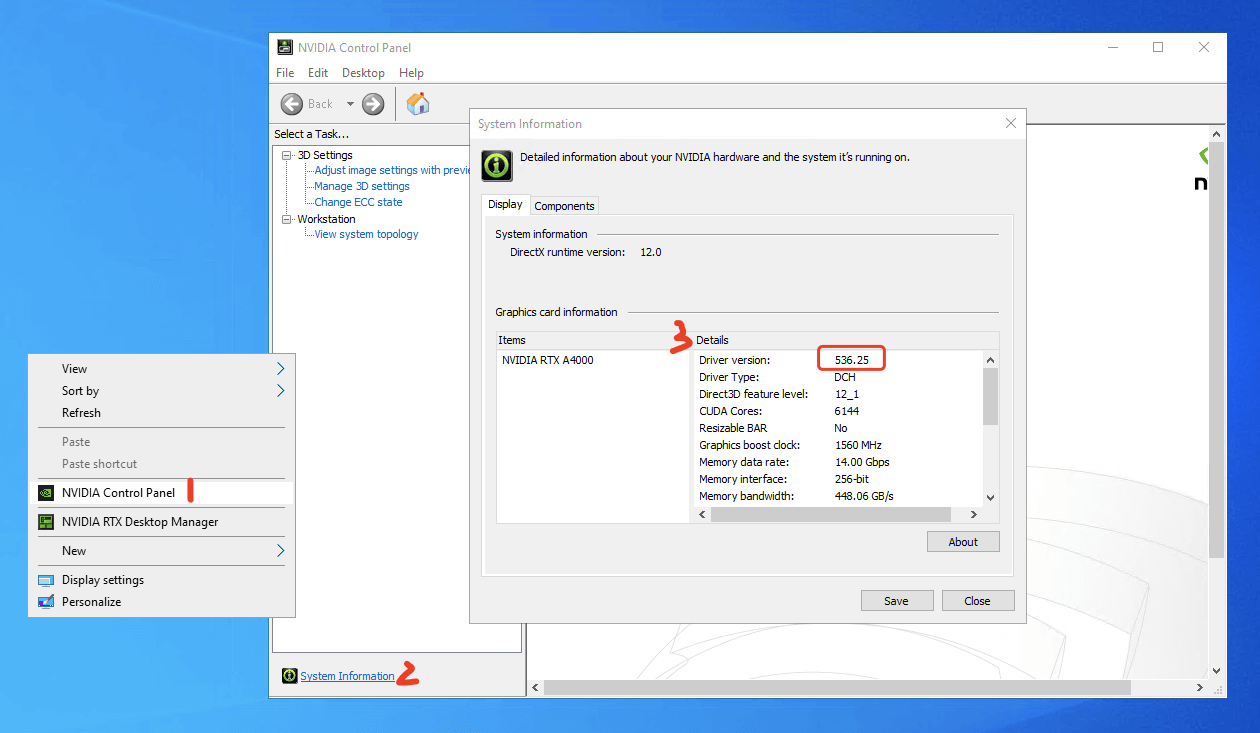
Once your drivers are successfully updated, the process is not quite finished. Each update can occasionally reset certain global settings within the NVIDIA Control Panel, which is the specialized interface for fine-tuning GPU behavior at the driver level.
Configuring Power Management and Texture Filtering
For desktop users, it is often beneficial to check the “Power management mode” under “Manage 3D settings.” Setting this to “Prefer maximum performance” ensures the GPU does not aggressively downclock during transition scenes in games or during heavy rendering tasks. Additionally, adjusting “Texture filtering – Quality” to “High performance” or “High quality” allows you to balance the visual sharpness of textures against the computational load on the GPU’s memory controller.
Enabling Low Latency Modes and G-Sync
Modern NVIDIA drivers include features like “Ultra-Low Latency Mode,” which minimizes the delay between a mouse click and the action appearing on the screen by reducing the number of frames the CPU queues for the GPU. Furthermore, if you have a G-Sync or G-Sync Compatible monitor, a driver update is a perfect time to verify that variable refresh rate (VRR) is enabled. This technology synchronizes the monitor’s refresh rate to the GPU’s output, eliminating screen tearing without the significant input lag associated with traditional V-Sync. Ensuring these settings are optimized after an update guarantees that you are getting the full technical value out of your hardware investment.
aViewFromTheCave is a participant in the Amazon Services LLC Associates Program, an affiliate advertising program designed to provide a means for sites to earn advertising fees by advertising and linking to Amazon.com. Amazon, the Amazon logo, AmazonSupply, and the AmazonSupply logo are trademarks of Amazon.com, Inc. or its affiliates. As an Amazon Associate we earn affiliate commissions from qualifying purchases.