
In the increasingly tech-driven landscape of modern kitchens, appliances like the Keurig coffee maker have become indispensable. Valued for their convenience, speed, and consistent brew quality, these single-serve systems simplify our daily routines. However, like any sophisticated piece of technology, a Keurig requires periodic maintenance to sustain its peak performance. At the heart of this maintenance regimen lies a crucial process often overlooked by casual users: descaling. Far from a mere cleaning task, descaling is a technical necessity, addressing a fundamental challenge posed by water chemistry that can severely impede your machine’s operation, compromise beverage quality, and ultimately shorten its lifespan. This article delves into the precise nature of descaling, unraveling the scientific principles behind it, exploring its indispensable role in appliance care, and providing a comprehensive guide to maintaining your Keurig’s technological integrity. Understanding and implementing a regular descaling routine is not just about extending the life of your gadget; it’s about preserving the investment, ensuring optimal functionality, and guaranteeing that every cup of coffee continues to meet the high standards you expect from your Keurig.

The Unseen Threat: Understanding Limescale and Its Impact on Your Keurig
Beneath the sleek exterior of your Keurig lies a complex network of heating elements, pumps, and tubing, all designed to deliver the perfect brew. However, this intricate system is constantly interacting with water, and therein lies the root of the descaling imperative. The pervasive issue of mineral deposits, commonly known as limescale, presents a silent yet significant threat to the performance and longevity of these precision components.
The Chemistry of Hard Water: Why Scale Forms
The fundamental cause of limescale is hard water. “Hardness” in water refers to its high concentration of dissolved minerals, primarily calcium and magnesium ions. While these minerals are naturally occurring and generally harmless for consumption, they pose a significant challenge to heating appliances. When hard water is heated, as it repeatedly is within a Keurig to brew coffee, the calcium bicarbonate dissolved in the water undergoes a chemical reaction. It decomposes into carbon dioxide, water, and calcium carbonate. Calcium carbonate, being less soluble at higher temperatures, precipitates out of the water and adheres to surfaces it encounters. This crystalline solid is the white, chalky residue we identify as limescale. Over time, these microscopic deposits accumulate, forming layers that progressively coat the internal surfaces of the Keurig’s water reservoir, heating coils, and dispense tubing.
Identifying the Symptoms: Signs Your Keurig Needs Descaling
The insidious nature of limescale means its detrimental effects often manifest gradually. Recognizing the early symptoms is key to preventative maintenance and avoiding more severe issues. Common indicators that your Keurig is suffering from scale build-up include:
-
Reduced Water Flow: The most direct symptom, as internal tubing narrows due to scale, restricting the path for water. This often results in a sputtering sound during brewing or a noticeably slower brew cycle.
-
Inconsistent Brew Temperatures: Scale acts as an insulator, reducing the efficiency of the heating element. This can lead to coffee that is not as hot as it should be, impacting flavor extraction.
-
Smaller Brew Sizes: If your Keurig consistently dispenses less coffee than the selected cup size, it’s a strong sign of restricted water flow.
-
Unusual Noises: A Keurig working harder to push water through scaled-up pathways might emit louder, strained noises, particularly whirring or vibrating sounds.
-
Visible Deposits: While often internal, sometimes you might see flakes or white residue in your coffee or around the K-cup holder, indicating severe scale.
Beyond Aesthetics: The Functional Deterioration Caused by Scale
The consequences of neglecting limescale extend far beyond mere inconvenience. Functionally, scale build-up degrades the entire brewing process. The insulating layer on heating elements forces the machine to consume more energy to reach desired temperatures, leading to decreased energy efficiency and higher operational costs. More critically, the continuous strain on pumps and heating elements due to blockages can lead to premature mechanical failure, necessitating expensive repairs or even complete replacement of the appliance. Moreover, the presence of scale can harbor bacteria and affect the taste profile of your coffee, imparting a metallic or stale flavor that undermines the very purpose of a premium coffee maker. Descaling is thus not just about cleaning; it’s a critical technical procedure to restore the machine’s designed operational parameters and safeguard its delicate internal mechanisms.
The Technical Imperative: Why Regular Descaling is Crucial for Your Appliance
Maintaining a Keurig, like any complex electronic appliance, requires understanding its internal workings and the environmental factors that impact them. Regular descaling transcends a simple recommendation; it is a technical imperative for ensuring the longevity, efficiency, and consistent performance of your device.
Preserving Performance: Consistent Temperature and Brew Quality
The cornerstone of a great cup of coffee from a Keurig is the precision with which it heats and delivers water. The brewing process relies on specific temperature ranges to extract optimal flavor compounds from the coffee grounds. Limescale accumulation directly interferes with the heating element’s ability to efficiently transfer heat to the water. A scaled heating element requires more time and energy to reach the target temperature, often resulting in fluctuating or sub-optimal temperatures during the brew cycle. This inconsistency leads to under-extracted coffee, characterized by a weak, sour, or flat taste. By regularly descaling, you strip away these insulating mineral layers, allowing the heating element to function at its engineered efficiency. This ensures that every brew is met with the precise temperature required for perfect flavor extraction, delivering a consistently hot and robust cup.
Extending Lifespan: Protecting Internal Components
The internal components of a Keurig—including the pump, heating element, and various sensors—are engineered for durability under normal operating conditions. However, the relentless stress imposed by limescale build-up can drastically shorten their operational life. A pump struggling against restricted water flow works harder, generating excess heat and strain on its motor. Similarly, a heating element encrusted with scale is forced to operate at higher power levels for longer durations, accelerating its wear and tear. These conditions not only lead to increased energy consumption but significantly heighten the risk of premature component failure, which can render the entire machine inoperable. Regular descaling mitigates this stress by removing obstructions and allowing all components to function within their designed parameters, thereby significantly extending the overall lifespan of your Keurig and protecting your investment.
Energy Efficiency and Operational Costs
In an era where energy consumption and environmental impact are increasingly scrutinized, the energy efficiency of household appliances is a significant consideration. A Keurig suffering from scale build-up is inherently less energy-efficient. The insulating properties of limescale on the heating element mean that more electricity is required to heat the same volume of water to the desired temperature. This translates directly into higher energy bills over time. While the individual increase per brew might seem negligible, aggregated over months or years, the financial impact can be substantial. By consistently descaling your Keurig, you ensure that its heating system operates at peak efficiency, minimizing wasted energy and contributing to lower operational costs. This not only makes your coffee routine more sustainable but also provides a tangible return on the time and effort invested in maintenance.
A Step-by-Step Guide: How to Technologically Restore Your Keurig’s Efficiency
The descaling process, while seemingly daunting to the uninitiated, is a straightforward technical procedure designed to restore your Keurig to its optimal working condition. Adhering to the manufacturer’s guidelines, typically provided in the user manual, is paramount, as specific models may have unique instructions. However, the general principles remain consistent.
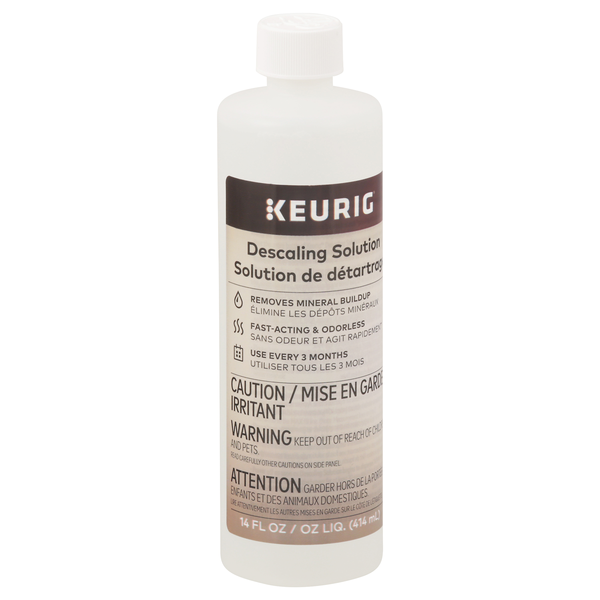
Gathering Your Arsenal: Descaling Solutions and Preparation
Before commencing the descaling process, preparation is key. First, ensure your Keurig is powered off and unplugged from the wall socket for safety. Next, you’ll need a descaling solution. Keurig offers its proprietary descaling solution, which is generally recommended for its effectiveness and compatibility. Alternatively, a solution of white vinegar and water (typically a 1:1 ratio) can be used, although some manufacturers advise against vinegar for specific models, so always check your manual. You will also need a large mug or container to catch the expelled descaling solution and water, along with access to fresh, clean water for rinsing. Empty any K-Cup pods from the brewer, remove the water filter (if installed), and ensure the water reservoir is empty.
The Descaling Cycle: Executing the Process
The descaling cycle typically involves two main phases:
-
Solution Application & Soaking: Fill the water reservoir with the descaling solution (or vinegar/water mix). Place a large mug on the drip tray. Power on the Keurig. For many models, there’s a dedicated “descale” button or a sequence of buttons to initiate the descaling mode. If not, simply run a series of large cup size brew cycles without a K-Cup pod until the reservoir is empty. The machine will draw the descaling solution through its internal system. Once the reservoir is empty, turn off the Keurig and let it stand for at least 30 minutes (or as per manufacturer instructions) to allow the solution to dissolve the mineral deposits. This soaking period is crucial for the chemical action of the descaling agent.
-
Rinse Cycles: After the soaking period, turn the Keurig back on. Fill the water reservoir with fresh, clean water. Run several large cup size brew cycles, dispensing only hot water, until the reservoir is completely empty. Repeat this process at least 10-12 times, refilling the reservoir with fresh water each time. The goal of these rinse cycles is to thoroughly flush out any residual descaling solution and loosened limescale particles from the internal components. It’s critical to ensure no descaling solution remains, as it can impart an unpleasant taste to subsequent beverages and potentially harm the machine over time.
Rinsing and Resetting: Ensuring Optimal Functionality
After completing the final rinse cycle, power off and unplug your Keurig. Reinstall the water filter (if applicable). Clean the exterior of the machine and the drip tray. Your Keurig is now descaled and ready for use. Some advanced models may have a descaling indicator light that needs to be reset – consult your manual for specific instructions. The machine should now operate more smoothly, brew faster, and deliver hotter coffee, reflecting its restored internal efficiency. This meticulous process ensures that the technological heart of your Keurig is free from mineral obstructions, ready to continue its daily duty with renewed vigor.
Proactive Maintenance: Advanced Strategies for Sustained Keurig Performance
While episodic descaling is essential, a proactive approach to maintenance integrates several strategies to minimize scale build-up and ensure consistent, long-term performance from your Keurig. This goes beyond reactive solutions, embedding preventative measures into your daily routine.
Water Quality Matters: Filtration Systems and Their Role
The quality of water used in your Keurig is the primary determinant of how quickly limescale accumulates. Tap water varies significantly in hardness depending on geographical location. Using filtered water can dramatically reduce the mineral content entering your machine. Many Keurig models come equipped with internal charcoal water filters. These filters, while primarily designed to remove chlorine and other impurities that affect taste, also offer a degree of protection against mineral build-up by trapping some particulates. Regularly replacing these internal filters (typically every 2 months) according to manufacturer recommendations is a simple yet effective preventative measure. For those with particularly hard water, using an external water filter pitcher or even a whole-house filtration system can further extend the time between descaling cycles and enhance overall water quality for brewing. Investing in better water quality is a direct investment in your Keurig’s health.
Frequency and Customization: Tailoring Your Descaling Schedule
There’s no universal “one-size-fits-all” answer for how often to descale a Keurig, as it heavily depends on water hardness and usage frequency. Keurig generally recommends descaling every 3 to 6 months. However, this is a guideline. If you use your Keurig multiple times a day with very hard water, you might need to descale more frequently, perhaps every 2 months. Conversely, if you use filtered water and brew less often, you might stretch it to 6-9 months. Pay attention to the early warning signs discussed earlier (slower brew, sputtering, cooler coffee). If your Keurig has a descaling indicator light, heed its warning. Customizing your descaling schedule based on your specific conditions ensures that you address scale build-up before it causes significant issues, optimizing both maintenance effort and machine performance.
Troubleshooting Common Descaling Challenges
Even with a clear guide, users might encounter issues during or after descaling. One common challenge is a persistent descaling indicator light. This usually means the machine’s internal counter or sensor hasn’t been reset; consult your manual for the specific button sequence to clear the indicator. If water flow remains poor after descaling, it could indicate severe, long-standing scale build-up that requires a second descaling cycle or more aggressive scrubbing of accessible parts like the entry needle (using a paperclip or specialized tool, with extreme caution). An unusual taste after descaling often points to insufficient rinsing; run several more pure water cycles to flush out any lingering solution. Always ensure you are using the correct descaling solution and following model-specific instructions meticulously, as deviations can lead to further complications or ineffective cleaning.
The Broader Spectrum of Care: Integrating Descaling into a Holistic Device Management Strategy
Descaling, while critical, is one component of a comprehensive maintenance strategy for your Keurig. Approaching appliance care with a holistic perspective ensures not only optimal performance but also extended longevity and a consistently premium user experience.
Beyond Scale: Other Maintenance Tips for Keurig Users
While mineral deposits are the most pervasive threat, other aspects of hygiene and functionality require attention:
-
Daily Rinsing: After each use, it’s good practice to run a quick water-only cycle to flush out any residual coffee grounds or flavors.
-
Cleaning Removable Parts: Regularly clean the drip tray, K-Cup holder, and water reservoir with warm, soapy water. These parts are susceptible to coffee residue, spills, and microbial growth.
-
Needle Cleaning: The entry and exit needles (the small, sharp pins that pierce the K-Cup pod) can become clogged with coffee grounds. Use a straightened paperclip or a specialized Keurig needle cleaning tool to carefully clear any obstructions, ensuring even water distribution during brewing.
-
Exterior Wipe-Down: Keeping the exterior surfaces clean prevents dust and grime accumulation, maintaining the aesthetic appeal of your appliance.
-
Storage: If storing the Keurig for an extended period, ensure it is thoroughly cleaned, descaled, and completely dry to prevent mold growth and maintain component integrity.

The Long-Term ROI: Value of Diligent Appliance Care
Integrating descaling and other maintenance practices into a diligent device management strategy offers significant long-term return on investment (ROI). From a financial perspective, regular care drastically reduces the likelihood of costly repairs or premature replacement, safeguarding your initial investment in the appliance. From a performance standpoint, it guarantees that your Keurig consistently delivers the high-quality, hot beverages it was designed for, preventing the gradual degradation of taste and temperature that can diminish the user experience. Moreover, a well-maintained appliance operates more efficiently, consuming less energy and contributing to a more sustainable household. In essence, understanding “what is descaling Keurig” is not merely about learning a procedure; it’s about embracing a mindset of proactive technological stewardship, ensuring that your trusted coffee maker remains a reliable and high-performing gadget for years to come.
aViewFromTheCave is a participant in the Amazon Services LLC Associates Program, an affiliate advertising program designed to provide a means for sites to earn advertising fees by advertising and linking to Amazon.com. Amazon, the Amazon logo, AmazonSupply, and the AmazonSupply logo are trademarks of Amazon.com, Inc. or its affiliates. As an Amazon Associate we earn affiliate commissions from qualifying purchases.