
In the dynamic world of digital art and design, artists and creators are constantly seeking tools that enhance precision, streamline workflows, and unlock new creative possibilities. Among the myriad features nestled within popular graphics software, “Alpha Lock” stands out as a deceptively simple yet profoundly powerful function. Often encountered as “Lock Transparent Pixels” or “Preserve Transparency,” this feature is a cornerstone for efficient and professional digital painting and manipulation. At its heart, Alpha Lock prevents you from painting or editing transparent areas of a layer, confining your brushstrokes and modifications exclusively to the existing, opaque content. This seemingly minor restriction unlocks a universe of control, allowing for immaculate coloring, precise shading, and effortless texture application without the tedious need for complex masking or careful manual selection.
Imagine you’ve meticulously drawn a character’s outline or laid down a base color. With Alpha Lock engaged, you can confidently add shadows, highlights, or intricate patterns without ever worrying about straying outside the lines of your existing artwork. It’s a digital safety net that accelerates your creative process, ensures clean results, and frees you to focus on the artistic expression rather than the technical minutiae of containment. Understanding Alpha Lock is not just about knowing where a button is; it’s about grasping a fundamental concept of digital image manipulation that can transform your workflow from cumbersome to effortless.
The Core Mechanism: Understanding Alpha Channels and Opacity
To truly appreciate the power of Alpha Lock, one must first grasp the underlying principles of how digital images are constructed and how transparency is managed. It all boils down to pixels, opacity, and the unseen hero: the alpha channel.
Pixels, Opacity, and Transparency
Every digital image, from a photograph to a hand-drawn illustration, is composed of a grid of tiny squares called pixels. Each pixel holds information about its color – typically represented by combinations of Red, Green, and Blue (RGB) values. However, pixels also carry another crucial piece of information: their opacity.
-
Opacity refers to how solid or transparent a pixel is.
-
A pixel with 100% opacity is fully solid; you cannot see through it.
-
A pixel with 0% opacity is fully transparent; it is completely invisible, revealing whatever is beneath it.
-
Pixels with partial opacity (e.g., 50%) are semi-transparent, allowing some degree of the underlying content to show through, creating effects like glass or mist.
The concept of transparency is fundamental to layering in digital art. When you have multiple layers, transparent areas on an upper layer allow you to see the layers below.
What is an Alpha Channel?
While the RGB channels define a pixel’s color, the alpha channel is an additional, often invisible, data channel that specifically stores the transparency information for each pixel in an image. Think of it as a separate grayscale image where white represents full opacity, black represents full transparency, and shades of gray represent varying degrees of partial transparency.
When you create a new layer in your digital art software, it typically starts as a completely transparent canvas. As you paint or import content onto that layer, pixels gain color and an associated alpha value. The alpha channel is constantly updated behind the scenes to reflect which areas are solid, which are clear, and which are somewhere in between. It’s this intelligent system that allows for sophisticated layering and blending effects.
How Alpha Lock Interacts with the Alpha Channel
Alpha Lock directly leverages the information stored in the alpha channel. When you activate Alpha Lock on a layer, you are essentially telling the software: “Do not modify any pixel on this layer that has an alpha value of zero (i.e., is fully transparent).”
-
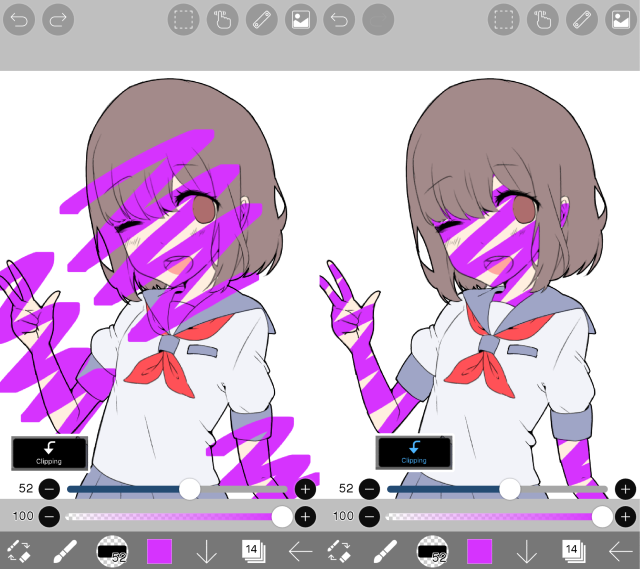
Behavior: With Alpha Lock engaged, any brushstroke, fill tool, or filter you apply will only affect the pixels that already have some degree of opacity on that specific layer.
-
Result: Transparent areas remain transparent, preserving the shape and boundary of your existing artwork. You cannot “paint outside the lines” because there are no “lines” (opaque pixels) to paint on in those transparent regions.
-
Analogy: Imagine a stencil. Alpha Lock acts like a dynamic stencil that automatically forms around the existing opaque content of your layer. You can only paint inside the holes of that stencil. If a part of the stencil is fully opaque, you can paint on it, and it will retain its overall shape, but you can change its color or texture.
This mechanism is what makes Alpha Lock so incredibly powerful for refining artwork, as it provides a precise, pixel-level constraint without the need for manual selections or masks.
Practical Applications and Workflow Benefits
The practical benefits of integrating Alpha Lock into your digital art workflow are numerous, ranging from enhancing precision to dramatically speeding up your creative process.
Refining Existing Artwork with Precision
One of the most common and impactful uses of Alpha Lock is in the meticulous refinement of existing artwork. It empowers artists to make detailed modifications without inadvertently affecting unintended areas.
-
Coloring Line Art Without Bleeding: Perhaps the quintessential use case. After creating clean line art on one layer and then laying down flat base colors on a layer below (or even directly on the line art if you’re working on a single layer after flattening), you can engage Alpha Lock on your color layer. Now, you can apply shading, highlights, or different color variations to a character’s skin, hair, or clothing with absolute confidence that your brushstrokes will not spill over the edges of the initial color shapes. This eliminates the need for tedious manual selections or masking each area, significantly speeding up the coloring process.
-
Adding Shadows and Highlights: Once a base shape is painted, Alpha Lock becomes invaluable for giving it depth. You can add realistic shadows and bright highlights directly onto the object without having to select its intricate silhouette repeatedly. The lock ensures that your light and shadow effects adhere perfectly to the object’s form.
-
Texturing Specific Areas: Whether you want to add a fabric texture to a character’s clothing, a metallic sheen to armor, or a rough surface to a rock, Alpha Lock allows you to apply these textures directly within the boundaries of the existing object, maintaining its clean edges.
Efficiency and Non-Destructive Editing
While Alpha Lock directly modifies the pixels on a layer, its application often contributes to an overall more efficient and, in a broader sense, “non-destructive” approach compared to some alternatives.
-
Speeds Up Workflow: By automating the masking of transparent areas, Alpha Lock drastically reduces the time spent on selection tools. Artists can remain in a fluid painting state, focusing on artistic choices rather than technical containment. This uninterrupted creative flow is a huge boon to productivity.
-
Eliminates Repetitive Selections: Imagine painting a complex character with many small, distinct color areas. Without Alpha Lock (or clipping masks), you’d have to create a new selection for each area every time you wanted to add a detail. Alpha Lock bypasses this, allowing you to paint directly.
-
Quick Iterations and Adjustments: Need to try a different color scheme for a specific element? Alpha Lock lets you quickly paint over the existing color, knowing you won’t affect the transparency. While it modifies the original pixels, the speed and ease of making changes can make the overall process feel more adaptable and less rigid than managing numerous complex masks for simple color adjustments.
-
Compared to Traditional Masking: While Alpha Lock isn’t a mask in the sense of a separate layer mask, it serves a similar function of containment. However, it’s more immediate and integrated into the painting process itself, making it ideal for quick, direct modifications to a layer’s content.
Creative Freedom and Stylization
Beyond precision and efficiency, Alpha Lock also fosters creative exploration by simplifying complex applications.
-
Experimenting with Colors and Textures: Artists can fearlessly experiment with different color palettes, gradients, or textural brushes within a predefined shape. The confinement provided by Alpha Lock allows for bold experimentation without the risk of overshooting boundaries and creating messy edges. This encourages a more playful and iterative approach to design.
-
Creating Complex Patterns or Gradients: If you want to apply a gradient across a specific object, or fill it with an intricate pattern, Alpha Lock ensures that these effects are seamlessly contained within the object’s original shape, no matter how complex its outline. This is particularly useful for stylized designs or intricate illustrations where clean, contained effects are paramount.
How to Use Alpha Lock: A Step-by-Step Guide (General Software)
While the specific icon or terminology might vary slightly across different software applications, the core functionality and method of use for Alpha Lock remain remarkably consistent.
Locating the Alpha Lock Feature
The Alpha Lock feature is almost universally found within or adjacent to the layers panel of your digital art software.
-
Common Locations: Look for icons or text that read “Alpha Lock,” “Lock Transparent Pixels,” “Preserve Transparency,” or sometimes a small checkerboard pattern icon (representing transparency) with a lock.
-
Software Examples:
-
Adobe Photoshop: In the Layers panel, above the layer list, look for “Lock transparent pixels” (often represented by a checkerboard icon).
-
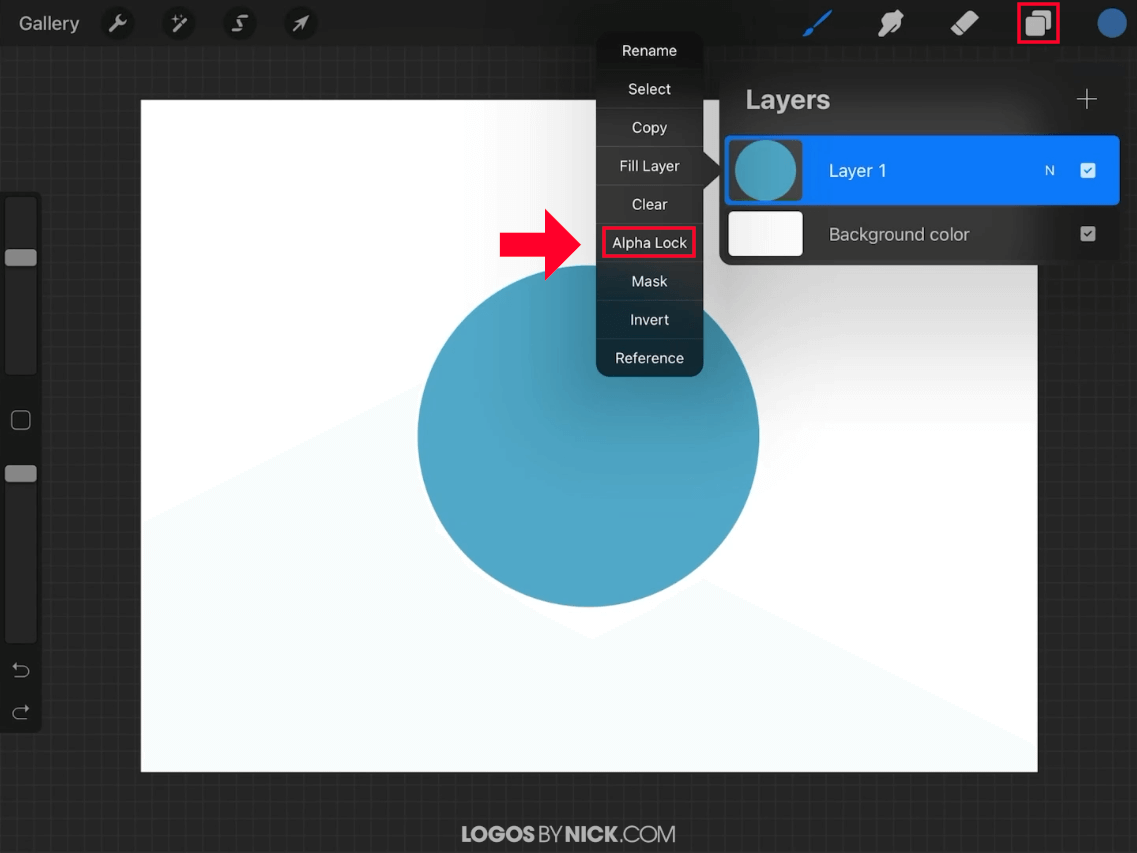
Procreate: Tap the layer thumbnail in the Layers panel, and a menu will appear. Select “Alpha Lock.”
-
Clip Studio Paint: In the Layers panel, look for “Lock Transparent Pixel” (represented by a checkerboard icon) above the layer list.
-
Krita: In the Layers panel, locate the “Lock Alpha” icon (often a small ‘A’ with a lock).
-
Painter: Typically called “Preserve Transparency.”
-
Activating and Deactivating Alpha Lock
Using Alpha Lock is straightforward:
-
Select the Layer: First, ensure the layer you wish to modify is selected in your layers panel. This layer must already contain some opaque pixels; Alpha Lock will have no effect on an entirely empty or transparent layer.
-
Activate Alpha Lock: Click or tap the Alpha Lock icon/option.
-
Visual Confirmation: Most software will provide a visual cue that Alpha Lock is active for that layer. This might be a lock icon appearing on the layer thumbnail, the checkerboard icon being highlighted, or the layer name changing color.
-
Paint/Edit: Now, proceed with your painting, filling, or filtering tools. You will observe that your actions are confined solely to the existing opaque content of that layer.
-
Deactivate Alpha Lock: When you’re finished with the precise modifications or wish to paint on transparent areas again, simply click or tap the Alpha Lock icon/option once more to toggle it off.
Workflow Example: Coloring a Character
Let’s walk through a common scenario to illustrate Alpha Lock’s power:
-
Line Art Layer: Start with a layer containing your clean line art (e.g., a character sketch). Keep this layer at the top.
-
Base Color Layer: Create a new layer below your line art layer. On this new layer, use a paint bucket or a large brush to lay down flat, distinct base colors for different parts of your character (e.g., skin, shirt, pants, hair). Don’t worry too much about precision here, as long as each color fills its respective area beneath the line art. Ensure there are no gaps in your base colors where transparency should be.
-
Select a Base Color Layer: Now, select the specific base color layer you want to add detail to (e.g., the skin layer).
-
Activate Alpha Lock: Click the “Lock Transparent Pixels” or “Alpha Lock” button for that layer.
-
Add Details: Pick a darker color for shading. Using your preferred brush, paint directly onto the character’s skin. You’ll immediately notice that your brush strokes are perfectly contained within the boundaries of the skin color you laid down earlier. You can add shadows, blend colors, or paint textures without fear of going outside the original shape.
-
Repeat for Other Areas: Deactivate Alpha Lock, select the shirt layer, activate Alpha Lock, and add details to the shirt. Repeat for all other colored areas.
This method allows for incredibly clean and efficient coloring, especially for illustrative work.
Alpha Lock vs. Clipping Masks and Layer Masks
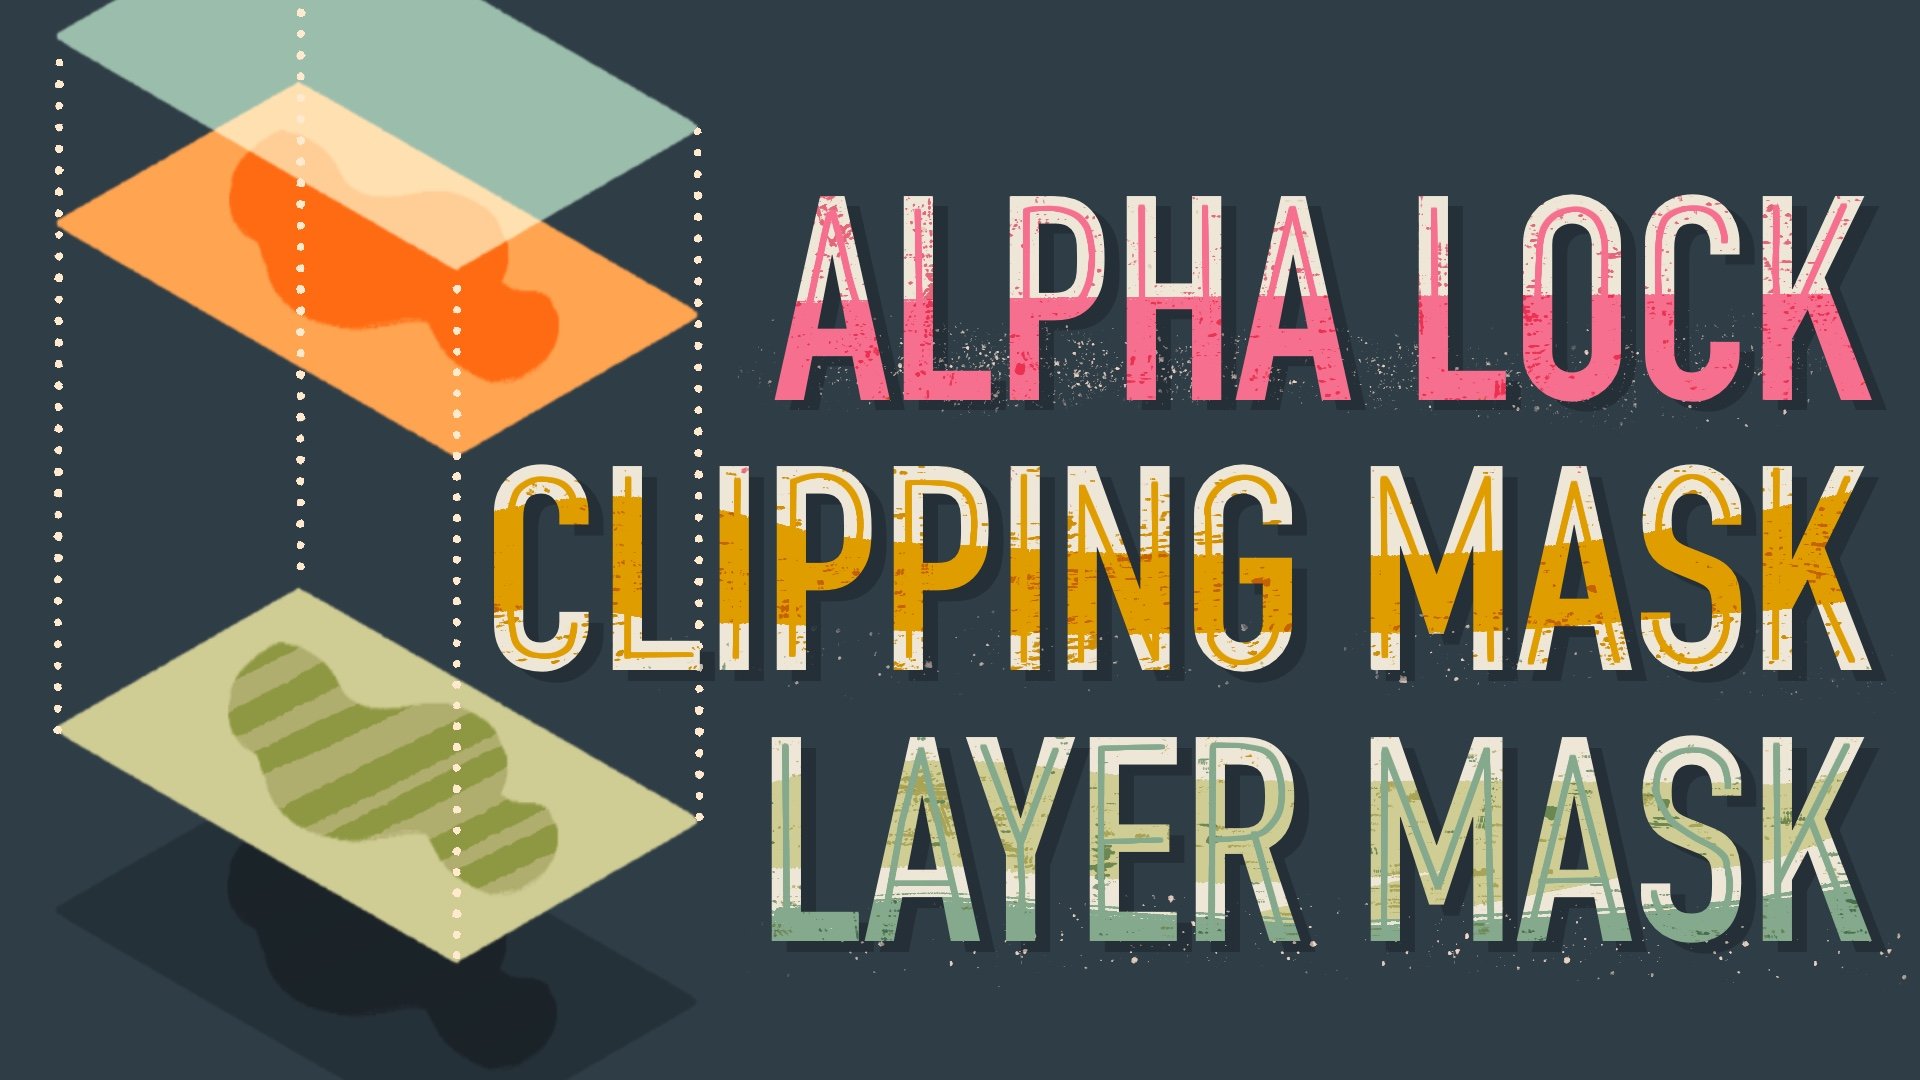
While Alpha Lock is a fantastic tool for many scenarios, it’s important to understand its relationship to other layer-based containment methods, primarily clipping masks and layer masks. All three serve to control visibility or editing areas, but they do so in fundamentally different ways.
Similarities and Key Differences
-
Alpha Lock:
-
Function: Restricts edits on the current layer to its existing opaque pixels.
-
Nature: It’s a property of the layer itself. It directly modifies the pixels of that layer.
-
Destructive/Non-Destructive: When you use Alpha Lock, you are directly changing the color/texture of the existing pixels on that layer. If you paint over a red area with blue while Alpha Lock is on, the red pixels become blue. In this sense, it’s destructive to the original pixel data, though non-destructive to the layer’s shape.
-
Complexity: Simple to activate and deactivate.
-
-
Clipping Mask (or Clipping Layer):
-
Function: Uses the transparency (alpha channel) of the layer immediately below it to determine the visibility of the current layer.
-
Nature: A relationship between two layers. The upper layer is “clipped” to the content of the lower layer.
-
Destructive/Non-Destructive: Highly non-destructive. The pixels on both the clipped layer and the clipping layer remain intact. You can modify the content of the clipped layer freely, and it will only show where the lower layer has opaque pixels.
-
Complexity: Involves setting up a relationship between two or more layers.
-
-
Layer Mask:
-
Function: An attached grayscale image that controls the visibility of its associated layer. White areas of the mask reveal the layer, black areas conceal it, and grays create partial transparency.
-
Nature: A separate, editable channel linked to a single layer.
-
Destructive/Non-Destructive: Extremely non-destructive. You’re never deleting pixels from the actual layer; you’re only hiding or revealing them via the mask. The original layer content is always preserved.
-
Complexity: Can be very complex, allowing for nuanced and gradual transparency effects.
-
When to Choose Which Tool
Understanding the distinctions helps you choose the most appropriate tool for your specific task:
-
Choose Alpha Lock when:
-
You need to quickly add details, textures, or color adjustments directly onto an existing colored area on a single layer.
-
The shape you want to work within is already perfectly defined on that layer, and you don’t need to preserve the original color data for later non-destructive modifications (e.g., if you’re just repainting the color).
-
You want maximum speed and minimal layer management for simple edits.
-
Example: Changing the color of a painted character’s shirt, adding a quick shadow to a specific element.
-
-
Choose a Clipping Mask when:
-
You want to apply effects, colors, or textures from one layer onto the shape or transparency of another layer without directly altering either layer’s original pixel content.
-
You need to maintain non-destructive editing for complex shading, lighting, or textural passes.
-
You have multiple layers of detail (e.g., shadows, highlights, textures) that all need to conform to a single base shape.
-
Example: Having a base color layer for skin, then separate clipping mask layers for shadows, subsurface scattering, and highlights, all constrained by the skin base.
-
-
Choose a Layer Mask when:
-
You need highly detailed, editable, and often gradual transparency control over an entire layer.
-
You want to create soft edges, feathered selections, or complex fading effects.
-
You need ultimate non-destructiveness, allowing you to hide and reveal parts of a layer at any time without deleting pixels.
-
Example: Blending multiple images seamlessly, creating vignettes, or painting out complex backgrounds while preserving all original pixels.
-
In many professional workflows, these tools are not mutually exclusive but rather complementary. An artist might use a clipping mask for initial broad shading, then Alpha Lock on the clipping mask layer itself to refine specific areas within the shadow, and finally, a layer mask on the entire group for overall fade or blend.
Advanced Tips and Troubleshooting
While Alpha Lock is generally intuitive, a few advanced tips and common pitfalls can help users maximize its utility and avoid frustration.
Combining with Other Layer Features
Alpha Lock often shines brightest when used in conjunction with other powerful layer features:
-
Blending Modes: Apply Alpha Lock to a layer, then experiment with different blending modes (e.g., Multiply for shadows, Screen for highlights, Overlay for texture). The Alpha Lock ensures the blend effect remains perfectly contained within the existing opaque pixels.
-
Adjustment Layers (Applicable in Some Setups): While typically adjustment layers affect everything below them, some software allows for more complex setups where Alpha Lock-like functionality might apply. More commonly, you’d use a clipping mask for an adjustment layer to affect only a specific underlying layer. However, understanding that Alpha Lock’s containment principle can often be mimicked or combined with other features expands your options.
-
Layer Groups: Group related layers (e.g., all shadow layers, all highlight layers) to keep your canvas organized. You can then use clipping masks to clip the entire group to a base layer, or apply Alpha Lock to individual layers within the group for specific contained edits.
Common Pitfalls
Even seasoned artists occasionally fall prey to simple oversights when using Alpha Lock:
-
Forgetting Alpha Lock is On: This is perhaps the most common frustration. You try to paint on a new, transparent area of your canvas or a different layer, and nothing happens. The first thing to check when your brush isn’t painting where you expect is whether Alpha Lock is still active on your current layer.
-
Applying Alpha Lock to an Empty Layer: Alpha Lock requires existing opaque pixels to function. If you activate it on a brand-new, entirely transparent layer, it will essentially lock all transparency, meaning you won’t be able to paint anything onto it. Always ensure your layer has some content before engaging Alpha Lock.
-
Confusing with “Lock All Pixels”: Most software offers various lock options: “Lock All Pixels” (prevents any edits), “Lock Position” (prevents moving the layer), etc. Ensure you’re selecting “Lock Transparent Pixels” or “Alpha Lock,” which specifically targets transparency, not all aspects of the layer.
-
Expecting it to Act Like a Separate Mask: Remember, Alpha Lock modifies the layer’s pixels directly. If you want to paint over a colored area with white and then easily revert to the original color, Alpha Lock isn’t the ideal choice. For true non-destructive pixel editing where you can easily revert, a clipping mask or layer mask is generally better.
Software-Specific Nuances
While the core functionality of Alpha Lock is consistent, the exact implementation, naming, and visual cues can differ.
-
Always refer to your specific software’s documentation or help files if you’re unsure where to find Alpha Lock or how it behaves.
-
Some programs might have slightly different performance implications depending on how they handle transparency and Alpha Lock internally. Generally, it’s a very efficient tool.
-
Experiment! The best way to understand Alpha Lock’s nuances is to actively use it in your preferred software. Create a simple shape, toggle Alpha Lock on and off, and see how your brushstrokes behave.
Conclusion
Alpha Lock, often seen as a small button in a crowded interface, holds immense power for digital artists and designers. It streamlines the creation process by offering an elegant solution for precise content containment, allowing creators to focus on artistic expression rather than the technicalities of maintaining clean edges. By understanding its relationship to alpha channels and appreciating its distinctions from clipping masks and layer masks, artists can strategically integrate Alpha Lock into their workflows, leading to cleaner artwork, faster production times, and a more enjoyable creative journey. Whether you are a beginner struggling to keep colors within lines or a seasoned professional seeking to optimize your shading process, mastering “what Alpha Lock does” is an essential step towards unlocking your full potential in the digital realm. Embrace this powerful feature, and watch as your precision and efficiency in digital art reach new heights.
aViewFromTheCave is a participant in the Amazon Services LLC Associates Program, an affiliate advertising program designed to provide a means for sites to earn advertising fees by advertising and linking to Amazon.com. Amazon, the Amazon logo, AmazonSupply, and the AmazonSupply logo are trademarks of Amazon.com, Inc. or its affiliates. As an Amazon Associate we earn affiliate commissions from qualifying purchases.