
In the realm of digital computing, the ISO file is a ubiquitous and essential format, serving as the modern equivalent of a physical optical disc. Whether you’re setting up a new operating system, installing a large software suite, or deploying a specialized utility, knowing how to work with an ISO file is a fundamental skill for any tech enthusiast or professional. This comprehensive guide will demystify the process, walking you through every step from understanding what an ISO is to successfully completing your installation. By the end, you’ll be equipped with the knowledge to confidently handle ISO-based installations across various scenarios.

Understanding ISO Files: The Digital Disc Image
At its core, an ISO file is a single archive file that contains an identical copy, or “image,” of an entire optical disc, such as a CD, DVD, or Blu-ray. The “ISO” in its name refers to the ISO 9660 file system, which is commonly used for optical disc media. Essentially, it’s a snapshot of a disc’s contents and its file structure, all bundled into one convenient package.
What is an ISO File?
Imagine an entire DVD, with all its folders, files, and bootable information, condensed into one digital file. That’s an ISO. It’s not merely a compressed folder; it replicates the exact layout and data of the original disc, including its boot sector information, making it ideal for creating bootable installation media. When you download an operating system like Windows or a Linux distribution, it almost invariably comes in an ISO format.
Common Uses of ISO Files
The versatility of ISO files makes them indispensable across numerous applications:
-
Operating System Installation: This is perhaps their most common use. ISOs are the standard delivery method for Windows, macOS, and virtually all Linux distributions, allowing users to create bootable USB drives or DVDs for a clean OS install.
-
Software Suites and Games: Large software packages, especially older ones, were often distributed as ISOs, reflecting their original CD/DVD format. Many PC games, particularly those from before digital distribution became dominant, also came as ISO images.
-
Bootable Utilities and Rescue Discs: Tools for system diagnostics, password resets, data recovery, or even creating live environments (like live Linux USBs) are frequently distributed as ISO files. These allow users to boot into a specialized environment without affecting their main operating system.
-
Archival and Backup: For preserving the exact contents of an optical disc, an ISO file is an ideal digital archive. It ensures that the disc’s integrity, including its bootability, is maintained.
Advantages of Using ISOs
Using ISO files offers several distinct advantages over physical media or simply copying files:
-
Portability and Convenience: A single ISO file is much easier to store, transfer, and back up than a collection of physical discs. It can be stored on hard drives, cloud storage, or USB sticks.
-
Integrity and Consistency: An ISO file is a byte-for-byte copy of the original disc, ensuring that all data and the file structure are preserved exactly as intended. This reduces the risk of corruption compared to manual file transfers.
-
Faster Installation: Reading data from a well-made bootable USB created from an ISO is often significantly faster than reading from a spinning optical disc, leading to quicker installation times.
-
Virtual Machine Compatibility: ISOs can be easily mounted directly into virtual machine software (like VirtualBox or VMware), allowing for OS installations within a virtualized environment without needing physical media.
Preparing for Installation: Essential Prerequisites
Before you embark on the actual installation, a thorough preparation phase is crucial. Skipping these steps can lead to frustrating errors or, worse, data loss. Taking the time to gather the necessary components and perform vital checks will ensure a smooth and successful installation process.
Acquiring the ISO File
The first step is to obtain the ISO file itself. Always download ISOs from official sources to ensure authenticity and prevent malware infection. For operating systems like Windows, visit Microsoft’s official download page. For Linux distributions, go to the respective distribution’s website (e.g., Ubuntu.com, FedoraProject.org).
- Verification: After downloading, it’s highly recommended to verify the ISO file’s integrity using checksums (MD5, SHA-1, SHA-256). Official sources usually provide these hashes. A mismatch indicates a corrupted download or a potentially tampered file. Use a utility like 7-Zip (Windows) or the
sha256sumcommand (Linux/macOS) to generate and compare the checksum.
Choosing Your Installation Medium
You have several options for creating bootable media from an ISO, each with its own advantages:
-
USB Drive: This is the most popular and recommended method for modern systems. USB drives are fast, reusable, and compatible with most computers (especially those without optical drives). You’ll need a USB drive with sufficient capacity (typically 8GB or more for an OS).
-
DVD: While less common now, burning an ISO to a DVD is still viable, especially for older machines that may not support booting from USB or for archival purposes. You’ll need a blank DVD and a DVD burner.
-
Virtual Machine: If your goal is to install an OS within a virtualized environment (e.g., to test it without affecting your main system), you can directly mount the ISO file to a virtual machine. This doesn’t require creating physical bootable media.
Required Tools and Software
Depending on your chosen installation medium, you’ll need specific software:
-
For Bootable USB:
-
Rufus (Windows): A highly popular and reliable tool for creating bootable USB drives from ISOs, offering various partitioning schemes.
-
Etcher (Windows, macOS, Linux): A user-friendly, cross-platform tool known for its simplicity and safety features.
-
ddcommand (Linux/macOS): For command-line enthusiasts, theddutility is powerful for writing ISOs directly to USB drives.
-
-
For Burning to DVD:
-
Windows Disc Image Burner (Windows): Built-in utility. Right-click the ISO and select “Burn disc image.”
-
ImgBurn (Windows): A popular third-party burning tool.
-
K3b (Linux): A feature-rich burning application for Linux.
-
-
For Virtual Machine Installation:
-
VirtualBox (Free & Open Source): A widely used virtualization software.
-
VMware Workstation Player (Free for personal use): Another robust virtualization solution.
-
System Requirements and Backup
Before installing an operating system, always check its minimum system requirements (processor, RAM, storage, graphics card). Ensure your hardware meets or exceeds these specifications.
Crucially, back up all important data from the drive where you plan to install the new operating system. A clean installation will erase everything on the target partition or disk. Use an external hard drive, cloud storage, or another safe location to preserve your files.
Creating a Bootable Installation Medium
With your ISO file acquired and verified, and your tools ready, the next step is to transform your chosen medium into a bootable installer. This is a critical juncture where the digital image becomes a functional installation tool.
Method 1: Creating a Bootable USB Drive
This is the most common and recommended method for modern systems due to its speed and convenience. We’ll focus on Rufus for Windows, but the principles apply to Etcher as well.
Using Rufus (Windows):
-
Download and Run Rufus: Get Rufus from its official website. It’s a portable application, so no installation is required; just run the executable.
-
Select Your USB Drive: In Rufus, ensure your USB drive is selected under “Device.” Double-check this to avoid accidentally formatting the wrong drive.
-
Select the ISO Image: Click the “SELECT” button next to “Boot selection” and browse to your downloaded ISO file.
-
Partition Scheme and Target System:
-
Rufus will usually auto-detect the correct partition scheme (GPT for UEFI, MBR for BIOS) based on your ISO and system type. For modern systems, GPT (GUID Partition Table) is generally preferred with UEFI firmware. MBR (Master Boot Record) is for older BIOS systems.
-
If unsure, check your target computer’s boot mode. Most new computers use UEFI. If installing Windows, the default settings Rufus suggests are usually correct.
-
-
File System and Cluster Size: Leave these at their default values unless you have specific reasons to change them.
-
Volume Label: You can set a descriptive name for your bootable USB.
-
Start the Process: Click “START.” Rufus will warn you that all data on the USB drive will be destroyed. Confirm to proceed.
-
Wait for Completion: The process can take several minutes depending on the ISO size and USB drive speed. Once “READY” appears, you can close Rufus and safely eject your USB drive.
Using Etcher (Cross-platform):
-
Download and Install Etcher: Get Etcher from balena.io/etcher.
-
Flash from file: Click “Flash from file” and select your ISO.
-
Select target: Click “Select target” and choose your USB drive. Again, be very careful to select the correct drive.
-
Flash!: Click “Flash!” and wait for the process to complete. Etcher includes validation, which takes a bit longer but ensures the integrity of the flashed drive.
Method 2: Burning the ISO to a DVD
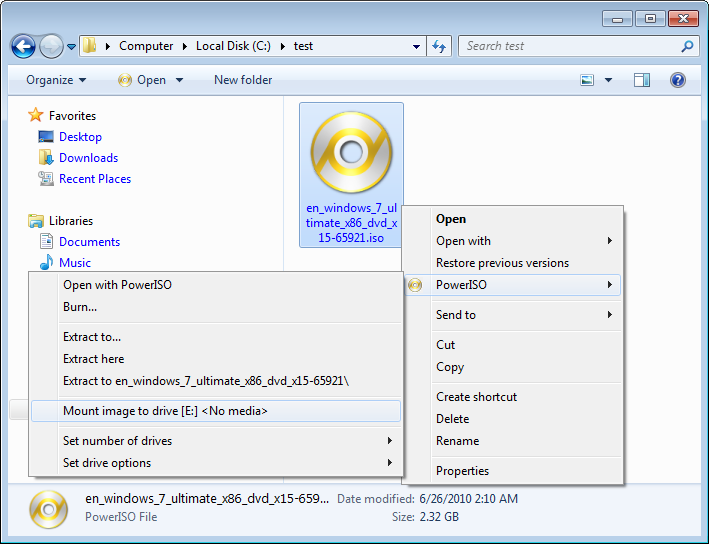
While less prevalent, burning an ISO to a DVD is straightforward and useful for older machines or specific archival needs.
Using Windows Disc Image Burner:
-
Insert Blank DVD: Place a blank, writable DVD into your computer’s optical drive.
-
Right-Click ISO: Locate your ISO file, right-click it, and select “Burn disc image.”
-
Select Burner and Burn: In the “Windows Disc Image Burner” window, ensure your DVD burner is selected. Optionally, check “Verify disc after burning” for data integrity, though it adds time. Click “Burn.”
-
Wait for Completion: The process will take some time. Once finished, the DVD will be ejected.
Method 3: Mounting the ISO in a Virtual Machine
This method is for installing an OS within a virtual environment, ideal for testing new operating systems or running multiple OSes concurrently without partitioning your physical hard drive.
Using VirtualBox:
-
Create a New Virtual Machine: Open VirtualBox, click “New” to create a new VM. Follow the wizard, providing a name, selecting the OS type and version, and allocating RAM and virtual hard disk space.
-
Configure Storage: After creating the VM, select it and click “Settings.” Go to the “Storage” section.
-
Attach ISO: Under “Controller: IDE” (or SATA, depending on your VM setup), click on the empty CD icon. On the right-hand side, click the smaller CD icon and choose “Choose a disk file.” Navigate to your ISO file and select it.
-
Start the VM: Click “OK” to save settings, then “Start” the virtual machine. It will boot from the ISO as if it were a physical DVD.
The Installation Process: From Boot to Desktop
Once your bootable medium is ready, the core installation begins. This phase involves interacting with your computer’s firmware, configuring storage, and setting up the initial operating system parameters.
Configuring BIOS/UEFI for Booting
Your computer’s firmware (BIOS or the more modern UEFI) controls the boot sequence. You need to tell it to boot from your newly created USB drive or DVD.
-
Access BIOS/UEFI: Restart your computer and repeatedly press the designated key to enter BIOS/UEFI setup. Common keys include
Del,F2,F10,F12, orEsc(consult your motherboard/PC manufacturer’s manual if unsure). -
Change Boot Order: Navigate to the “Boot” or “Boot Options” tab. Locate “Boot Order” or “Boot Priority” and move your USB drive (often listed as “USB HDD” or by its brand name) or DVD drive to the top of the list.
-
Save and Exit: Save your changes (often
F10) and exit. The computer will restart and attempt to boot from your chosen medium. -
Disable Secure Boot (if necessary): For some Linux distributions, especially older ones, you might need to temporarily disable “Secure Boot” in UEFI settings if you encounter boot issues.
Initiating the Installation
Once your computer successfully boots from the installation media:
-
Language and Keyboard Layout: You’ll typically be prompted to select your preferred language, time and currency format, and keyboard layout.
-
License Agreement: Review and accept the end-user license agreement (EULA) to proceed.
-
Installation Type:
-
Clean Installation: This is usually recommended for new OS installations. It involves formatting the target drive/partition, erasing all existing data, and installing a fresh copy of the OS.
-
Upgrade (if applicable): Some OS installers offer an upgrade option, which attempts to preserve your files and settings while updating the OS. This is less common for ISO-based installations unless upgrading a specific OS version.
-
Disk Partitioning and Formatting
This is a critical step, especially during a clean OS installation. Proceed with extreme caution, as incorrect choices can lead to data loss.
-
Select Target Drive: The installer will display a list of available drives and partitions. Identify the drive where you want to install the OS.
-
Custom Partitioning: For most users, especially on a dedicated drive for a new OS, choose “Custom” or “Advanced” options.
-
Delete/Create Partitions:
-
If installing on an empty drive, you can simply select the unallocated space and let the installer create the necessary partitions automatically.
-
If installing on a drive with existing data you want to overwrite, select the relevant partition (e.g., your old C: drive) and choose to “Delete” or “Format” it. Be absolutely sure you’re formatting the correct partition.
-
For advanced users or dual-boot setups, you might manually create partitions for different purposes (e.g., a small boot partition, a larger system partition, a data partition).
-
-
Format: Ensure the chosen partition is formatted with the appropriate file system (e.g., NTFS for Windows, Ext4 for Linux).
-
Begin Installation: Once partitioning is finalized, proceed, and the installer will begin copying files and setting up the OS.
User Account and System Configuration
After the initial file copying, the installer will guide you through setting up your user environment:
-
Region and Keyboard Layout: Reconfirm or adjust these settings.
-
User Account: Create a username and password. This will be your primary account for logging into the OS.
-
Network Settings: Configure your internet connection (Wi-Fi or Ethernet).
-
Privacy Settings: For Windows, you’ll review privacy options. For Linux, this might involve setting up services.
-
Time Zone: Select your current time zone.
-
Initial Updates: The installer might prompt you to download and install initial updates. It’s generally a good idea to allow this if an internet connection is available.
Post-Installation Steps
After the OS finishes installing and reboots to your new desktop:
-
Driver Installation: Install any missing or outdated drivers for your hardware (graphics card, chipset, network adapter, etc.). For Windows, use Windows Update or download from manufacturer websites. For Linux, most drivers are often included or easily installed via package managers.
-
Software Updates: Run a full system update to ensure all components and pre-installed applications are up-to-date.
-
Security Software: Install antivirus/anti-malware software (for Windows) and configure your firewall.
-
Restore Data: Transfer your backed-up personal files back to your new OS installation.
-
Install Applications: Install your preferred web browser, office suite, media players, and other essential software.
Troubleshooting Common ISO Installation Issues
Even with careful preparation, installations can sometimes encounter roadblocks. Knowing how to diagnose and resolve common issues can save significant time and frustration.
“No Bootable Device Found”
This is a frequent issue indicating the computer can’t find an OS to load.
-
Incorrect Boot Order: Re-enter BIOS/UEFI and verify that your USB drive or DVD is at the top of the boot priority list.
-
Corrupt ISO or Faulty USB: The ISO might be corrupted (verify checksums), or the USB drive itself might be faulty. Try re-downloading the ISO or using a different USB drive and recreating the bootable media.
-
Improperly Created Bootable Medium: Ensure you used a reliable tool (like Rufus or Etcher) and followed the steps correctly. Sometimes, a non-UEFI compatible ISO might be written to a GPT-partitioned USB, causing issues.
-
Legacy vs. UEFI Mode: Some older systems or specific configurations might require switching between “Legacy” (BIOS) and “UEFI” boot modes in your firmware settings.
Installation Freezes or Fails
An installation that halts unexpectedly or fails mid-way can point to several underlying problems.
-
Hardware Incompatibility: Your hardware might not be fully compatible with the OS you’re trying to install. Check official compatibility lists.
-
Bad RAM: Faulty RAM can cause data corruption during installation. If you suspect this, try removing one RAM stick at a time or running a memory diagnostic tool (like MemTest86) from another bootable USB.
-
Corrupt ISO: A corrupted ISO can lead to incomplete file transfers and installation failures. Verify its checksum.
-
Insufficient Disk Space: Ensure you have allocated enough space for the OS, especially if performing a dual-boot setup.
-
Overheating: If the system is working hard during installation, poor cooling can lead to overheating and shutdowns. Ensure adequate ventilation.
Driver-Related Problems
These usually manifest after the OS is installed, such as no internet, low screen resolution, or audio issues.
-
Missing Drivers: The OS might not have built-in drivers for all your components. Check the device manager (Windows) or use
lspci(Linux) to identify missing drivers. -
Incorrect Drivers: Download drivers directly from your hardware manufacturer’s website (e.g., Nvidia, AMD, Intel, Realtek). Avoid generic driver update utilities.
-
Post-Installation Fixes: For graphics drivers, especially on Linux, you might need to install proprietary drivers from repositories or directly from the vendor. For network issues, try connecting via Ethernet if Wi-Fi isn’t working to download drivers.
Secure Boot and Legacy Mode Conflicts
Modern UEFI firmware includes “Secure Boot,” which can prevent unsigned operating systems or bootloaders from launching.
-
Linux Distributions: Some older or less mainstream Linux distributions might require Secure Boot to be disabled in UEFI settings to boot correctly.
-
Legacy Mode: If you’re trying to install an older OS or run specific boot utilities, you might need to enable “Legacy Support” or “CSM (Compatibility Support Module)” in your UEFI settings, or ensure your bootable media is created with an MBR partition scheme.
Conclusion: Empowering Your Digital Journey
Mastering the art of installing with an ISO file is a fundamental skill that unlocks a world of possibilities for customizing, maintaining, and recovering your computer systems. From deploying the latest operating system to resurrecting a failing machine with a rescue disc, the ability to confidently handle ISOs puts significant power in your hands. By understanding the nature of these digital disc images, preparing diligently, utilizing the right tools, and knowing how to troubleshoot common pitfalls, you can navigate the complexities of system installations with professionalism and insight. This guide aims to be your compass, empowering you to take full control of your digital environment and embark on your tech journeys with assurance and expertise.
aViewFromTheCave is a participant in the Amazon Services LLC Associates Program, an affiliate advertising program designed to provide a means for sites to earn advertising fees by advertising and linking to Amazon.com. Amazon, the Amazon logo, AmazonSupply, and the AmazonSupply logo are trademarks of Amazon.com, Inc. or its affiliates. As an Amazon Associate we earn affiliate commissions from qualifying purchases.