
The modern automobile is a marvel of engineering, equipped with a sophisticated array of sensors and electronic control units that work in concert to ensure optimal performance, safety, and efficiency. Among these critical components is the wheel speed sensor, a seemingly small device that plays an outsized role in the functionality of your vehicle’s most vital safety systems. From anti-lock brakes (ABS) to traction control and even stability control, the wheel speed sensor is the unsung hero providing real-time data about each wheel’s rotational velocity. When this sensor falters, it can trigger a cascade of issues, compromising safety and illuminating those ominous warning lights on your dashboard.
Understanding the function of this sensor, recognizing the symptoms of its failure, and knowing how to replace it are invaluable skills for any vehicle owner or enthusiast. This guide will demystify the wheel speed sensor, walk you through the diagnostic process, and provide a detailed, step-by-step tutorial for its installation, empowering you to maintain your vehicle’s safety systems with confidence and precision.
Understanding the Wheel Speed Sensor: A Core Component of Modern Vehicles
Before diving into the mechanics of installation, it’s crucial to grasp what a wheel speed sensor is and why it’s so indispensable. Often referred to as an ABS sensor, this device is strategically mounted near each wheel, monitoring its rotational speed and transmitting this data to the vehicle’s onboard computer, specifically the ABS control module. This continuous feedback loop is fundamental to the operation of several critical safety features.
The Role of ABS, Traction Control, and Stability Control Systems
The primary function of the wheel speed sensor is to feed data to the Anti-lock Braking System (ABS). In an emergency braking scenario, if one or more wheels begin to lock up (stop rotating while the vehicle is still moving), the ABS system detects this through the sensor data. It then rapidly modulates the brake pressure to that specific wheel, preventing lock-up and allowing the driver to maintain steering control. Without accurate wheel speed data, the ABS cannot function effectively, leading to potential skids and loss of control during hard braking.
Beyond ABS, wheel speed sensors are also pivotal for Traction Control Systems (TCS). When a wheel loses traction during acceleration (e.g., on a slippery surface), spinning faster than the others, the TCS uses the sensor data to detect this slippage. It then intervenes by reducing engine power or applying slight braking to the slipping wheel, thereby restoring traction and improving acceleration stability.
Furthermore, Electronic Stability Control (ESC), also known as ESP or VSC, integrates wheel speed sensor data with input from other sensors (like yaw rate and steering angle sensors) to monitor the vehicle’s trajectory. If the ESC system detects that the vehicle is deviating from the driver’s intended path (e.g., understeer or oversteer), it can selectively apply brakes to individual wheels and/or reduce engine power to help steer the vehicle back on course, preventing loss of control. The precision of ESC relies heavily on accurate, real-time wheel speed information from each corner of the vehicle.
How a Wheel Speed Sensor Works
Most modern wheel speed sensors operate on one of two principles: passive (magnetic reluctance) or active (Hall effect or magnetoresistive).
-
Passive Sensors: These sensors consist of a coil of wire wrapped around a magnetic core. They work in conjunction with a toothed reluctor ring (tone ring) attached to the wheel hub or axle shaft. As the reluctor ring spins, its teeth pass through the magnetic field of the sensor, inducing a small alternating current (AC) voltage. The frequency and amplitude of this AC signal are directly proportional to the wheel’s rotational speed. While robust, passive sensors generate weaker signals at low speeds.
-
Active Sensors: These are more common in newer vehicles and are powered by the vehicle’s electrical system. They use either the Hall effect or magnetoresistive technology. An active sensor generates a digital signal (square wave) whose frequency corresponds to the wheel speed. They typically require a multi-pole magnet or a finely toothed reluctor ring. Active sensors offer superior accuracy at very low speeds, crucial for sophisticated ABS and traction control systems, and are less susceptible to electromagnetic interference.
Regardless of the type, the sensor’s job is to precisely measure and report wheel speed, providing the foundational data for the vehicle’s most critical active safety systems.
Symptoms of a Failing Wheel Speed Sensor and Diagnosis
A failing wheel speed sensor can manifest in several noticeable ways, primarily through illuminated dashboard warning lights and compromised safety system performance. Prompt recognition and diagnosis are key to maintaining vehicle safety and preventing more extensive issues.
Common Warning Signs and Dashboard Indicators
The most overt indication of a wheel speed sensor issue is the illumination of specific warning lights on your instrument cluster. These typically include:
-
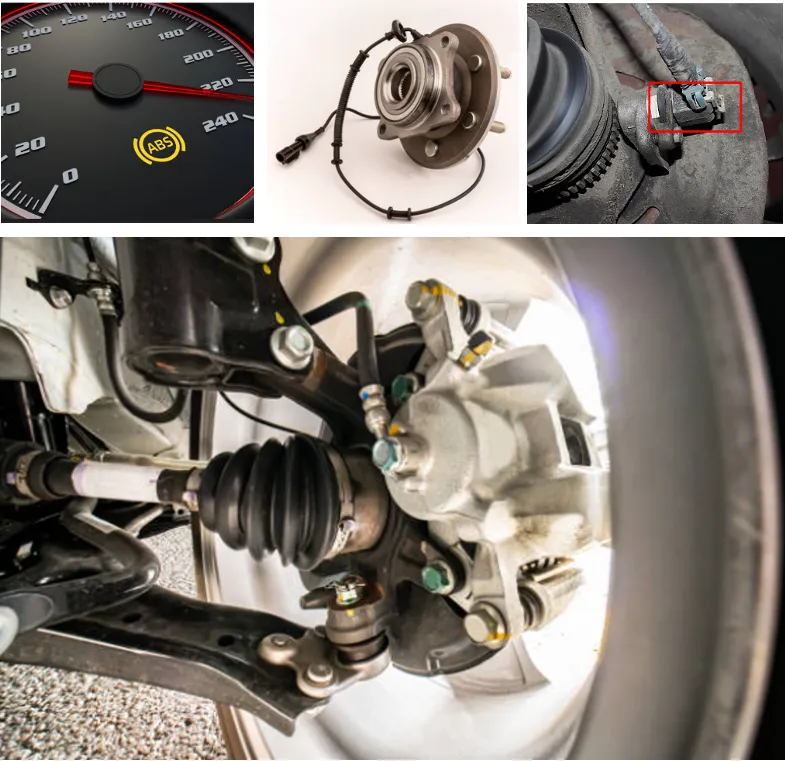
ABS Warning Light: This is usually the first and most direct indicator. When the ABS light comes on, it signifies that the Anti-lock Braking System has detected a fault and is likely deactivated.
-
Traction Control System (TCS) or Stability Control System (SCS/ESC) Warning Light: Since these systems rely on the same wheel speed data as ABS, their warning lights will often illuminate concurrently with or shortly after the ABS light. This indicates a general fault within the vehicle’s dynamic stability management.
-
Check Engine Light (CEL): In some vehicles, a fault with a wheel speed sensor, especially if it affects transmission operation or other interconnected systems, might also trigger the Check Engine Light.
-
Erratic Speedometer Readings: While less common with modern sensors, an issue with a wheel speed sensor (particularly on vehicles where one sensor feeds the speedometer) could potentially lead to an erratic or non-functional speedometer.
-
Poor Braking Performance or Unintended ABS Activation: A faulty sensor can send incorrect data, leading the ABS system to activate prematurely or not at all, resulting in strange braking sensations, extended stopping distances, or even a pulsing brake pedal without a hard stop.
-
Transmission Shifting Problems: In some FWD/AWD vehicles, wheel speed data is used by the transmission control module (TCM) for shift logic. A faulty sensor can lead to rough shifting, delayed shifts, or the transmission going into “limp mode.”
Basic Diagnostic Procedures
Diagnosing a faulty wheel speed sensor typically involves a few key steps:
-
OBD-II Scanner Scan: This is the most effective starting point. Connect an OBD-II scanner (preferably one capable of reading ABS/chassis codes) to your vehicle’s diagnostic port. Look for Diagnostic Trouble Codes (DTCs) related to wheel speed sensors (e.g., C0035 for Left Front Wheel Speed Sensor, C0040 for Right Front, etc.). The codes will often pinpoint which specific sensor (e.g., “Left Front,” “Right Rear”) is reporting an issue.
-
Visual Inspection: Once you’ve identified the suspect wheel, perform a thorough visual inspection.
-
Wiring and Connector: Check the sensor’s wiring harness for any signs of damage, fraying, cuts, or corrosion. Ensure the connector is securely seated and free of dirt or moisture.
-
Sensor Body and Mounting: Inspect the sensor itself for physical damage, cracks, or signs of impact. Verify it’s securely mounted and not loose.
-
Reluctor Ring (Tone Ring): This is critical. Look for cracked, bent, missing, or corroded teeth on the reluctor ring, which is typically visible through the hub or behind the brake rotor. A damaged tone ring will cause the sensor to send incorrect signals, even if the sensor itself is fine.
-
-
Multimeter Testing (for Passive Sensors): For passive sensors, you can often test resistance and AC voltage output:
-
Resistance Check: Disconnect the sensor and use a multimeter to measure the resistance across its two terminals. Consult your vehicle’s service manual for the specified resistance range (typically a few hundred to a couple thousand ohms). An open circuit (infinite resistance) or a short circuit (very low resistance) indicates a faulty sensor.
-
AC Voltage Check: With the wheel jacked up and spinning, measure the AC voltage output. A working passive sensor should generate a small AC voltage that increases with wheel speed.
-
-
Live Data Stream (with advanced scanner): More advanced OBD-II scanners can display live data for each wheel speed sensor. By driving the vehicle slowly (if safe to do so) or spinning each wheel individually, you can monitor the reported speed from each sensor. A sensor reporting zero speed, intermittent speed, or a wildly different speed compared to the others is likely faulty.
Essential Tools and Preparations for Installation
Before you begin the replacement process, thorough preparation is crucial. Having the right tools and parts on hand will make the job smoother, safer, and more efficient.
Gathering Your Arsenal: Tools and Safety Gear
You’ll need a selection of standard hand tools and some specialized items:
-
Safety Glasses and Gloves: Always protect your eyes and hands.
-
Vehicle Jack and Jack Stands: Essential for safely lifting and supporting the vehicle. Never work under a vehicle supported only by a jack.
-
Wheel Chocks: To prevent the vehicle from rolling.
-
Lug Nut Wrench/Breaker Bar and Socket: For removing the wheel.
-
Socket Wrench Set (metric/SAE as needed): For bolts securing the sensor and possibly other components.
-
Torque Wrench: Crucial for tightening lug nuts and other fasteners to manufacturer specifications.
-
Flathead Screwdriver or Trim Removal Tool: For disconnecting electrical connectors and routing clips.
-
Wire Brush and Brake Cleaner: For cleaning mounting surfaces and surrounding areas.
-
Anti-Seize Compound: Useful for applying to mounting bolts, especially in corrosive environments.
-
Penetrating Oil: If bolts are rusted or seized.
-
Zip Ties or Electrical Tape: For securing the new sensor’s wiring.
Sourcing the Right Replacement Sensor
Accuracy here is paramount.
-
Match by Vehicle Information: Always provide your vehicle’s exact year, make, model, and engine size when purchasing a replacement sensor. Some vehicles have different sensors for front vs. rear, and left vs. right.
-
OEM vs. Aftermarket: While OEM (Original Equipment Manufacturer) sensors are often recommended for their exact fit and reliability, high-quality aftermarket sensors can be a cost-effective alternative. Be wary of extremely cheap generic sensors, as they may have fitment issues or poor signal quality.
-
Check the Connector: Before purchasing, if possible, compare the connector type of the new sensor with your old one to ensure it matches.
Pre-Installation Checks and Vehicle Preparation
-
Consult Service Manual: If available, refer to your vehicle’s specific service manual for precise torque specifications, wiring diagrams, and any vehicle-specific nuances.
-
Park on a Level Surface: Ensure the vehicle is on a firm, level surface before lifting.
-
Engage Parking Brake and Chock Wheels: Set the parking brake firmly. Place wheel chocks on the wheels that will remain on the ground (e.g., if working on the front, chock the rear wheels).
-
Loosen Lug Nuts: While the vehicle is still on the ground, slightly loosen the lug nuts on the wheel you’ll be working on. This makes it easier to remove them once the vehicle is lifted.
-
Disconnect Battery (Optional but Recommended): For safety and to prevent potential short circuits or error codes during electrical work, it’s often a good practice to disconnect the negative terminal of the battery.
A Step-by-Step Guide to Wheel Speed Sensor Replacement
With your tools ready and the vehicle prepared, you’re ready to tackle the replacement process. This guide covers a general procedure; slight variations may occur depending on your specific vehicle model.
Lifting the Vehicle and Removing the Wheel
-
Jack Up the Vehicle: Place your jack under the designated jacking point near the wheel you’re working on. Carefully lift the vehicle until the wheel is off the ground.
-
Secure with Jack Stands: Position jack stands under the appropriate frame points or suspension components, ensuring they are stable and secure. Lower the vehicle onto the jack stands. Never rely solely on the jack.
-
Remove the Wheel: Finish unscrewing the lug nuts and carefully remove the wheel. Set it aside in a safe place.
Locating and Disconnecting the Old Sensor
-
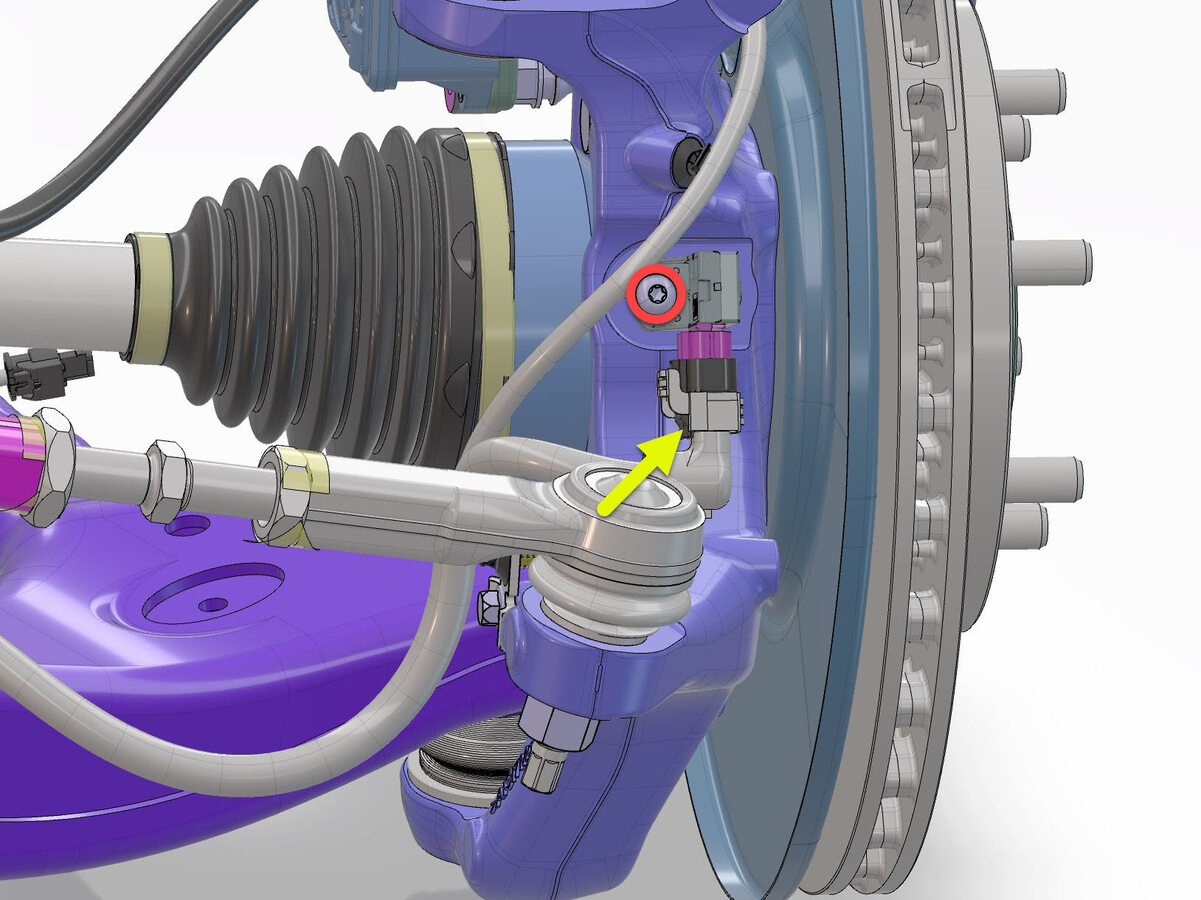
Identify the Sensor: The wheel speed sensor is typically located near the wheel hub, often mounted directly to the steering knuckle or a brake caliper bracket. It will have a wire leading from it, often routed along the suspension components.
-
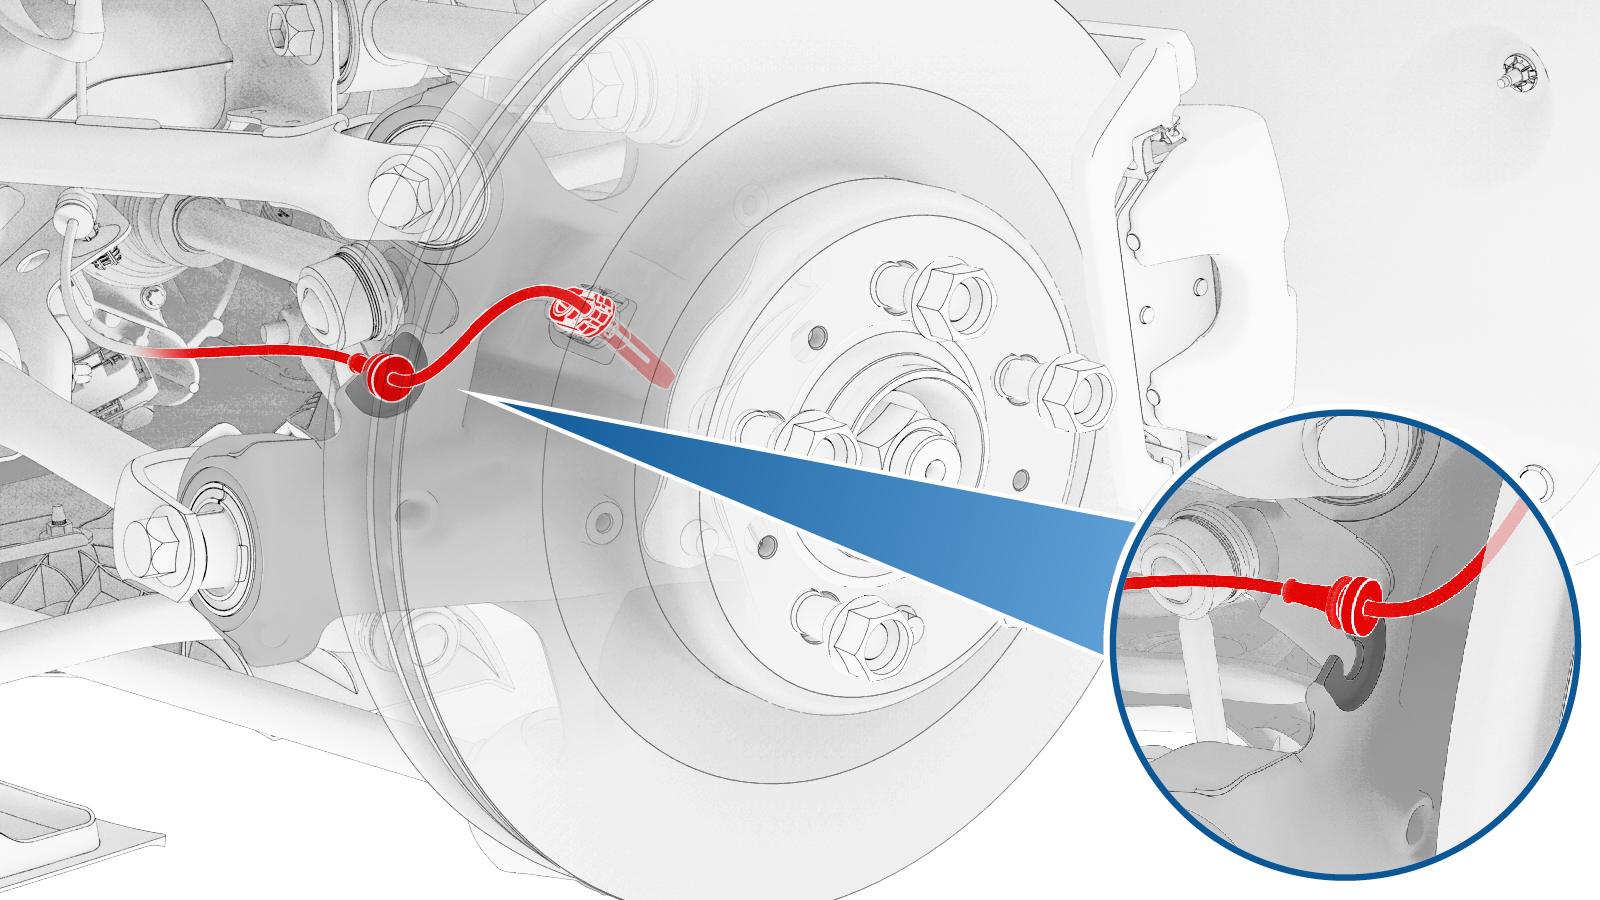
Trace the Wiring: Follow the sensor’s wire back to its electrical connector. This connector might be located in the wheel well, under the fender liner, or even inside the engine bay for front wheels, or near the frame rail for rear wheels.
-
Disconnect the Electrical Connector: Carefully disconnect the electrical connector. Most connectors have a tab or squeeze clip that needs to be pressed or pulled to release them. Be gentle to avoid breaking the plastic.
-
Remove Wiring Clips and Brackets: Detach any clips, zip ties, or brackets that secure the sensor’s wiring harness to the vehicle’s chassis or suspension components.
-
Remove the Sensor Mounting Bolt: The sensor itself is usually held in place by a single bolt (often a small hex bolt or Torx screw). Use the appropriate socket or bit to remove it.
-
Extract the Old Sensor: Once the bolt is out, carefully pull the old sensor straight out of its mounting hole. It might be seized due to corrosion. Gentle wiggling, twisting, or a penetrating oil application may be necessary. Avoid excessive force to prevent breaking off pieces inside the mounting bore.
Installing the New Sensor and Reassembly
-
Clean the Mounting Area: Use a wire brush and brake cleaner to thoroughly clean the sensor’s mounting bore and the surrounding area. Remove any rust, dirt, or debris. This ensures the new sensor seats correctly and provides an accurate reading.
-
Inspect the Reluctor Ring: Take this opportunity to visually inspect the reluctor ring (tone ring) for any damage. If it’s damaged, replacing it might be necessary, which is a more involved process.
-
Insert the New Sensor: Gently push the new wheel speed sensor into its mounting hole. Ensure it sits flush and properly oriented. Do not force it.
-
Install the Mounting Bolt: Hand-thread the mounting bolt for the new sensor. Once snug, tighten it to the manufacturer’s specified torque using your torque wrench. Avoid over-tightening, as this can damage the sensor or its mounting.
-
Route and Secure Wiring: Carefully route the new sensor’s wiring along the same path as the old one, securing it with the original clips or new zip ties. Ensure the wiring is not pinched, rubbing against moving parts, or hanging loosely, where it could get caught or damaged.
-
Connect the Electrical Connector: Plug the new sensor’s electrical connector securely into the vehicle’s wiring harness. Listen for a click to confirm it’s fully seated.
-
Reinstall the Wheel: Mount the wheel back onto the hub. Hand-tighten the lug nuts.
-
Lower the Vehicle: Raise the vehicle slightly with the jack to remove the jack stands. Then, slowly and safely lower the vehicle completely to the ground.
-
Torque Lug Nuts: With the vehicle on the ground, use your torque wrench to tighten the lug nuts in a star pattern to the manufacturer’s specified torque.
Post-Installation Verification and Testing
-
Reconnect Battery: If you disconnected the battery, reconnect the negative terminal.
-
Clear DTCs: Connect your OBD-II scanner and clear any stored ABS or Check Engine Light diagnostic trouble codes.
-
Test Drive: Take the vehicle for a test drive. Drive slowly at first, then gradually increase speed. Pay attention to the dashboard warning lights. They should extinguish after a short period of driving as the system recognizes the new sensor and its correct signals. Perform a few gentle braking maneuvers to ensure the ABS system functions correctly.
-
Re-scan (Optional): If the warning lights persist, re-scan for codes. It’s possible there’s another issue, or the sensor itself is faulty (though rare for a new part).
Tips for Longevity and Advanced Considerations
Replacing a wheel speed sensor is a manageable DIY task, but a few extra considerations can ensure a lasting repair and help you troubleshoot more complex scenarios.
Protecting Your Investment: Maintenance Tips
-
Regular Visual Inspections: During tire rotations or brake jobs, take a moment to visually inspect your wheel speed sensors and their wiring for any signs of damage, corrosion, or loose connections.
-
Keep It Clean: Mud, dirt, and road salt can accumulate around sensors and reluctor rings, potentially interfering with their operation. A quick spray with a hose during a car wash can help. Avoid high-pressure washing directly at the sensor if possible.
-
Proper Cable Management: Always ensure sensor wiring is properly secured and routed, preventing it from chafing, getting pinched, or coming into contact with hot or moving components.
Common Installation Pitfalls to Avoid
-
Damaging the Reluctor Ring: Be extremely careful not to bend, chip, or damage the reluctor ring during sensor removal or installation, especially if you need to use force.
-
Improper Torque: Overtightening can strip threads or crack the sensor housing. Undertightening can cause the sensor to come loose. Always use a torque wrench to specifications.
-
Incorrect Sensor Type: Using the wrong sensor for your specific wheel position or vehicle model will lead to incorrect readings and persistent fault codes.
-
Damaging Wiring/Connectors: Harshly pulling on wires or forcing connectors can lead to shorts or open circuits.
-
Not Clearing Codes: Sometimes the warning lights won’t go out until the old fault codes are manually cleared with a scanner.
When to Seek Professional Assistance
While wheel speed sensor replacement is often straightforward, there are situations where professional intervention is advisable:
-
Persistent Warning Lights: If, after replacing the sensor and clearing codes, the warning lights return, it indicates a deeper issue. This could be a damaged wiring harness, a faulty ABS control module, or an issue with the reluctor ring that you couldn’t diagnose.
-
Seized Components: If the old sensor is severely seized and cannot be removed without risking damage to the hub or knuckle, a professional may have specialized tools or techniques.
-
Complex Diagnostics: For intermittent issues or multiple fault codes, advanced diagnostic equipment and expertise are often needed to pinpoint the root cause accurately.
-
Lack of Confidence or Tools: If you’re unsure about any step of the process, lack the necessary tools, or are uncomfortable working on safety-critical systems, it’s always best to consult a certified mechanic.
The wheel speed sensor is a small but mighty component vital to your vehicle’s safety architecture. By understanding its role, recognizing symptoms of failure, and confidently performing its replacement, you not only save on repair costs but also ensure your vehicle continues to provide the stability and control expected in modern driving. Empowering yourself with this technical knowledge is a testament to proactive vehicle maintenance and a commitment to road safety.
aViewFromTheCave is a participant in the Amazon Services LLC Associates Program, an affiliate advertising program designed to provide a means for sites to earn advertising fees by advertising and linking to Amazon.com. Amazon, the Amazon logo, AmazonSupply, and the AmazonSupply logo are trademarks of Amazon.com, Inc. or its affiliates. As an Amazon Associate we earn affiliate commissions from qualifying purchases.