
In an increasingly digital world, efficient data retrieval is paramount for developers, system administrators, and even casual users. While web browsers offer a convenient way to download files, they often fall short when dealing with automated tasks, large file transfers, or fetching content from scripts. This is where Wget, a free and powerful command-line utility, steps in. Originally designed for Unix-like systems, Wget has become an indispensable tool for many, and its utility extends seamlessly to the Windows environment, provided you know how to install and configure it correctly.
This comprehensive guide will walk you through the various methods of installing Wget on Windows, delve into its practical applications, and equip you with the knowledge to leverage its full potential. Whether you prefer a straightforward manual setup, the convenience of a package manager, or the robust environment of the Windows Subsystem for Linux (WSL), we’ve got you covered.
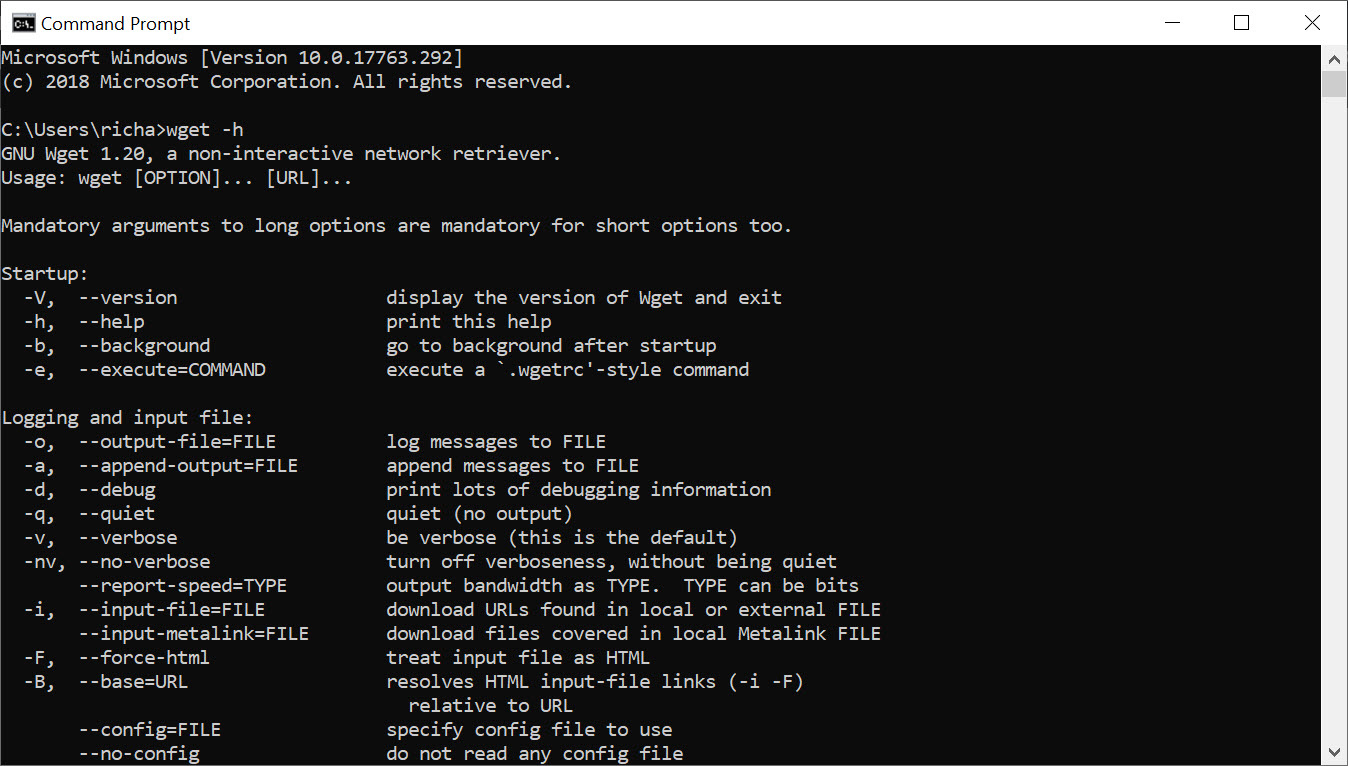
Understanding Wget: A Powerful Command-Line Utility
Before diving into the installation process, it’s crucial to understand what Wget is and why it remains a favorite among power users. Its name, “Wget,” is derived from “World Wide Web” and “get,” perfectly encapsulating its core function: getting content from the web.
What is Wget?
Wget is a non-interactive network downloader. This means it can work in the background, even after you log out, making it ideal for large, time-consuming downloads. It supports HTTP, HTTPS, and FTP protocols, allowing it to retrieve files from virtually any web server. Key features include:
-
Recursive Downloading: Wget can follow links within an HTML page and download entire websites, mirroring their structure locally.
-
Resuming Downloads: If a download is interrupted (due to a network glitch, power outage, etc.), Wget can pick up exactly where it left off, saving time and bandwidth.
-
Proxy Support: It can work through web proxies, which is useful in corporate or restricted network environments.
-
Bandwidth Limiting: You can set limits on Wget’s download speed to avoid saturating your network connection.
-
Logging and Error Handling: Wget provides detailed logs of its operations and robust error handling capabilities.
Why Use Wget on Windows?
While Windows has its own set of download managers and browser capabilities, Wget offers distinct advantages, particularly for scripting and automation:
-
Automation: Integrate Wget into batch scripts, PowerShell scripts, or scheduled tasks to automate routine downloads, such as fetching daily reports, software updates, or log files.
-
Reliability for Large Files: For multi-gigabyte files or downloads over unstable connections, Wget’s resume capability is a lifesaver, preventing the need to restart from scratch.
-
Website Mirroring: Developers, researchers, or anyone needing an offline copy of a website can use Wget to mirror entire sites, including their directory structure and linked resources.
-
Non-Interactive Operations: Run downloads silently in the background without requiring a graphical user interface, perfect for server environments or unattended operations.
-
Specific Protocol Support: While browsers handle HTTP/S well, Wget’s robust FTP support can be crucial for specific server interactions.
Wget vs. Browser Downloads: A Quick Comparison
| Feature | Wget | Browser Downloads |
| :———————- | :—————————————– | :————————————————- |
| Interactivity | Non-interactive (CLI) | Interactive (GUI) |
| Automation | Excellent for scripting/scheduling | Limited, usually manual intervention required |
| Resume Capability | Robust, built-in | Varies by browser/server, sometimes unreliable |
| Recursive Downloads | Yes, powerful | No, requires specialized extensions |
| Resource Usage | Low, especially for background tasks | Can be higher, especially for large files |
| Protocols Supported | HTTP, HTTPS, FTP | HTTP, HTTPS (sometimes FTP via extensions) |
| Use Cases | Scripting, large files, website mirroring | Casual downloads, single files, user-friendly |
Pre-Installation Considerations and Method Selection
Before you begin the installation, it’s good to understand the minimal requirements and choose the installation method that best suits your technical comfort level and specific needs.
System Requirements
Wget is a lightweight utility, so its system requirements are minimal. Any modern version of Windows (Windows 7, 8, 10, or 11) will run Wget without issues. You’ll need a modest amount of disk space (a few MBs for the executable) and an active internet connection to download the installer or package. Basic command-line proficiency is beneficial for using Wget effectively.
Choosing an Installation Method
There are several ways to get Wget up and running on Windows, each with its own advantages:
-
Manual Installation (Native Binary): This involves downloading the Wget executable directly and adding it to your system’s PATH. It’s straightforward but requires a few manual steps.
-
Package Managers (Chocolatey or Scoop): These are highly recommended for Windows users as they simplify installation, updates, and uninstallation of software. They are akin to
aptorbrewon Linux/macOS.-
Chocolatey: A widely popular package manager for general users.
-
Scoop: A package manager designed for command-line tools, favored by developers and power users.
-
-
Windows Subsystem for Linux (WSL): If you already use or plan to use WSL, you can install the Linux version of Wget within your chosen Linux distribution. This provides a native Linux experience for Wget and other command-line tools.
We will cover each of these methods in detail.
Method 1: Installing Wget via Native Binary (Manual)
This method involves downloading a pre-compiled Windows version of Wget and configuring your system to recognize it. It’s a reliable approach if you prefer not to use package managers.
Step-by-Step Guide for Manual Installation
-
Download the Wget Executable:
-
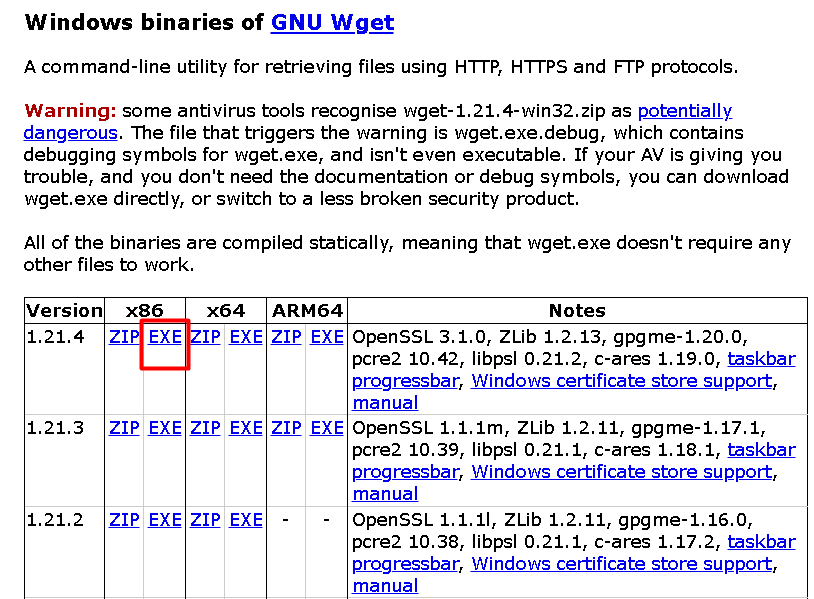
Wget doesn’t have an official Windows build from GNU directly, but several trusted sources provide compiled versions. A common source is the “eternally grateful” website (sourceforge.net/projects/gnuwin32/files/wget/).
-
Navigate to a reliable source (e.g., https://eternallyconfuzzled.com/wired/wget/ or search for “wget for windows” on SourceForge).
-
Look for a recent stable version, typically an executable file (
.exe) or a ZIP archive containing it. Download the appropriate 32-bit or 64-bit version for your system. For most modern systems, the 64-bit version is preferred.
-
-
Extract the Archive (if applicable):
- If you downloaded a ZIP file (e.g.,
wget-1.21.1-win64.zip), extract its contents to a simple, easily accessible location. A good practice is to create a folder likeC:Program FilesWgetorC:Wget. For this guide, let’s assume you extract it toC:Wget. Ensure thewget.exefile is directly within this folder.
- If you downloaded a ZIP file (e.g.,
-
Add Wget to System PATH Environmental Variables:
-
For Windows to recognize
wget.exewhen you typewgetin any command prompt or PowerShell window, you need to add its directory to your system’s PATH environment variable. -
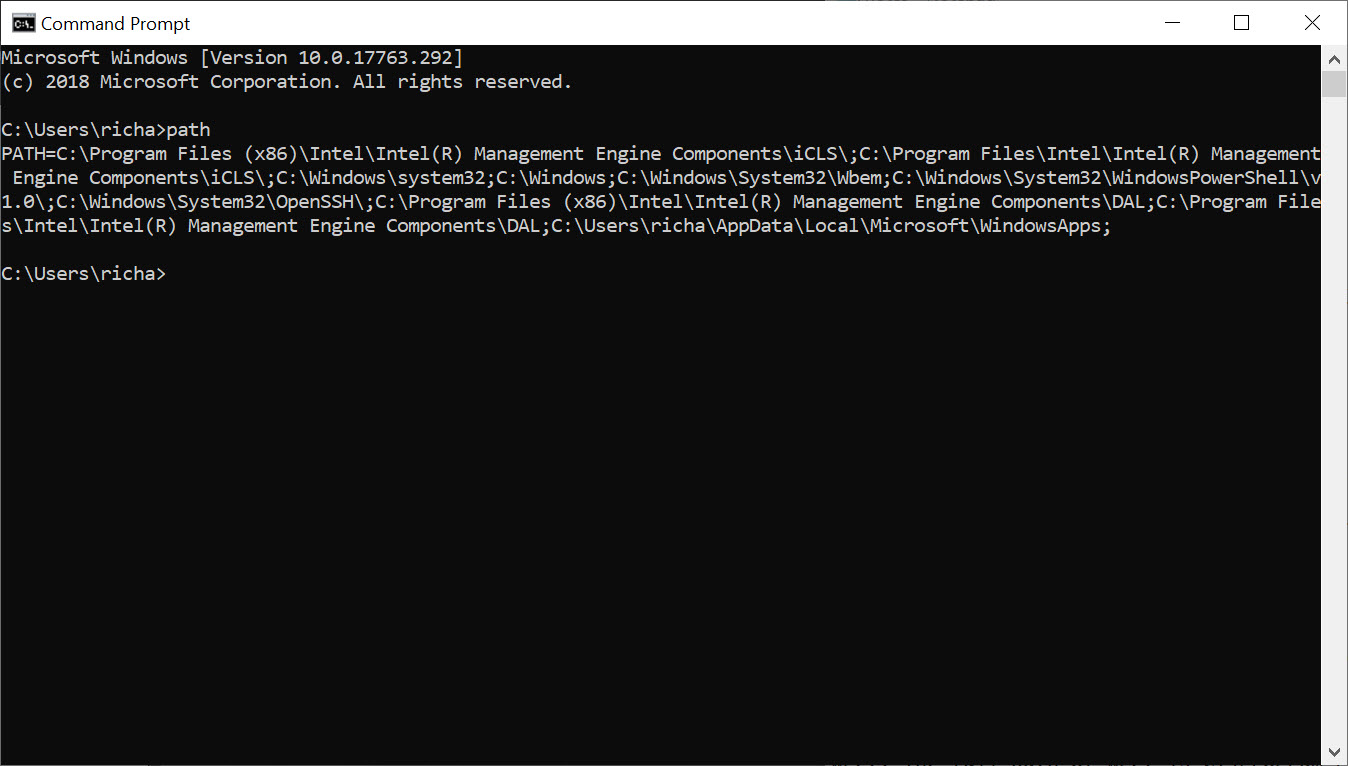
Search for “Environment Variables” in the Windows search bar and select “Edit the system environment variables.”
-
In the “System Properties” window, click on the “Environment Variables…” button.
-
Under “System variables” (not “User variables” if you want it available for all users), find and select the “Path” variable, then click “Edit…”.
-
Click “New” and add the path to your Wget directory (e.g.,
C:Wget). -
Click “OK” on all open windows to save the changes.
-
Important: You might need to restart any open Command Prompt or PowerShell windows for the changes to take effect.
-
-
Verify Installation:
-
Open a new Command Prompt or PowerShell window.
-
Type
wget --versionand press Enter. -
If Wget is correctly installed and its path is configured, you should see the version information displayed. If you get an error like “‘wget’ is not recognized as an internal or external command,” double-check your PATH variable settings and ensure you’ve opened a new console window.
-
Pros and Cons of Manual Installation
-
Pros:
-
No external dependencies on package managers.
-
Direct control over where the files are located.
-
Relatively simple for a single tool.
-
-
Cons:
-
Manual updates: You’ll have to repeat the process to update Wget to a newer version.
-
Potential for PATH misconfigurations if not careful.
-
Finding a reliable download source can sometimes be tricky.
-
Method 2: Streamlined Installation with Package Managers
For a more modern and convenient approach, especially if you manage other command-line tools or software on Windows, using a package manager is highly recommended. Chocolatey and Scoop are excellent choices.
Using Chocolatey (Recommended for General Users)
Chocolatey is a software management solution that brings the ease of package management from Linux to Windows.
-
Install Chocolatey (if not already present):
-
Open PowerShell as an administrator.
-
Ensure
Get-ExecutionPolicyis notRestricted. If it is, runSet-ExecutionPolicy AllSignedorSet-ExecutionPolicy Bypass -Scope Processto allow scripts to run. -
Run the Chocolatey installation command:
Set-ExecutionPolicy Bypass -Scope Process -Force; [System.Net.ServicePointManager]::SecurityProtocol = [System.Net.ServicePointManager]::SecurityProtocol -bor 3072; iex ((New-Object System.Net.WebClient).DownloadString('https://community.chocolatey.org/install.ps1')) -
After installation, close and reopen PowerShell as administrator to ensure Chocolatey is initialized.
-
Verify by typing
chocoorchoco -?.
-
-
Install Wget via Chocolatey:
-
In an administrator PowerShell or Command Prompt, type:
choco install wget -
Chocolatey will download Wget and automatically configure its PATH. Confirm any prompts (
Y).
-
-
Verify Installation:
-
Open a new (non-administrator) Command Prompt or PowerShell window.
-
Type
wget --versionto confirm Wget is installed and accessible.
-
Using Scoop (Recommended for Developers/Power Users)
Scoop is a command-line installer for Windows, specifically designed for developer tools and open-source applications.
-
Install Scoop (if not already present):
-
Open PowerShell.
-
Ensure PowerShell can execute local scripts:
Set-ExecutionPolicy RemoteSigned -Scope CurrentUser. -
Install Scoop with:
irm get.scoop.sh | iex -
Verify by typing
scoop help.
-
-
Install Wget via Scoop:
-
In a PowerShell window, type:
scoop install wget -
Scoop will download and install Wget, automatically managing its path.
-
-
Verify Installation:
-
Open a new PowerShell window.
-
Type
wget --versionto confirm the installation.
-
Advantages of Package Managers
-
Simplified Installation: Single command to install software.
-
Automatic PATH Configuration: No manual environment variable editing.
-
Easy Updates:
choco upgrade wgetorscoop update wgetupdates to the latest version. -
Clean Uninstallation:
choco uninstall wgetorscoop uninstall wgetremoves software completely. -
Dependency Management: Handles any necessary dependencies automatically.
Method 3: Leveraging Windows Subsystem for Linux (WSL)
If you’re already familiar with Linux or require a Linux environment for other development tasks, installing Wget within WSL is an excellent option. This gives you the native Linux version of Wget, which can sometimes have more features or behave more predictably in certain scenarios than Windows ports.
What is WSL?
Windows Subsystem for Linux (WSL) allows developers to run a GNU/Linux environment directly on Windows, without the overhead of a traditional virtual machine or dual-boot setup. It provides a Linux kernel interface, allowing you to run most command-line tools, utilities, and applications as you would on a native Linux system.
Installing WSL
If you don’t have WSL installed, here’s a high-level overview of how to set it up:
-
Enable the WSL Feature:
-
Open PowerShell as administrator.
-
Run:
dism.exe /online /enable-feature /featurename:Microsoft-Windows-Subsystem-Linux /all /norestart -
Then, enable the Virtual Machine Platform (for WSL 2):
dism.exe /online /enable-feature /featurename:VirtualMachinePlatform /all /norestart -
Restart your computer.
-
-
Install a Linux Distribution:
-
Open the Microsoft Store.
-
Search for your preferred Linux distribution (e.g., Ubuntu, Debian, Kali Linux).
-
Click “Get” or “Install” to download and install it.
-
Launch the installed distribution. The first time, it will prompt you to create a username and password.
-
Installing Wget within WSL
Once your WSL distribution is set up, installing Wget is as simple as it is on any Linux system:
-
Update Package Lists:
-
Open your WSL terminal (e.g., Ubuntu).
-
Run:
sudo apt update(for Debian/Ubuntu-based distributions)
-
-
Install Wget:
- Run:
sudo apt install wget
- Run:
-
Verify Installation:
- Run:
wget --version
- Run:
When to Use Wget via WSL
-
Linux Native Behavior: If you need Wget to behave exactly as it would on a Linux server, especially for complex scripts or specific options.
-
Cross-Platform Development: When your development workflow primarily involves Linux tools, WSL provides a consistent environment.
-
Already Using WSL: If you’re already leveraging WSL for other tasks, it’s natural to integrate Wget into that environment.
-
Accessing Windows Files: WSL distributions can access your Windows file system, so you can download files directly into your Windows drives from within WSL.
Post-Installation: Basic Wget Usage and Essential Commands
Now that Wget is installed, let’s explore some fundamental commands to get you started. Remember, you’ll execute these commands in your Command Prompt, PowerShell, or WSL terminal.
Verifying Wget
Always start by ensuring Wget is accessible:
wget --version
This command displays the Wget version and its compiled features, confirming it’s correctly installed.
Downloading a Single File
The most basic usage is to download a file from a specified URL:
wget https://example.com/path/to/yourfile.zip
Wget will save yourfile.zip to the directory from which you ran the command.
Resuming Downloads
If a download is interrupted, use the -c (continue) flag to resume it:
wget -c https://example.com/path/to/largefile.iso
This is incredibly useful for large files or unreliable connections.
Downloading to a Specific Directory
To save a downloaded file to a different directory, use the -P (prefix) flag:
wget -P C:UsersYourUserDownloads https://example.com/document.pdf
Or within WSL:
wget -P /mnt/c/Users/YourUser/Downloads https://example.com/document.pdf
Recursive Downloads and Website Mirroring
For downloading an entire website or a portion of it, Wget’s recursive mode is powerful:
wget -r -l 1 -np -k https://example.com/blog/
-
-r: Turn on recursive retrieving. -
-l 1: Set the recursion depth to 1 (downloads the page itself and all linked assets directly from that page, but won’t follow links from those assets). Increase for deeper mirroring. -
-np: Do not ascend to the parent directory (prevents downloading the entire domain if starting from a sub-path). -
-k: After downloading, convert absolute links in the document to relative ones for local viewing (important for offline browsing).
Downloading Multiple Files from a List
If you have a list of URLs, you can put them in a text file and use Wget to download them all:
wget -i C:pathtourls.txt
Where urls.txt contains one URL per line.
Advanced Options (Brief Mention)
Wget boasts a vast array of options for specific scenarios:
-
--user-agent: Spoof a browser’s user-agent string. -
--limit-rate: Limit the download speed (e.g.,500kfor 500 KB/s). -
--no-check-certificate: Bypass SSL certificate validation (use with caution, only on trusted sites). -
-O output_filename: Save the file with a specific name. -
-q: Quiet mode, suppresses Wget’s output.
Troubleshooting Common Issues
While Wget installation and usage are generally straightforward, you might encounter a few common problems.
“‘wget’ is not recognized as an internal or external command”
-
Cause: The directory containing
wget.exeis not in your system’s PATH environment variable, or your console window hasn’t refreshed its PATH. -
Solution:
-
If you did a manual installation, revisit “Step 3: Add Wget to System PATH.”
-
Ensure there are no typos in the path.
-
Open a new Command Prompt or PowerShell window after making PATH changes.
-
If using a package manager, ensure the package manager itself is correctly installed and its own paths are configured.
-
Download Failures or Network Errors
-
Cause: Incorrect URL, network connectivity issues, firewall blocking, proxy server problems, server-side restrictions.
-
Solution:
-
Check the URL: Ensure the URL is correct and accessible via a web browser.
-
Network Connectivity: Verify your internet connection.
-
Firewall: Temporarily disable your Windows Firewall or add an exception for
wget.exeto see if it resolves the issue. -
Proxy Settings: If you are behind a corporate proxy, Wget needs to be configured. You can use environment variables like
http_proxy,https_proxy,ftp_proxy, or Wget’s--proxy=onand--proxy-user/--proxy-passwordoptions. -
Server Restrictions: Some websites block automated downloaders or specific user agents. Try using the
--user-agentflag to mimic a browser.
-
SSL Certificate Errors
-
Cause: The server’s SSL certificate is invalid, expired, or self-signed, and Wget (by default) will refuse to connect.
-
Solution:
-
Verify Source: Only if you absolutely trust the source and understand the risks, you can use
wget --no-check-certificateto bypass certificate validation. This is generally discouraged for public internet sites due to security implications. -
Update Root Certificates: Ensure your Windows system (or WSL distro) has up-to-date root SSL certificates.
-
Conclusion
Wget is an exceptionally powerful and versatile command-line utility that significantly enhances a Windows user’s ability to download and manage files from the internet. Whether you opt for the direct control of a manual installation, the convenience of package managers like Chocolatey or Scoop, or the native environment of WSL, integrating Wget into your toolkit is a decision you won’t regret.
By mastering its basic commands and understanding its various options, you unlock capabilities for automation, reliable large file transfers, and even offline content browsing that go far beyond what a typical web browser offers. Take the time to experiment with its features, and you’ll find Wget quickly becomes an indispensable part of your digital workflow.
aViewFromTheCave is a participant in the Amazon Services LLC Associates Program, an affiliate advertising program designed to provide a means for sites to earn advertising fees by advertising and linking to Amazon.com. Amazon, the Amazon logo, AmazonSupply, and the AmazonSupply logo are trademarks of Amazon.com, Inc. or its affiliates. As an Amazon Associate we earn affiliate commissions from qualifying purchases.