
In the rapidly evolving landscape of artificial intelligence and machine learning, PyTorch has emerged as a cornerstone framework, empowering researchers and developers to build, train, and deploy sophisticated deep learning models with unparalleled flexibility and efficiency. Whether you’re a seasoned data scientist looking to expand your toolkit or a curious beginner eager to delve into the world of neural networks, installing PyTorch correctly is your crucial first step. This guide aims to demystify the installation process, providing a professional, insightful, and engaging roadmap to get PyTorch up and running on your system, ensuring a smooth start to your AI journey.

PyTorch, an open-source machine learning library primarily developed by Facebook’s AI Research lab (FAIR), has gained immense popularity for its Pythonic interface, dynamic computation graph, and strong GPU acceleration capabilities. It has become a go-to choice for academic research, rapid prototyping, and even production-grade applications across various domains, including computer vision, natural language processing, and reinforcement learning. A proper installation is foundational to harnessing its power, and this article will walk you through everything from understanding its significance to verifying your setup.
Understanding PyTorch: Why It Matters in the AI Landscape
Before diving into the technicalities of installation, it’s essential to grasp what PyTorch is and why it holds such a prominent position in the artificial intelligence ecosystem. Understanding its core philosophy and capabilities will not only motivate the installation process but also provide context for its diverse applications.
The Power of PyTorch: Key Features and Benefits
PyTorch distinguishes itself through several key features that resonate deeply with developers and researchers. At its heart is the concept of a dynamic computation graph, often referred to as “define-by-run.” Unlike static graphs (found in earlier versions of TensorFlow, for example), PyTorch builds the computation graph on the fly as operations are executed. This dynamic nature offers immense flexibility for debugging, allows for varying input sizes during training, and simplifies the implementation of complex network architectures like recurrent neural networks.
Beyond its dynamic graph, PyTorch boasts a highly intuitive and Pythonic API. If you’re familiar with Python and its scientific computing libraries like NumPy, you’ll find PyTorch’s syntax remarkably accessible. This design philosophy reduces the learning curve, enabling quicker experimentation and faster development cycles. Furthermore, PyTorch provides seamless integration with Python’s debugging tools, allowing developers to step through code and inspect tensors directly, much like debugging any other Python script.
Another critical advantage is its robust support for GPU acceleration. Deep learning models, particularly those with millions or billions of parameters, demand significant computational power. PyTorch leverages NVIDIA’s CUDA technology to perform computations on GPUs, dramatically accelerating training times. This GPU support is not just an add-on; it’s deeply integrated into the framework, making it straightforward to move data and models between CPU and GPU.
Who Uses PyTorch? Industry Adoption and Applications
PyTorch’s blend of flexibility, ease of use, and powerful capabilities has made it a favorite across various sectors. In academia, it’s widely used for cutting-edge research, with many new papers and models being implemented and released in PyTorch. Its dynamic nature makes it ideal for exploring novel architectures and unconventional approaches without being constrained by rigid framework structures.
In the industry, PyTorch powers a diverse array of applications. Companies utilize it for developing advanced computer vision systems, from object detection and image segmentation to facial recognition and medical imaging analysis. For natural language processing (NLP), PyTorch is instrumental in building large language models (LLMs), machine translation systems, sentiment analysis tools, and chatbots. Its ecosystem provides powerful tools for handling text data, making it a strong contender in this rapidly evolving field. Furthermore, PyTorch is increasingly employed in reinforcement learning for training intelligent agents in simulated environments and real-world control systems. Its adaptability means it can be found in startups pushing boundaries with AI-driven products, as well as in large tech corporations like Meta (Facebook), Microsoft, and Tesla, which rely on it for critical AI infrastructure.
Pre-Installation Checklist: Paving the Way for a Smooth Setup
A successful PyTorch installation often hinges on proper preparation. Overlooking crucial prerequisites can lead to frustrating errors and compatibility issues. This section outlines the essential checks and preparatory steps to ensure a smooth and hassle-free installation experience.
System Requirements: Hardware and Software Considerations
Before initiating the installation, it’s vital to ensure your system meets the fundamental requirements. PyTorch is cross-platform, supporting Linux, Windows, and macOS, but specific versions and hardware configurations can impact performance, especially for GPU acceleration.
-
Operating System: PyTorch officially supports recent versions of Linux (e.g., Ubuntu 18.04+, CentOS 7+), Windows 10 (or newer), and macOS (10.13 High Sierra or newer).
-
Python Version: PyTorch typically requires Python 3.7 or newer. Always check the official PyTorch website for the most current compatible Python versions.
-
RAM: While PyTorch can run with minimal RAM, for any serious deep learning task, 8GB of RAM is a practical minimum, with 16GB or 32GB being highly recommended, especially when working with large datasets or models.
-
Disk Space: Allocate at least a few gigabytes of free disk space for PyTorch and its dependencies, along with any models or datasets you plan to use.
-
CPU: Any modern multi-core CPU will suffice for CPU-only operations.
-
GPU (Optional but Recommended): For significant performance gains in deep learning, an NVIDIA GPU is highly recommended. PyTorch leverages NVIDIA’s CUDA platform. Ensure your GPU is CUDA-enabled (most NVIDIA GPUs from the GTX 10-series, RTX series, or professional Quadro/Tesla cards are). AMD GPUs have experimental support through ROCm, but NVIDIA remains the dominant platform for PyTorch.
Python Environment Management: Anaconda, Miniconda, and Virtual Environments
One of the most critical best practices in Python development, particularly for machine learning, is the use of isolated Python environments. This prevents dependency conflicts between different projects and ensures that your PyTorch installation doesn’t interfere with other Python applications on your system.
-
Anaconda/Miniconda: These are highly recommended for managing Python environments and packages. Anaconda is a larger distribution that includes many scientific computing packages, while Miniconda is a minimal installer that only includes Python and the
condapackage manager. Miniconda is generally preferred for its smaller footprint.-
Installation: Download and install Miniconda or Anaconda from their official websites.
-
Creating an Environment: Once installed, open your terminal or command prompt and create a new environment:
conda create -n my_pytorch_env python=3.9 # Use your preferred Python version conda activate my_pytorch_env -
This command creates an isolated environment named
my_pytorch_envwith Python 3.9. All subsequent PyTorch installations will be confined to this environment.
-
-
venv(Python’s Built-in Virtual Environments): If you prefer not to useconda, Python’s built-invenvmodule offers similar isolation.-
Creating an Environment:
python -m venv my_pytorch_env

source my_pytorch_env/bin/activate # On Windows: .my_pytorch_envScriptsactivate
-
GPU Acceleration: NVIDIA CUDA Toolkit and CuDNN
If you have an NVIDIA GPU and intend to perform serious deep learning, installing the CUDA Toolkit and CuDNN is non-negotiable. These libraries allow PyTorch to utilize the GPU’s parallel processing power, vastly accelerating computations.
-
NVIDIA Graphics Drivers: Ensure you have the latest stable NVIDIA drivers installed for your GPU. Outdated drivers are a common source of CUDA-related issues.
-
CUDA Toolkit: The CUDA Toolkit provides the development environment for creating high-performance GPU-accelerated applications.
-
Compatibility: Crucially, the CUDA Toolkit version must be compatible with both your NVIDIA drivers and the PyTorch version you intend to install. PyTorch’s official installation page will specify the compatible CUDA versions.
-
Installation: Download the appropriate CUDA Toolkit version from the NVIDIA developer website. Follow the installation instructions carefully.
-
-
CuDNN (CUDA Deep Neural Network library): CuDNN is a GPU-accelerated library of primitives for deep neural networks. It provides highly optimized implementations for standard routines such as convolution, pooling, normalization, and activation layers.
- Installation: CuDNN requires a free developer account with NVIDIA. Download the CuDNN library version that matches your installed CUDA Toolkit version. Installation typically involves extracting the downloaded files and copying them into the CUDA Toolkit directory. Detailed instructions are usually provided with the CuDNN download.
It’s imperative to get the CUDA and CuDNN versions right. Mismatched versions are a frequent cause of PyTorch failing to detect or utilize the GPU. The PyTorch website’s installation configurator (discussed next) will help guide you on the exact CUDA version string to use in your installation command.
Step-by-Step Installation Guide: Getting PyTorch Up and Running
With your system prepared and environment ready, we can proceed with the core installation of PyTorch. The official PyTorch website provides the most reliable and up-to-date installation instructions.
The Official PyTorch Website: Your Primary Resource
The first and most important step is to visit the official PyTorch website’s “Get Started Locally” section: pytorch.org/get-started/locally/. This page features an interactive configurator that generates the precise installation command based on your system and preferences.
The configurator allows you to select:
-
PyTorch Build: Stable (recommended for most users) or Preview (for testing upcoming features).
-
Your OS: Linux, Windows, or macOS.
-
Package Manager:
Conda(recommended if you installed Miniconda/Anaconda) orpip. -
Python Version: Matches your active environment’s Python version.
-
CUDA Version: (If you have an NVIDIA GPU) Select the CUDA version that matches your installed CUDA Toolkit. If you don’t have a GPU or don’t want GPU acceleration, choose “CPU.”
Once you make these selections, the website will display the exact command you need to run in your activated Python environment.
Command-Line Installation: CPU vs. GPU Versions
After activating your conda or venv environment (e.g., conda activate my_pytorch_env), copy the generated command from the PyTorch website and paste it into your terminal or command prompt.
Example for CPU-only installation (using pip):
pip install torch torchvision torchaudio --index-url https://download.pytorch.org/whl/cpu
This command installs torch (the core library), torchvision (for computer vision applications), and torchaudio (for audio processing), all optimized for CPU.
Example for GPU-enabled installation (using conda with CUDA 11.8):
conda install pytorch torchvision torchaudio pytorch-cuda=11.8 -c pytorch -c nvidia
This command (generated by the website for specific CUDA versions) leverages conda channels to fetch PyTorch and its CUDA dependencies. The -c pytorch -c nvidia arguments specify the channels from which conda should download packages.
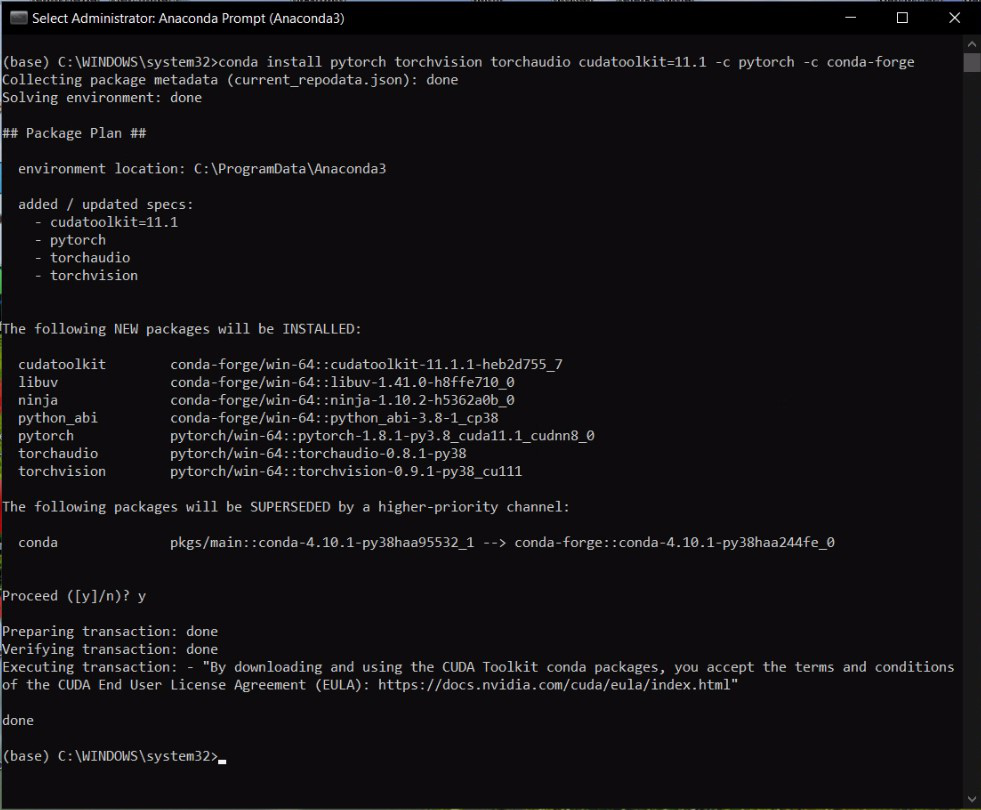
Example for GPU-enabled installation (using pip with CUDA 11.8):
pip install torch torchvision torchaudio --index-url https://download.pytorch.org/whl/cu118
Notice the cu118 in the URL, indicating the CUDA 11.8 build. If you have CUDA 12.1, it would be cu121, and so on. Always refer to the PyTorch website for the exact URL segment.
The installation process may take several minutes, depending on your internet connection and system speed, as it downloads several large packages.
Verifying Your Installation: A Crucial Final Step
After the installation completes, it’s paramount to verify that PyTorch has been installed correctly and, if applicable, that your GPU is detected.
-
Open a Python interpreter: In your activated environment, type
pythonand press Enter. -
Import PyTorch:
import torch

print(torch.__version__)
This should print the installed PyTorch version without any errors. If you see a
ModuleNotFoundError, it means PyTorch wasn’t installed into your active environment, or the installation failed. -
Verify GPU (CUDA) availability (if applicable):
print(torch.cuda.is_available())If you installed the GPU-enabled version and your CUDA setup is correct, this command should print
True. If it printsFalsebut you expectedTrue, it indicates an issue with your CUDA, CuDNN, or PyTorch’s GPU build. -
Check CUDA device count and name (if available):
if torch.cuda.is_available():print(torch.cuda.device_count()) print(torch.cuda.get_device_name(0)) # Prints the name of the first GPUThis provides further confirmation that PyTorch can see and identify your GPU(s).
Troubleshooting Common Issues: Navigating Potential Hurdles
Even with careful preparation, issues can sometimes arise. Here are some common problems and their solutions:
-
ModuleNotFoundError: No module named 'torch':-
Cause: PyTorch was not installed in your current Python environment, or you didn’t activate the correct environment.
-
Solution: Ensure your
condaorvenvenvironment is activated (conda activate my_pytorch_envorsource my_pytorch_env/bin/activate) before running Python. If it still fails, try reinstalling PyTorch in the activated environment.
-
-
torch.cuda.is_available()returnsFalsewhen expectingTrue:-
Cause: Mismatched CUDA Toolkit/CuDNN versions, incorrect NVIDIA drivers, or installing the CPU-only version of PyTorch by mistake.
-
Solution:
-
Verify your NVIDIA drivers are up to date.
-
Check that your CUDA Toolkit and CuDNN versions are compatible with each other and the PyTorch version.
-
Re-run the PyTorch installation command from the official website, ensuring you selected the correct CUDA version.
-
Make sure
nvcc --version(for CUDA) andnvidia-smi(for drivers) commands work in your terminal.
-
-
-
condaorpiperrors during installation:-
Cause: Network issues, corrupted cache, or dependency conflicts.
-
Solution:
-
Check your internet connection.
-
Clear
conda‘s cache:conda clean --all. -
Clear
pip‘s cache:pip cache purge. -
Try updating your package managers:
conda update -n base condaandpip install --upgrade pip.
-
-
-
“DLL load failed while importing _C” (Windows):
-
Cause: Often related to missing or incompatible DLLs, commonly due to an incorrect Visual C++ Redistributable or CUDA installation issues.
-
Solution: Ensure you have the latest Microsoft Visual C++ Redistributable installed. Reverify your CUDA and CuDNN installations.
-
Advanced Installation and Configuration: Optimizing Your PyTorch Environment
Beyond the basic installation, there are several ways to further refine and expand your PyTorch setup to suit specific development needs.
Installing Specific PyTorch Versions
Sometimes, you might need to install an older or a specific nightly build of PyTorch, perhaps to reproduce research results or test experimental features.
-
Installing an Older Version: You can specify the version number directly with
piporconda:pip install torch==1.13.1 torchvision==0.14.1 torchaudio==0.13.1 --index-url https://download.pytorch.org/whl/cu117 # Or with conda: conda install pytorch==1.13.1 torchvision==0.14.1 torchaudio==0.13.1 pytorch-cuda=11.7 -c pytorch -c nvidiaAlways match the
torchvisionandtorchaudioversions with thetorchversion as closely as possible, usually found in the release notes on the PyTorch GitHub page. -
Installing Nightly Builds: For access to the very latest features (which might be unstable), PyTorch offers nightly builds. These can be installed using specific commands provided on the PyTorch website, typically by changing the
--index-urlor channel.
Integrating with Jupyter Notebooks and IDEs
PyTorch integrates seamlessly with popular development environments, enhancing productivity.
-
Jupyter Notebooks/Lab: If you installed PyTorch in a
condaenvironment, you’ll need to make that environment available as a kernel in Jupyter.conda install ipykernel python -m ipykernel install --user --name=my_pytorch_env --display-name "PyTorch Env (Python 3.9)"Now, when you launch Jupyter Notebook or Lab (
jupyter notebookorjupyter lab), you can select “PyTorch Env (Python 3.9)” as your kernel. -
VS Code & PyCharm: Both popular IDEs offer excellent Python support. When opening your project, simply select your
my_pytorch_envas the Python interpreter for the project. They will automatically recognize the installed PyTorch library and provide features like intelligent code completion, debugging, and environment management.
Exploring PyTorch Ecosystem Libraries (TorchVision, TorchText, TorchAudio)
PyTorch is more than just its core library; it’s a vibrant ecosystem. You’ve likely installed torchvision and torchaudio along with torch.
-
TorchVision: This library is indispensable for computer vision tasks. It provides:
-
Pre-trained models (e.g., ResNet, VGG, YOLO)
-
Common datasets (e.g., ImageNet, CIFAR-10, MNIST)
-
Image transformations and utilities for data loading
-
-
TorchText: Essential for natural language processing (NLP), TorchText offers:
-
Datasets for text classification, translation, and more.
-
Text processing utilities (tokenization, vocabulary building).
-
Pre-trained word embeddings.
-
-
TorchAudio: Focused on audio processing and deep learning with sound:
-
Datasets for speech recognition, music generation.
-
Audio transformations (e.g., spectrograms, MFCCs).
-
I/O utilities for various audio formats.
-
These libraries significantly streamline development by providing battle-tested components and tools, allowing you to focus on model architecture and experimentation rather than boilerplate code.
Beyond Installation: Diving Deeper into PyTorch Development
Congratulations! You’ve successfully navigated the installation process and are now equipped with a fully functional PyTorch environment. This marks the beginning of an exciting journey into building and understanding advanced AI models.
First Steps with PyTorch: Tensors and Basic Operations
The fundamental data structure in PyTorch is the torch.Tensor, which is essentially a multi-dimensional array similar to a NumPy array, but with added benefits like GPU acceleration and automatic differentiation (autograd). Your next step should be to familiarize yourself with tensor operations:
import torch


# Create a tensor

x = torch.rand(5, 3)

print(x)


# Perform basic operations

y = torch.ones(5, 3)

print(x + y)


# Move tensor to GPU (if available)

if torch.cuda.is_available():

    device = torch.device("cuda")

    x = x.to(device)

    y = y.to(device)

    print(x + y)
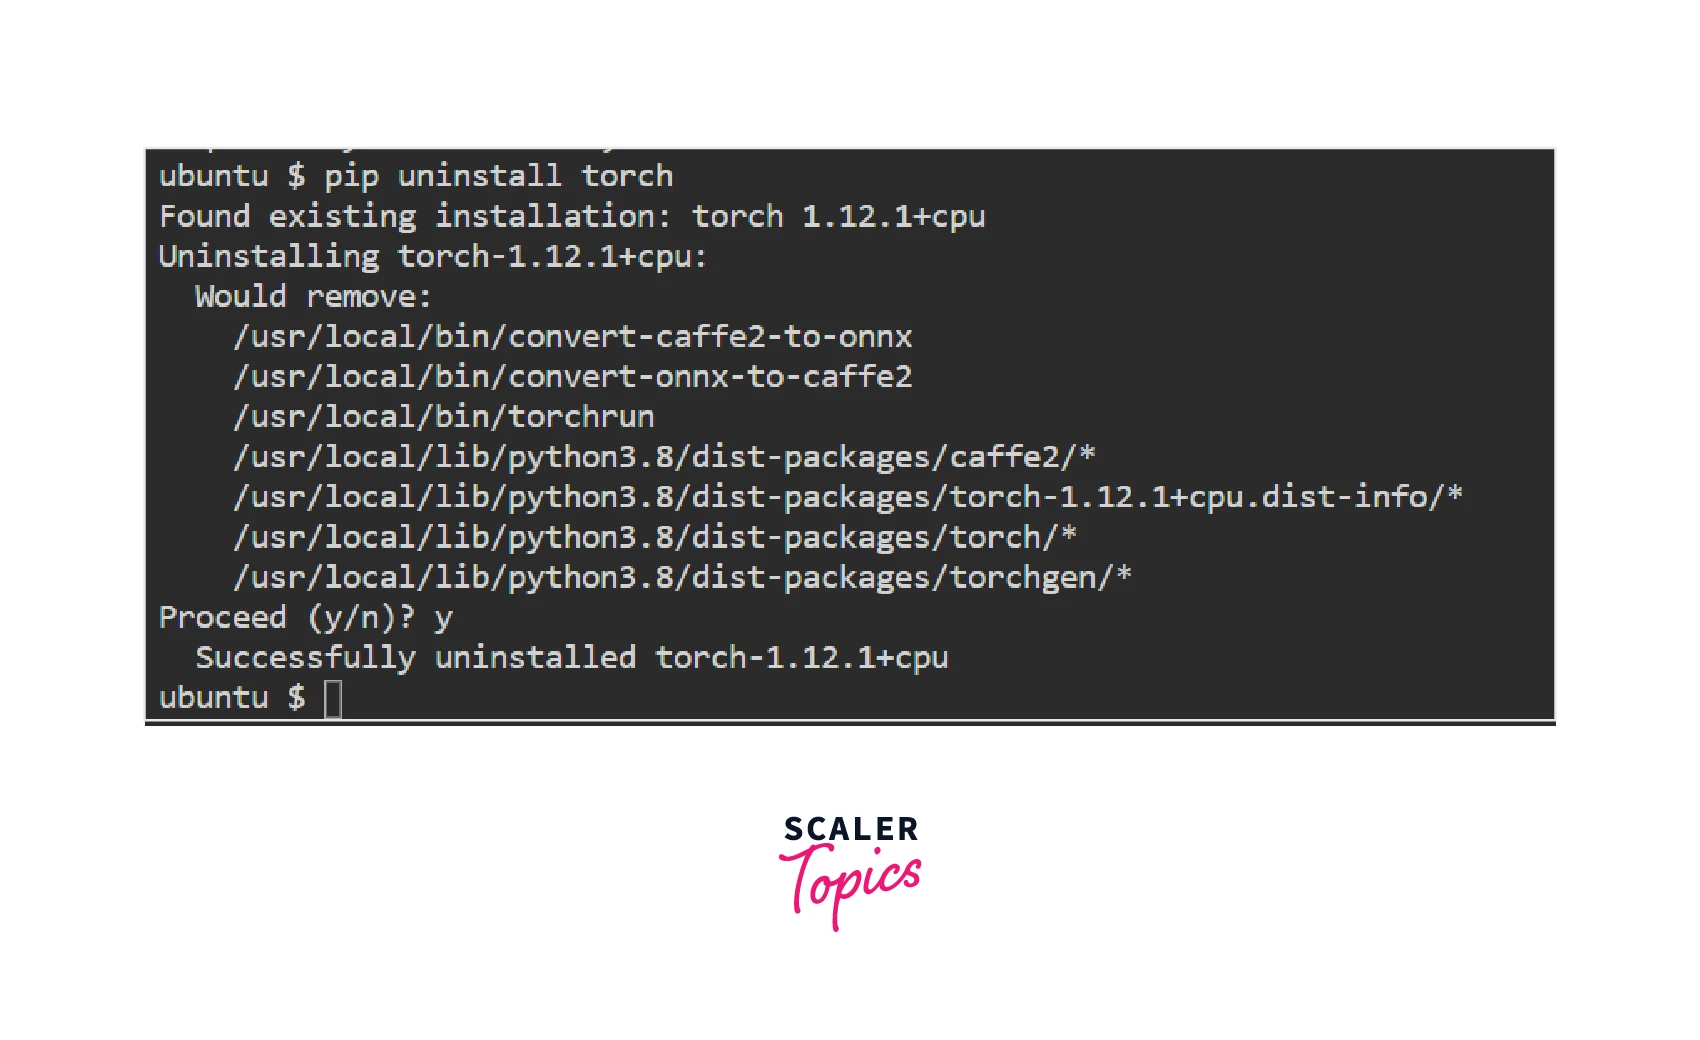
Experiment with creating tensors, performing arithmetic operations, reshaping them, and understanding how to move them between CPU and GPU.
Learning Resources and Community Support
The PyTorch community is incredibly active and supportive, offering a wealth of resources to help you learn and grow:
-
Official PyTorch Documentation: Comprehensive and well-organized, it’s your go-to source for API references and detailed explanations.
-
PyTorch Tutorials: The
pytorch.org/tutorialssection offers excellent, beginner-friendly guides covering everything from basic tensor operations to building complex neural networks. -
Online Courses and MOOCs: Platforms like Coursera, Udacity, and fast.ai offer structured courses on deep learning with PyTorch.
-
Community Forums and Stack Overflow: For specific questions or troubleshooting, the PyTorch discussion forum and Stack Overflow are invaluable resources.
-
GitHub: Exploring the PyTorch GitHub repository and those of related projects (e.g., Hugging Face Transformers) can provide deep insights into how real-world models are implemented.
Installing PyTorch is the gateway to unlocking vast possibilities in AI and machine learning. With your environment now configured, you have the tools to embark on challenging projects, contribute to cutting-edge research, or simply explore the fascinating world of deep learning. Embrace the learning process, experiment frequently, and leverage the robust community support, and you’ll soon be building innovative AI solutions with confidence.
aViewFromTheCave is a participant in the Amazon Services LLC Associates Program, an affiliate advertising program designed to provide a means for sites to earn advertising fees by advertising and linking to Amazon.com. Amazon, the Amazon logo, AmazonSupply, and the AmazonSupply logo are trademarks of Amazon.com, Inc. or its affiliates. As an Amazon Associate we earn affiliate commissions from qualifying purchases.