
In the digital age, a computer’s performance is paramount, whether for gaming, professional productivity, or simply browsing the web. One of the most impactful and often overlooked components in determining your PC’s speed and responsiveness is its Random Access Memory (RAM). Upgrading or installing new RAM is a relatively straightforward process that can yield significant performance benefits, yet it often intimidates many users. This comprehensive guide demystifies the process, providing a step-by-step walkthrough to confidently install RAM in your PC, ensuring you harness your system’s full potential.
Understanding RAM and Its Importance
Before diving into the installation process, it’s crucial to grasp what RAM is, why it’s so vital, and the different types you might encounter. This foundational knowledge will empower you to make informed decisions and appreciate the impact of your upgrade.
What is RAM (Random Access Memory)?
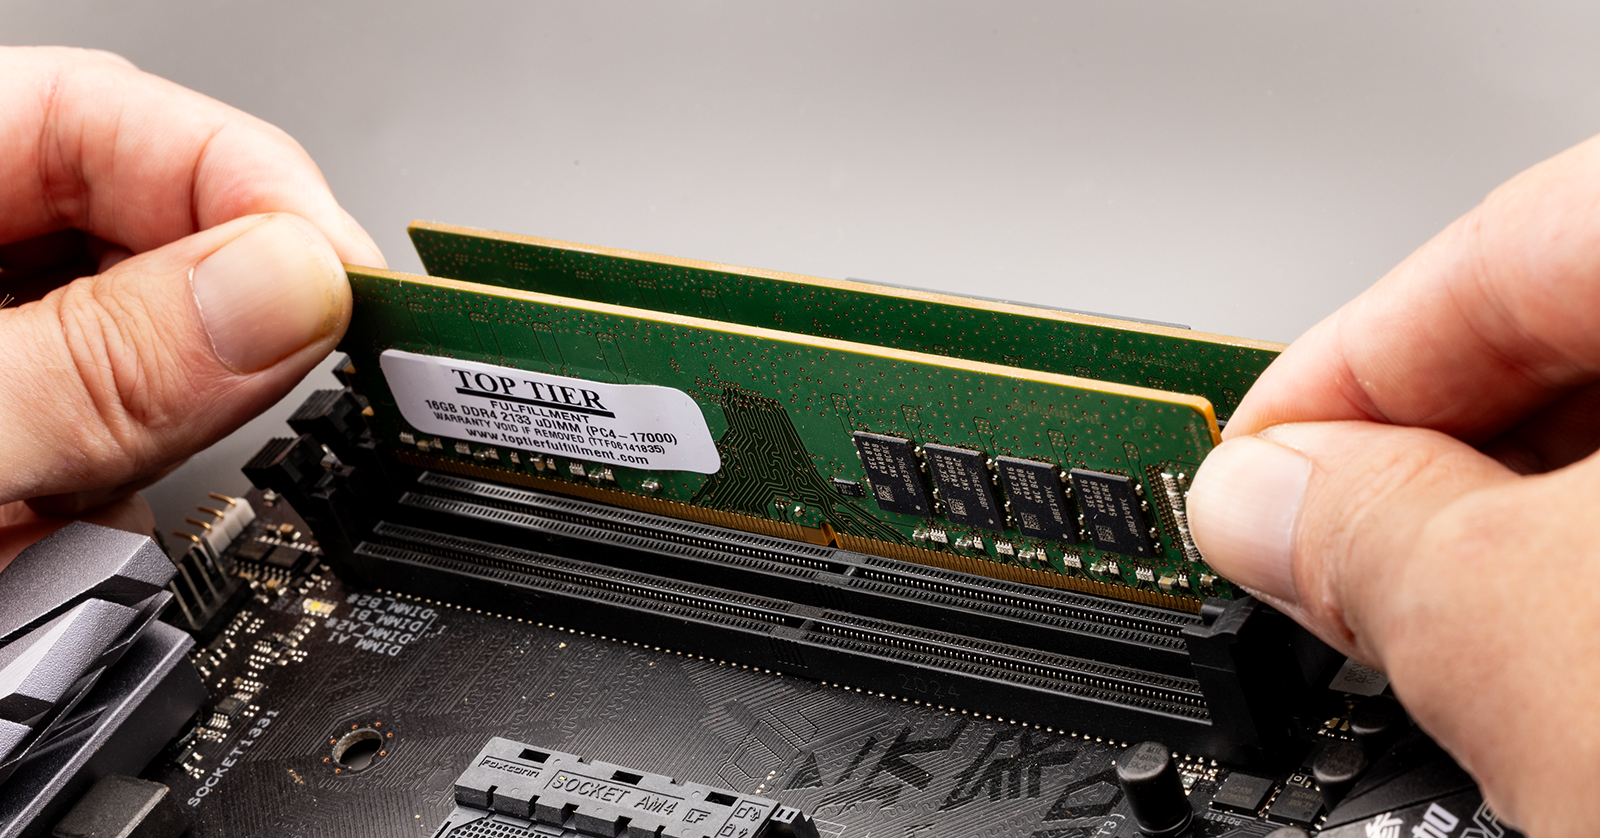
RAM is a form of volatile computer memory that stores data and program instructions that the CPU needs to access quickly. Unlike permanent storage devices such as hard drives (HDDs) or solid-state drives (SSDs), RAM loses its data when the computer is turned off. Think of RAM as your computer’s short-term working memory. When you open an application, load a document, or browse a website, the data required for these tasks is temporarily loaded into RAM. The more RAM you have, the more tasks your computer can handle simultaneously without slowing down, leading to a smoother, more responsive user experience.
Why Upgrade Your RAM?
The benefits of upgrading your RAM are tangible and far-reaching across various computing activities:
-
Improved Multitasking: With more RAM, your PC can keep more applications and browser tabs open simultaneously without experiencing lag or performance dips. Switching between programs becomes seamless.
-
Enhanced Gaming Performance: Modern games are incredibly demanding, often recommending or requiring substantial amounts of RAM. Upgrading can reduce loading times, minimize stuttering, and improve overall frame rates, especially in graphically intensive titles.
-
Faster Content Creation: For professionals in video editing, graphic design, 3D rendering, or music production, RAM is a bottleneck no more. Larger project files and complex software benefit immensely from increased memory, leading to quicker rendering, smoother previews, and more efficient workflows.
-
Boosted General System Responsiveness: Even for everyday tasks like web browsing, document editing, and email, a RAM upgrade can make your system feel snappier and more fluid, reducing frustrating delays.
-
Future-Proofing: As software and operating systems evolve, their memory demands tend to increase. A RAM upgrade can extend the useful life of your existing PC, delaying the need for a complete system overhaul.
Types of RAM
RAM comes in various forms, primarily differentiated by generation and form factor. Understanding these distinctions is crucial for compatibility:
-
DDR Generations (DDR4, DDR5): The most common RAM types today are Double Data Rate Synchronous Dynamic Random-Access Memory (DDR SDRAM). Currently, DDR4 is prevalent, but DDR5 is the latest standard, offering higher speeds and bandwidth. DDR generations are not backward compatible; a motherboard designed for DDR4 will not accept DDR5 RAM, and vice-versa.
-
Form Factors (DIMM vs. SODIMM):
-
DIMM (Dual In-line Memory Module): These are the larger modules typically found in desktop computers and servers.
-
SODIMM (Small Outline Dual In-line Memory Module): These are smaller, more compact modules designed for laptops, mini PCs, and some all-in-one desktops where space is limited.
-
Ensure you purchase the correct form factor for your specific PC.
-
Pre-Installation Checklist: Preparation is Key
A successful RAM installation hinges on thorough preparation. Before you even open your PC case, you need to verify compatibility, gather the necessary tools, and take crucial safety precautions. Skipping these steps can lead to frustrating compatibility issues or even damage to your components.
Compatibility Matters: Identifying Your Motherboard and Current RAM
The single most critical factor when buying new RAM is compatibility with your motherboard. Not all RAM is created equal, and your motherboard dictates the type, generation, and maximum capacity of RAM it can support.
-
Using Software: The easiest way to check your current RAM and motherboard specifications without opening your PC is by using system information tools. For Windows, utilities like CPU-Z or Speccy provide detailed information on your motherboard model, chipset, current RAM type (DDR4, DDR5), speed, and how many slots are occupied/available.
-
Physical Inspection (for existing RAM): If you already have RAM installed, you can often read the specifications directly from the stickers on the modules themselves. Look for labels indicating “DDR4,” “DDR5,” capacity (e.g., 8GB, 16GB), and speed (e.g., 3200MHz, 6000MHz).
-
Checking Motherboard Manual: For definitive compatibility information, consult your motherboard’s user manual or visit the manufacturer’s website. Search for your specific motherboard model (e.g., ASUS ROG STRIX B550-F Gaming) to find its “Memory QVL” (Qualified Vendor List) and specifications for supported RAM types, speeds, and maximum capacity per slot and overall. This will tell you if it supports DDR4 or DDR5, the maximum frequency (MHz) it can handle, and if it prefers certain brands or configurations.
Essential Tools and Safety Precautions
Working inside a computer requires a few basic tools and adherence to safety guidelines to prevent static discharge and component damage.
-
Screwdriver (Phillips Head): Most PC cases use Phillips head screws. Ensure you have one that fits properly.
-
Anti-static Wrist Strap or Grounding Techniques: Static electricity is the silent killer of computer components. An anti-static wrist strap, connected to a grounded metal object (like your PC’s unpainted metal chassis), safely dissipates any static charge from your body. If you don’t have one, frequently touch an unpainted metal part of your PC case before and during the installation to ground yourself.
-
Workspace Preparation: Choose a clean, dry, well-lit, and static-free work surface. Avoid working on carpet or near synthetic materials that can generate static. Keep pets and children away from the workspace.
Purchasing the Right RAM
Once you’ve identified your system’s compatibility requirements, you can confidently purchase the new RAM.
-
Matching Speed, Type, and Capacity:
-
Type: Ensure you buy the correct DDR generation (DDR4 for a DDR4 motherboard, DDR5 for DDR5).
-
Speed: Aim for RAM modules with a speed (MHz) that your motherboard supports, ideally matching or exceeding your existing RAM’s speed (if adding to existing modules) for optimal performance. Remember, your RAM will operate at the speed of the slowest stick or the maximum speed supported by your motherboard/CPU, whichever is lower.
-
Capacity: Decide on the total RAM you need (e.g., 16GB, 32GB). Most modern systems benefit from at least 16GB.
-
-
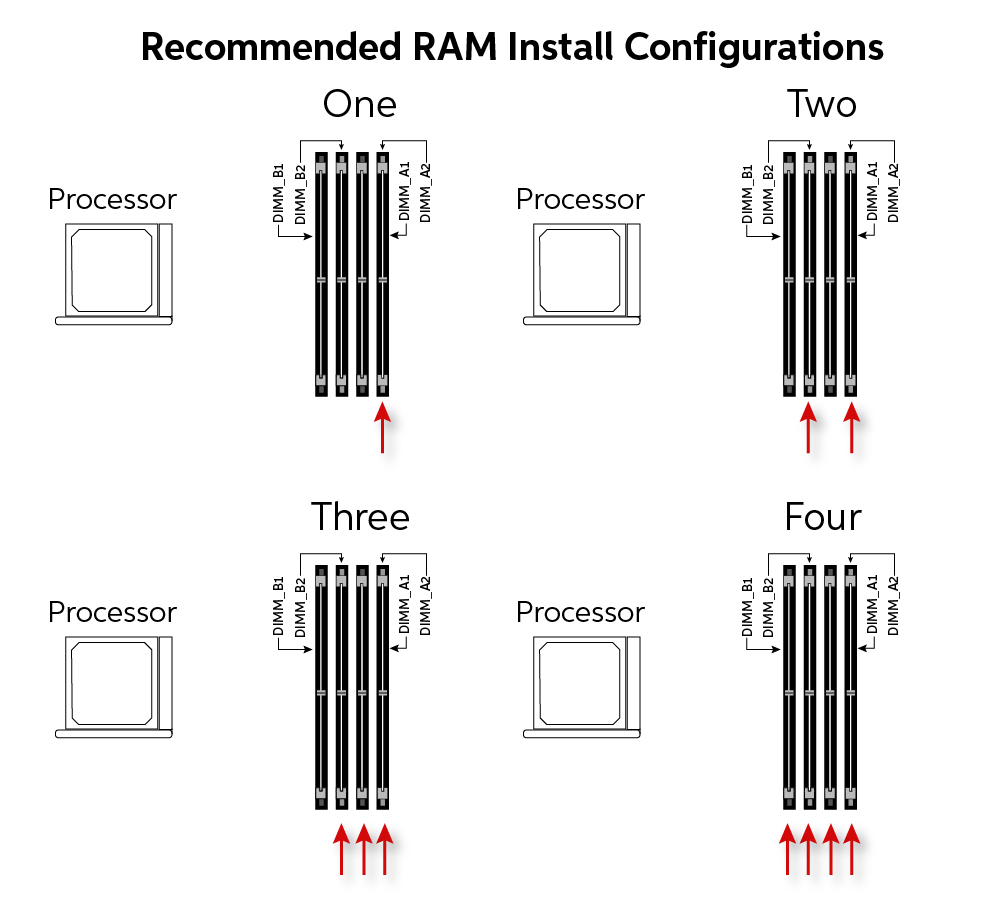
Considering Dual-Channel or Quad-Channel Configurations: For optimal performance, RAM should typically be installed in pairs (or sometimes quads) to enable “dual-channel” (or “quad-channel”) mode, which doubles the data bandwidth. Your motherboard manual will specify which slots to use for these configurations (e.g., slots 2 and 4). It’s generally best to buy RAM in kits (e.g., 2x8GB, 2x16GB) to ensure matching modules.
-
Reliable Brands: Stick to reputable RAM manufacturers known for quality and reliability, such as Corsair, G.Skill, Kingston, Crucial, Samsung, and Patriot.
The Installation Process: Step-by-Step Guide
With your new RAM in hand and your workspace prepared, it’s time for the actual installation. Approach each step methodically and with care.
Power Down and Disconnect
Safety first! Before touching any internal components, ensure your PC is completely powered down and disconnected from power.
-
Shut Down Completely: Go to your operating system’s menu and select “Shut down.” Do not merely put it to sleep.
-
Unplug All Cables: Disconnect the power cable from the back of the PC. Also, unplug all peripherals: monitor cables, USB devices, Ethernet cables, etc.
-
Press Power Button (Optional but Recommended): While unplugged, press and hold the PC’s power button for 5-10 seconds. This helps drain any residual power stored in the capacitors on the motherboard, further reducing the risk of static discharge.
Gaining Access to the Motherboard
Now you’ll need to open your PC case to access the internal components.
-
Lay the Case Down: Carefully lay your PC case on its side on your prepared work surface, with the motherboard side facing up.
-
Open the PC Case: Most cases have two side panels. Typically, you’ll remove the panel opposite where the CPU cooler window is, held in place by two or more thumb screws or standard Phillips head screws at the rear of the case. Remove these screws and slide the panel backward, then lift it off.
-
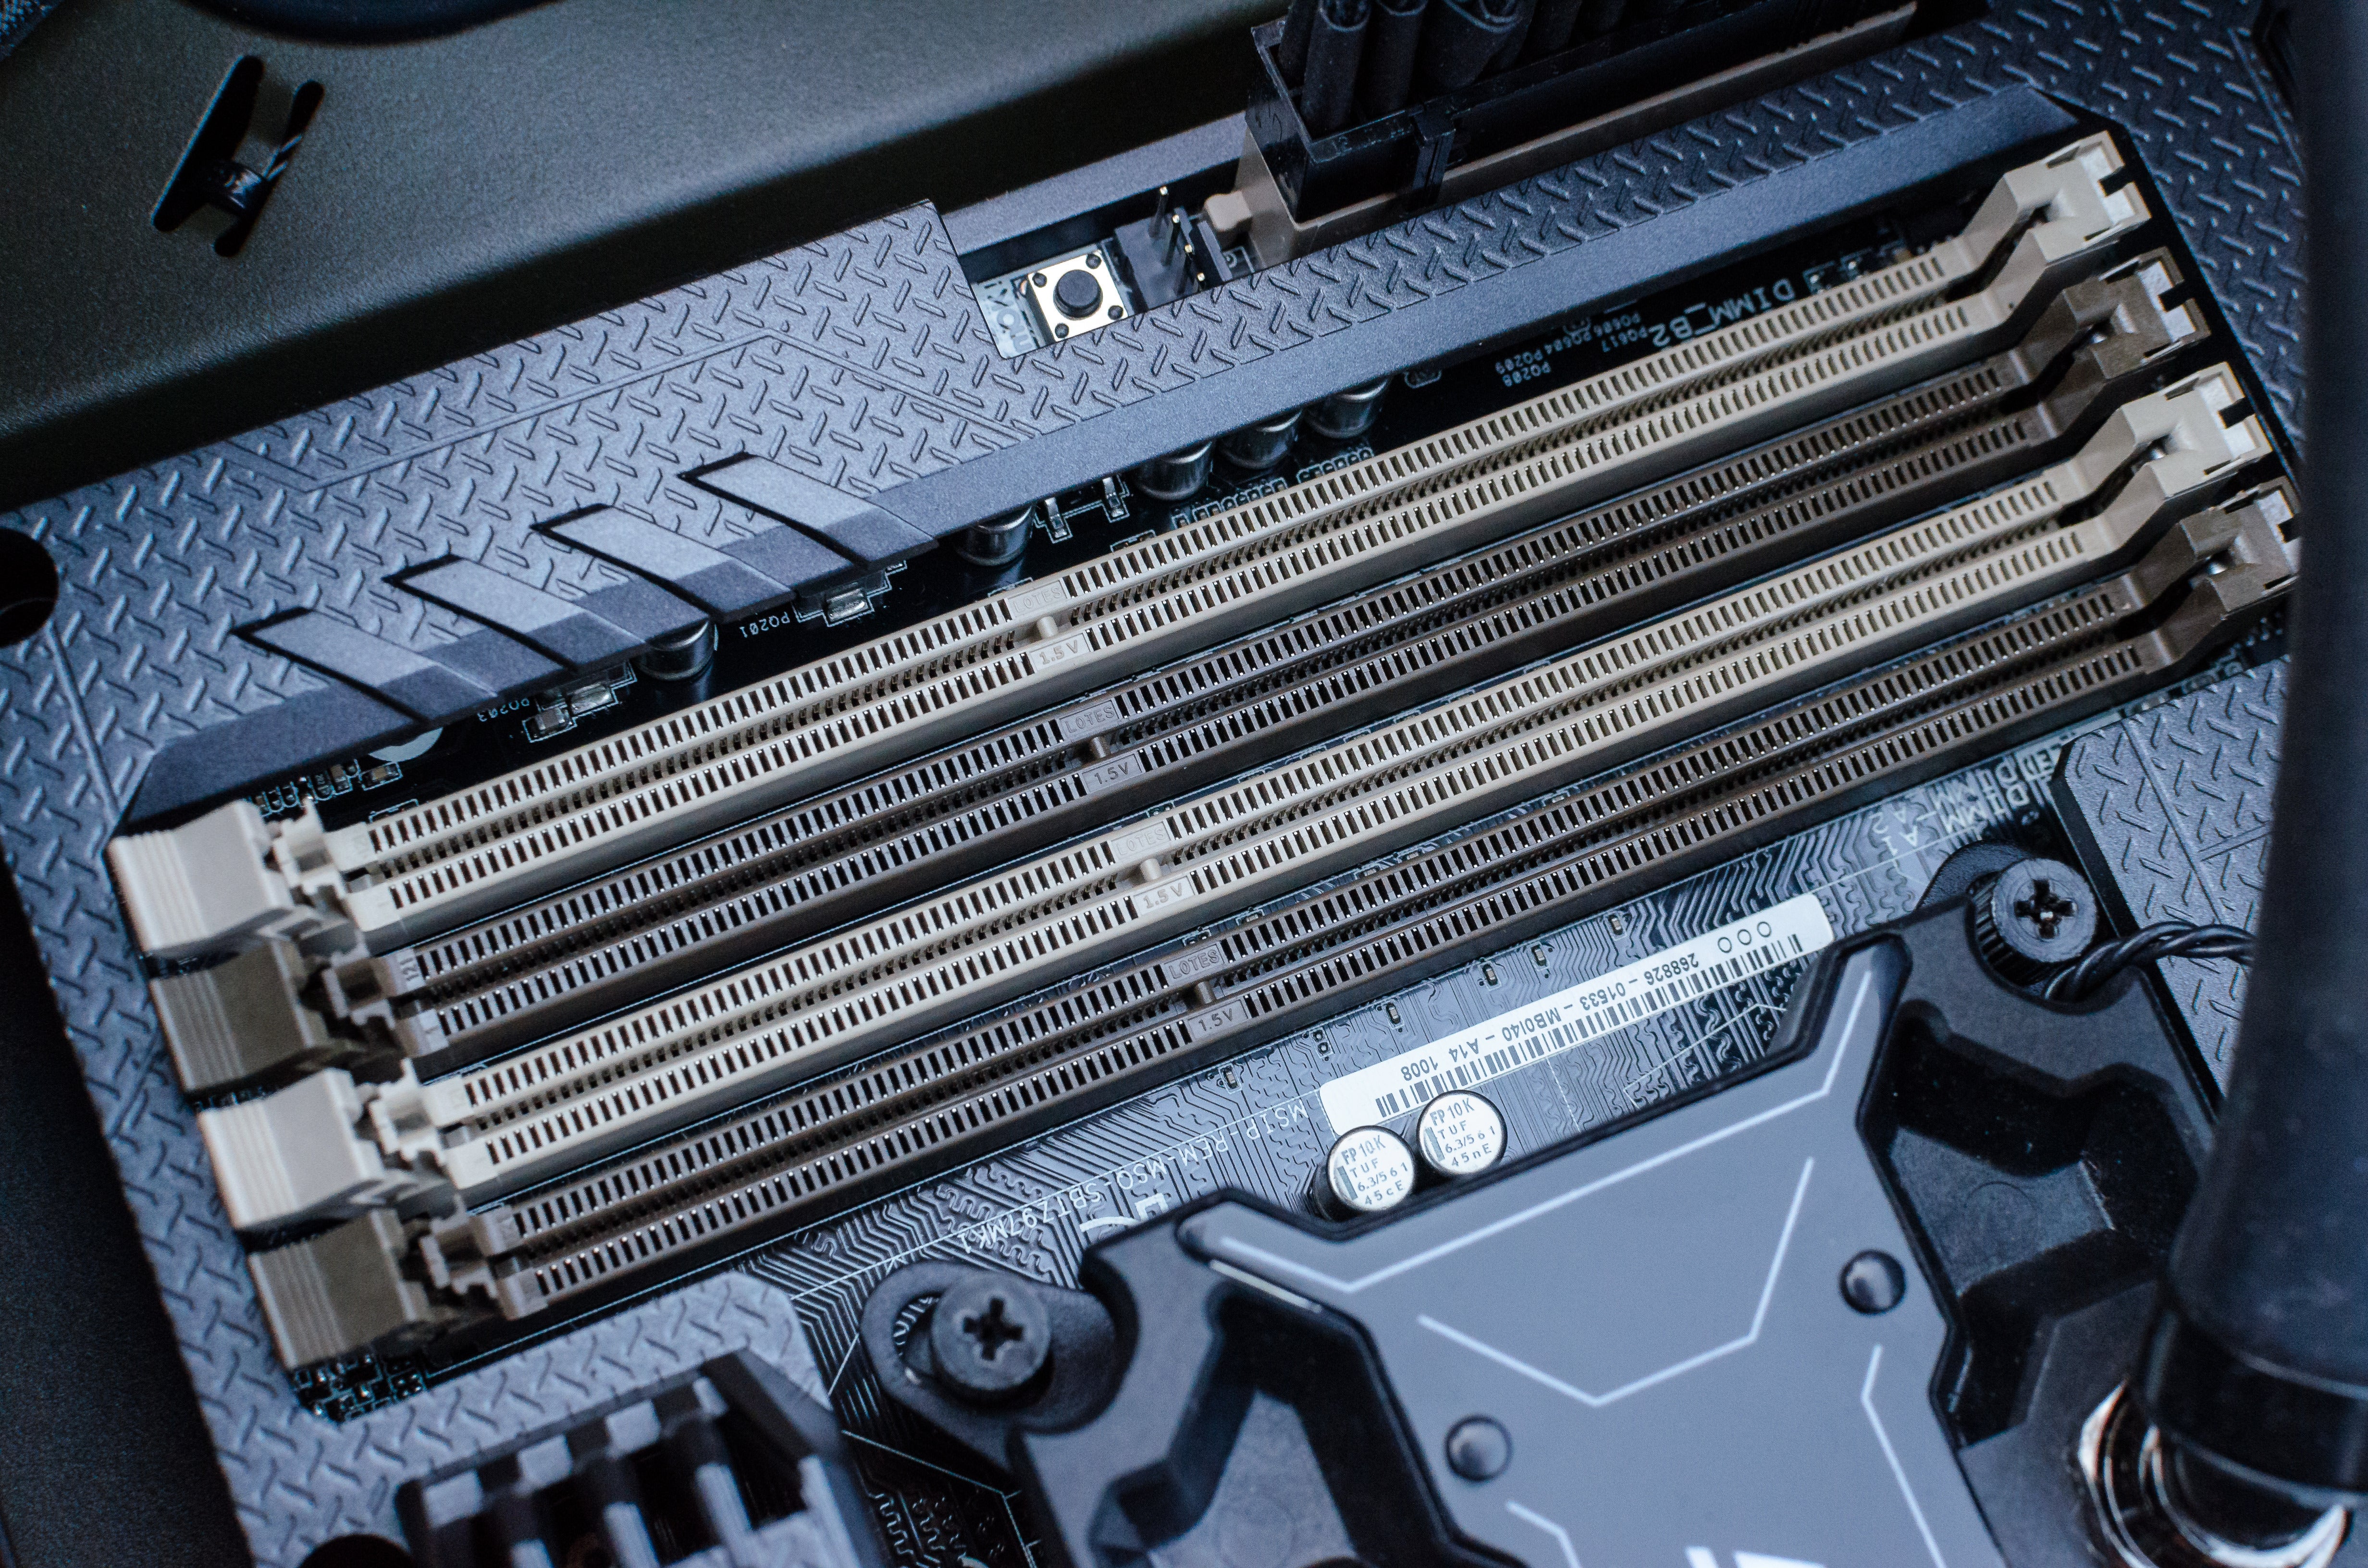
Locate RAM Slots: Once the side panel is off, identify the RAM slots on your motherboard. They are long, narrow slots usually located to one side of the CPU socket, identifiable by retention clips at either end. Most motherboards have two or four RAM slots.
Removing Existing RAM (If Upgrading)
If you’re replacing existing RAM, you’ll need to remove the old modules first.
-
Release Retention Clips: Gently push down on the small plastic clips at both ends of each RAM slot. These clips will spring outwards, releasing the module.
-
Gentle Removal: Once the clips are open, the RAM module will slightly pop up. Grasp the module by its sides (avoiding touching the gold contacts at the bottom) and carefully pull it straight out of the slot.
-
Store Safely: Place the removed RAM in an anti-static bag or a safe, dry place if you plan to keep it.
Installing New RAM Modules
This is the core of the process. Take your time to align and insert the new modules correctly.
-
Identify the Notch: Look at your new RAM module. You’ll notice a small notch or cutout on the bottom edge, where the gold contacts are. This notch must align with the corresponding key in the RAM slot on the motherboard. This ensures the module is inserted in the correct orientation.
-
Open Retention Clips (if closed): If the clips on your empty RAM slots are closed, gently push them outwards to open them.
-
Align and Insert: Position the RAM module directly above the empty slot, ensuring the notch aligns. Hold the module by its two top corners (again, avoiding the gold contacts).
-
Apply Even Pressure: Gently but firmly press down on both ends of the RAM module simultaneously until it seats fully into the slot. You should hear and feel the retention clips snap back into place, securing the module. If the clips don’t snap automatically, gently push them inward until they lock. Do not force the module; if it doesn’t go in smoothly, re-check the alignment of the notch.
-
Repeat for Multiple Modules: If you’re installing multiple RAM sticks, repeat the process for each module, ensuring you use the correct slots for dual-channel (or quad-channel) operation as specified in your motherboard manual (e.g., slots 2 and 4, or 1 and 3).
Reassembling and Initial Boot-Up
Once all RAM modules are securely installed, it’s time to close up your PC and test the upgrade.
-
Close the PC Case: Carefully reattach the side panel you removed earlier. Slide it forward until it aligns, then reinsert and tighten the screws.
-
Reconnect Peripherals: Reconnect all cables you unplugged earlier: power cable, monitor, keyboard, mouse, etc.
-
First Boot and BIOS Check:
-
Power on your computer.
-
The first boot after a RAM change might take slightly longer than usual as the system performs a memory check.
-
Immediately after powering on, repeatedly press the key to enter your BIOS/UEFI settings (commonly DEL, F2, F10, or F12, depending on your motherboard).
-
Once in the BIOS/UEFI, navigate to the system information or memory section. Verify that the BIOS recognizes the total amount of new RAM installed. If it does, you’re off to a great start!
-
Exit the BIOS, saving any changes if prompted. Your system should now boot into your operating system.
-
Post-Installation: Verification and Optimization
Successfully booting into your OS is a major milestone, but a few final steps will ensure your new RAM is fully recognized, stable, and performing at its best.
Verifying RAM Recognition
After booting into your operating system, double-check that the OS reports the correct amount of installed RAM.
-
Windows:
-
Right-click on the Start button and select “System.” Under “Installed RAM,” you should see the total capacity.
-
Alternatively, open Task Manager (Ctrl+Shift+Esc), go to the “Performance” tab, and click on “Memory.” This will show you the total RAM, its speed, and slot usage.
-
-
Linux (example for Ubuntu/Debian-based):
-
Open a terminal and type
free -horhtopfor a quick overview. -
For more detailed information, use
sudo lshw -c memory.
-
Running Stability Tests
While your PC might boot fine, it’s good practice to run a memory diagnostic tool to ensure the new RAM is stable and free of errors. This is especially important for ensuring long-term reliability.
-
MemTest86+: This is a highly recommended, free, standalone memory testing program. You’ll need to create a bootable USB drive with MemTest86+ on it. Boot your PC from this USB drive and let it run for several passes (at least 4-8 hours, or overnight) to thoroughly check for any memory errors. Zero errors indicate healthy RAM.
-
Windows Memory Diagnostic: Windows has a built-in memory diagnostic tool. Search for “Windows Memory Diagnostic” in the Start menu, and follow the prompts to restart your computer and run the test. While not as thorough as MemTest86+, it can catch common issues.
Troubleshooting Common Issues
Despite careful installation, you might encounter a few hiccups. Here’s how to address them:
-
PC Won’t Boot / Black Screen:
-
Reseat RAM: The most common cause is RAM not being seated properly. Power down, unplug, open the case, and firmly push down on each RAM module until the clips audibly snap into place.
-
Check Compatibility: Re-verify that the RAM type (DDR generation) and speed are compatible with your motherboard.
-
Try One Stick at a Time: If you installed multiple sticks, remove all but one and try booting. If it boots, test each stick individually to identify a faulty module.
-
Clear CMOS: If the system still won’t boot, you might need to clear your motherboard’s CMOS (Complementary Metal-Oxide-Semiconductor) settings to reset the BIOS to default. This usually involves removing the CMOS battery for a minute or using a jumper on the motherboard (consult your motherboard manual).
-
-
RAM Not Fully Recognized: If the BIOS or OS shows less RAM than installed, ensure all modules are fully seated. Also, check that you’ve used the correct dual-channel slots if applicable. Sometimes, a BIOS update for your motherboard can improve RAM compatibility and recognition.
-
Beep Codes: If your PC emits a series of beeps on startup and doesn’t display anything, these are “beep codes” indicating a hardware problem. The pattern of beeps usually points to a specific issue (e.g., memory error). Consult your motherboard manual or the manufacturer’s website for a key to decode these beeps.
Maximizing Your New RAM
Once your RAM is installed and verified, there’s one more step to ensure you’re getting its advertised performance.
-
Enabling XMP/DOCP in BIOS: High-speed RAM (e.g., 3200MHz, 6000MHz) often defaults to a lower JEDEC standard speed (e.g., 2133MHz or 2400MHz) when first installed. To achieve the advertised speeds, you’ll need to enable an “Extreme Memory Profile” (XMP for Intel platforms) or “DOCP” (Direct Overclock Profile for AMD platforms) in your motherboard’s BIOS/UEFI settings. Locate this option (often under an “Overclocking” or “Advanced” tab), enable it, and select the profile that matches your RAM’s advertised speed. Save and exit the BIOS. Your RAM will now run at its optimal, higher speed.
-
Considering Future Upgrades: Keep your motherboard’s total RAM capacity in mind. If you’ve only filled two of four slots, you have room for future expansion should your needs grow.
By following these detailed steps, you can confidently install or upgrade your PC’s RAM, unlocking a new level of performance and responsiveness from your system. Enjoy your faster, more capable computer!
aViewFromTheCave is a participant in the Amazon Services LLC Associates Program, an affiliate advertising program designed to provide a means for sites to earn advertising fees by advertising and linking to Amazon.com. Amazon, the Amazon logo, AmazonSupply, and the AmazonSupply logo are trademarks of Amazon.com, Inc. or its affiliates. As an Amazon Associate we earn affiliate commissions from qualifying purchases.