
In the evolving landscape of digital image manipulation, tools that offer robust functionality without breaking the bank are invaluable. Paint.NET stands out as a formidable, free-to-use image and photo editing software for Windows, celebrated for its intuitive interface and powerful features. While it offers a comprehensive suite of tools right out of the box, its true power, versatility, and enduring appeal lie in its extensibility through plugins. These small but mighty additions can transform Paint.NET from a capable editor into a professional-grade powerhouse, unlocking a universe of effects, tools, and file format support that cater to virtually any creative or technical need.
This guide is designed to demystify the process of installing plugins on Paint.NET, providing a professional, insightful, and engaging roadmap for users to enhance their editing capabilities. Whether you’re a seasoned graphic designer seeking advanced filters or a photography enthusiast looking for sophisticated retouching tools, understanding how to effectively integrate plugins is a fundamental skill that will profoundly expand your creative horizons. Join us as we explore the seamless integration of plugins, ensuring you can harness the full potential of this exceptional software.
Understanding Paint.NET Plugins: The Power of Extension
At its core, Paint.NET is a testament to efficient software design, offering a streamlined experience for most common editing tasks. However, the open-source nature of many of its components and the robust API (Application Programming Interface) for developers have fostered a vibrant community that continuously contributes to its ecosystem through plugins. These extensions are not just add-ons; they are vital arteries that pump new life and functionality into the application.
What are Plugins?
In the context of Paint.NET, plugins are typically small, self-contained software components, often distributed as .dll (Dynamic Link Library) files. These files contain code that Paint.NET can load and execute, introducing new functionalities that were not part of the original installation. They can manifest in various forms:
-
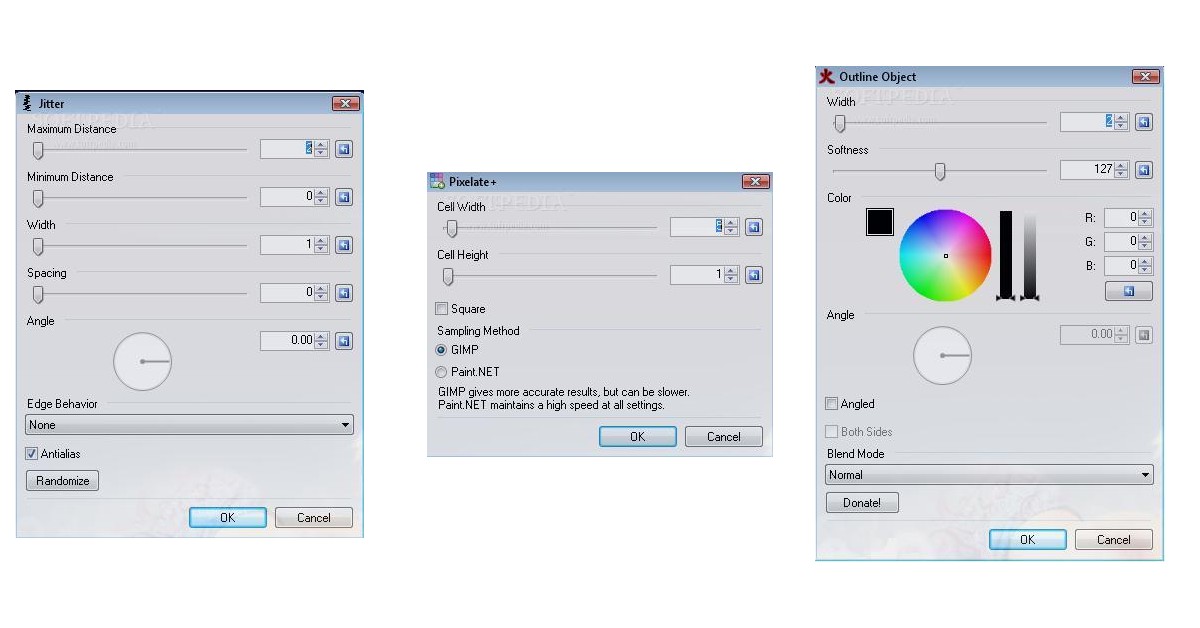
Effect Plugins: These are the most common type, adding new visual effects, filters, adjustments, or distortions to your images. Think of advanced blurring techniques, intricate texture generators, or specialized color corrections.
-
Tool Plugins: These introduce entirely new interactive tools to Paint.NET’s toolbox, such as advanced selection methods, perspective correction tools, or specialized drawing instruments.
-
File Type Plugins: These extend Paint.NET’s ability to open and save images in formats not natively supported, such as DDS (for game textures), WebP, or even certain raw camera formats.
The beauty of plugins lies in their modularity. You only install what you need, keeping your software lean while still having the option to expand its capabilities on demand.
Why Use Plugins?
The rationale behind integrating plugins into your Paint.NET workflow is compelling, offering a multitude of benefits that range from practical utility to unleashing boundless creativity:
-
Enhanced Functionality: Plugins provide access to advanced algorithms and features often found in more expensive, subscription-based software. This includes sophisticated noise reduction, intelligent sharpening, content-aware scaling, and intricate layer management tools.
-
Cost-Effectiveness: By leveraging a free core application and free community-developed plugins, users can achieve professional-grade results without incurring significant software costs, making it an excellent choice for budget-conscious individuals and small businesses.
-
Specialized Needs: For niche applications, such as game development (requiring specific texture formats), scientific imaging, or highly artistic endeavors, plugins often provide the precise tools or effects necessary that general-purpose software might lack.
-
Community-Driven Innovation: The Paint.NET plugin ecosystem thrives on community contributions. This means a constant influx of new ideas, improvements, and solutions to user-identified needs, often addressing emerging trends in digital art and photography faster than commercial software updates.
-
Efficiency and Workflow Improvement: Many plugins are designed to automate repetitive tasks or provide shortcuts to complex operations, significantly improving efficiency and streamlining the editing workflow for frequent users.
Embracing plugins transforms Paint.NET into a highly customizable and immensely powerful platform, adaptable to an extraordinary range of creative and technical challenges.
Preparing for Plugin Installation: Essential Steps
Before diving into the actual installation process, a few preparatory steps are crucial to ensure a smooth, secure, and successful integration of new plugins. This involves understanding where to source plugins, recognizing different plugin types, and safeguarding your existing setup.
Where to Find Reliable Plugins?
The integrity and security of your system depend heavily on where you acquire your software, and plugins are no exception. Given their ability to extend program functionality, malicious plugins can pose a significant risk. Therefore, always prioritize trusted sources:
-
The Official Paint.NET Forum: This is hands-down the most reliable and comprehensive repository for Paint.NET plugins. The “Plugins” section of the forum hosts discussions, download links, and direct support from plugin developers. All plugins posted here are generally vetted by the community and often by the Paint.NET developers themselves, making it the safest starting point.
-
Developer Websites: Some prominent plugin developers might host their plugins on their personal or professional websites. If linking from the Paint.NET forum or a reputable tech review site, these can also be considered trustworthy.
-
Exercise Caution with Third-Party Sites: While other websites may host collections of Paint.NET plugins, downloading from unverified sources carries inherent risks, including malware, outdated versions, or incorrectly packaged files. Always prioritize the official forum or direct developer links.
When browsing, pay attention to user reviews, developer activity, and the last update date to gauge the plugin’s reliability and current compatibility.
Understanding Plugin Types and Compatibility
Knowing the different categories of plugins and their compatibility requirements is key to a hassle-free installation and optimal performance.
-
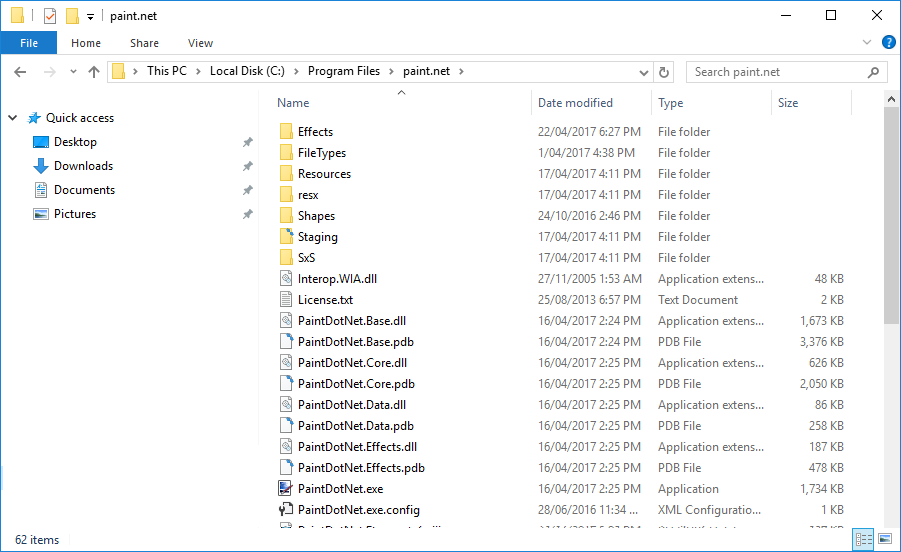
File Organization: Paint.NET plugins are typically installed into specific subfolders within the Paint.NET installation directory, based on their function:
-
Effects: For effect plugins (filters, adjustments, distortions). -
Tools: For new interactive tools. -
FileTypes: For plugins that enable new image file formats. -
It’s important to place the
.dllfile(s) in the correct folder for Paint.NET to recognize them. Sometimes a plugin might include multiple.dllfiles or additional resource files; these usually need to stay together in the designated plugin folder.
-
-
Version Compatibility: While many plugins are backward compatible, some might be designed for specific versions of Paint.NET or might require a particular version of the .NET Framework (the underlying technology Paint.NET is built upon). Always check the plugin’s documentation or forum thread for compatibility notes. Running an outdated Paint.NET version with new plugins or vice-versa can lead to crashes or non-functional plugins.
-
System Architecture (32-bit vs. 64-bit): Modern versions of Paint.NET are predominantly 64-bit, and most contemporary plugins are built for 64-bit architecture. However, if you are running an older 32-bit version of Paint.NET, ensure the plugin explicitly supports 32-bit. Mismatching architecture can prevent the plugin from loading.
-
Backup Strategy: Before installing a significant number of new plugins or plugins from less-known sources, it’s a good practice to back up your
paint.netinstallation folder, or at least note down your currently installed plugins. This helps in quickly reverting to a stable state if a plugin causes unexpected issues or conflicts.
Thorough preparation ensures that your plugin installation process is not only successful but also maintains the stability and security of your Paint.NET environment.
The Step-by-Step Guide to Installing Paint.NET Plugins
Once you’ve understood the nature of plugins and completed the necessary preparatory steps, the actual installation process is straightforward. Follow these steps meticulously to seamlessly integrate new functionalities into your Paint.NET application.
Downloading the Plugin
The first step involves acquiring the plugin files.
-
Navigate to a Trusted Source: As recommended, head to the official Paint.NET forum’s “Plugins” section, or a reputable developer’s website.
-
Locate the Plugin: Find the specific plugin you wish to install.
-
Download the File: Plugin downloads are almost always packaged in compressed archives, typically
.zipor.rarfiles. Click the download link provided by the developer. Save the archive to a temporary location on your computer, such as your “Downloads” folder or a dedicated “Plugin Downloads” folder.
Extracting the Plugin Files
Compressed archives need to be unzipped to access the actual plugin files.
-
Open the Archive: Navigate to where you saved the
.zipor.rarfile. Right-click on it. -
Extract Files:
-
If you have a program like 7-Zip or WinRAR installed, you’ll see options like “Extract Here,” “Extract to [Folder Name],” or “Open Archive.”
-
For
.zipfiles, Windows’ built-in extractor can be used: select “Extract All…” from the right-click context menu.
-
-
Identify Plugin Files: Inside the extracted folder, you’ll typically find one or more
.dllfiles. Sometimes there might be aREADME.txtfile, aLICENSE.txtfile, or other resource files (e.g., images, data files) that accompany the.dll. Ensure you identify all necessary files for the plugin to function.
Locating the Paint.NET Installation Directory
For plugins to be recognized, they must be placed in the correct subfolder within Paint.NET’s main installation directory.
-
Default Installation Path:
-
For 64-bit systems (most common):
C:Program Filespaint.netorC:Program Filespaint.netx64 -
For 32-bit systems (less common):
C:Program Files (x86)paint.net
-
-
Alternative Method (if you’re unsure):
-
Right-click on the Paint.NET shortcut on your desktop or Start Menu.
-
Select “Open file location” or “Properties” and then “Open File Location.” This will take you directly to the
paint.netapplication folder.
-
-
Identify Subfolders: Within the main Paint.NET directory, you’ll see folders like
Effects,Tools, andFileTypes. These are your destination folders for the extracted.dllfiles.
Copying Plugin Files to the Correct Folder
This is the most critical step for successful plugin installation.
-
Determine Plugin Type: Based on the plugin’s description or its forum thread, identify whether it’s an effect, a tool, or a file type plugin. This will dictate which subfolder to use.
-
Copy the Files:
-
Select all the
.dllfiles and any accompanying resource files that you extracted earlier. -
Copy them (Ctrl+C) or drag-and-drop them into the appropriate subfolder (e.g.,
C:Program Filespaint.netEffectsfor an effect plugin). -
You may be prompted for administrator permissions to paste files into
Program Files. Click “Continue” or “Yes” to grant these permissions. -
Important: Ensure all parts of a multi-file plugin stay together in the designated folder. For example, if a plugin has
MyPlugin.dllandMyPlugin.resources, both should go into theEffectsfolder.
-
Restarting Paint.NET
After copying the plugin files, Paint.NET needs to be restarted for it to detect and load the new additions.
-
Close Paint.NET: If Paint.NET is currently running, close it completely.
-
Launch Paint.NET: Open Paint.NET again.
-
Verify Installation:
-
For Effect Plugins: Go to the “Effects” menu. You should see a new submenu or a new entry in an existing submenu corresponding to your installed plugin.
-
For Tool Plugins: Check the “Tools” window (F5) or the “Tools” menu.
-
For File Type Plugins: Go to “File” > “Open…” or “File” > “Save As…” and check the “Files of type” dropdown menu for the new format.
-
If you see your new plugin listed and it appears functional, congratulations – you’ve successfully installed a Paint.NET plugin!
Managing and Troubleshooting Plugins
While the installation process is generally smooth, occasionally you might encounter issues. Furthermore, effective plugin management ensures your Paint.NET installation remains stable and optimized.
Common Issues and Solutions
-
Plugin Not Appearing in Menu:
-
Solution 1: Incorrect Folder: Double-check that the
.dllfile(s) were placed in the correct subfolder (Effects,Tools,FileTypes) within the Paint.NET installation directory. This is the most common mistake. -
Solution 2: Paint.NET Not Restarted: Ensure Paint.NET was completely closed and reopened after copying the files.
-
Solution 3: Corrupted Download/Extraction: Try re-downloading the plugin and re-extracting its contents, ensuring no files were lost or corrupted.
-
Solution 4: Incompatibility: Verify if the plugin is compatible with your specific version of Paint.NET and your system’s architecture (32-bit vs. 64-bit). Check the plugin’s forum thread for known issues or requirements.
-
-
Paint.NET Crashing or Freezing After Installation:
-
Solution 1: Conflicting Plugin: A newly installed plugin might conflict with an existing one or with Paint.NET itself. Try removing the newly installed plugin to see if stability returns.
-
Solution 2: Outdated/Buggy Plugin: The plugin itself might be outdated or contain bugs. Check the plugin’s forum thread for updates or reported issues.
-
Solution 3: Corrupted Paint.NET Installation: In rare cases, the Paint.NET installation itself might be corrupted. Try repairing or reinstalling Paint.NET.
-
-
Plugin Functions Incorrectly:
-
Solution 1: Read Documentation: Some plugins have specific usage instructions or require certain preconditions. Refer to the plugin’s documentation or forum thread.
-
Solution 2: Check for Updates: The developer might have released an update addressing bugs.
-
Best Practices for Plugin Management
Maintaining a healthy and efficient plugin ecosystem requires a proactive approach.
-
Keep Paint.NET Updated: Always run the latest stable version of Paint.NET. Updates often include performance enhancements, bug fixes, and better compatibility with newer plugins.
-
Install Only What You Need: Resist the urge to download every plugin available. A bloated plugin folder can slow down Paint.NET’s startup time and increase the likelihood of conflicts. Prioritize plugins that genuinely enhance your workflow.
-
Document Your Plugins: For advanced users, maintaining a simple text file listing your installed plugins, their source, and perhaps a brief note on their function can be invaluable for troubleshooting or migrating your setup.
-
Regularly Check for Plugin Updates: Developers frequently release updates to fix bugs, improve performance, or add new features. Monitor the Paint.NET forums for updates to your favorite plugins.
-
Uninstalling Plugins: To uninstall a plugin, simply navigate to the
Effects,Tools, orFileTypesfolder in your Paint.NET installation directory and delete the corresponding.dllfile(s) and any associated resource files. Remember to restart Paint.NET afterward.
By adhering to these practices, you can ensure a stable, efficient, and creatively empowering Paint.NET experience, leveraging the full potential of its expansive plugin architecture without encountering common pitfalls.
Maximizing Your Creativity with Paint.NET Plugins
With a firm grasp on installing and managing plugins, you’re now poised to unlock a remarkable spectrum of creative possibilities within Paint.NET. The sheer diversity of available plugins means there’s virtually no limit to what you can achieve, transforming your digital artwork and photography.
Exploring Popular Plugin Categories
The Paint.NET plugin community has generated an incredible array of tools catering to every imaginable need. Here are some popular categories worth exploring:
-
Photo Correction and Enhancement:
-
Noise Reduction: Eliminate graininess from high-ISO photos.
-
Advanced Sharpening: Bring out details without creating halos.
-
Color Balance & Grading: Achieve professional color correction and cinematic looks.
-
Retouching Tools: Skin smoothing, blemish removal, and liquify effects for portrait work.
-
-
Artistic and Stylistic Effects:
-
Sketch & Painting Effects: Transform photos into pencil sketches, watercolors, or oil paintings.
-
Distortion & Warping: Create surreal landscapes or abstract designs.
-
Fractal & Generative Art: Produce intricate patterns and textures from mathematical algorithms.
-
Seamless Tile Generators: Ideal for game textures or background patterns.
-
-
Utility and Workflow Plugins:
-
Batch Processing: Apply effects or adjustments to multiple images at once.
-
Selection Tools: More advanced and precise selection methods than the defaults.
-
Alignment & Distribution: Precisely arrange layers and objects.
-
Text & Layer Management: Enhanced tools for working with text, layers, and masks.
-
-
Specialized File Types:
-
DDS File Type: Essential for game developers working with textures.
-
WebP: Support for Google’s modern image format for web optimization.
-
Raw Camera Formats: Opening and basic editing of RAW files from various camera brands.
-
The key is to experiment. Download a few plugins from categories that pique your interest, try them out, and observe their impact on your creative process. You’ll quickly discover indispensable tools that become cornerstones of your workflow.
Community Engagement and Discovery
The Paint.NET plugin ecosystem is a vibrant, community-driven space. Engaging with this community can significantly enhance your experience:
-
Participate in the Forum: The official Paint.NET forum is not just a download hub; it’s a place for discussion. Ask questions, share your creations, provide feedback to developers, and seek recommendations for specific effects or tools. This interaction can lead to discovering hidden gems or understanding advanced uses for existing plugins.
-
Share Your Creations: Showcasing how you’ve utilized plugins can inspire others and help developers see their tools in action.
-
Learn from Others: Observing how other artists and photographers use plugins can spark new ideas and techniques for your own projects.
-
Contribute (if able): If you have programming skills, consider contributing to existing open-source plugins or even developing your own to address a specific need. This keeps the ecosystem thriving.
The Future of Paint.NET and its Plugin Ecosystem
Paint.NET continues to evolve, with regular updates from its primary developer, Rick Brewster, and an unwavering commitment from its global community. The open-source friendly nature of its plugin architecture ensures that innovation will persist, driven by the collective needs and ingenuity of its users. As technology advances, expect to see plugins that leverage new computational methods, offer greater automation, and integrate with emerging standards in digital media.

Conclusion
The journey into Paint.NET’s plugin ecosystem is an exciting one, transforming a capable, free image editor into an endlessly customizable and powerful creative suite. By understanding how to properly source, install, and manage these extensions, users can unlock a profound level of functionality, bringing professional-grade effects, specialized tools, and enhanced workflow capabilities within reach.
We’ve explored the fundamental types of plugins, guided you through the step-by-step installation process, and provided essential troubleshooting and management tips to ensure a stable and enriching experience. The power of Paint.NET truly lies in its community-driven extensibility, offering an unparalleled blend of accessibility and advanced capability. Embrace the world of plugins, experiment with the vast array of available options, and let your creativity flourish, unconstrained by the limitations of out-of-the-box software. Paint.NET, augmented by its plugins, stands ready to empower your every artistic and photographic endeavor.
aViewFromTheCave is a participant in the Amazon Services LLC Associates Program, an affiliate advertising program designed to provide a means for sites to earn advertising fees by advertising and linking to Amazon.com. Amazon, the Amazon logo, AmazonSupply, and the AmazonSupply logo are trademarks of Amazon.com, Inc. or its affiliates. As an Amazon Associate we earn affiliate commissions from qualifying purchases.