
In the realm of data management and analysis, Microsoft Excel remains an undisputed titan. Its widespread adoption makes it a common medium for storing, sharing, and processing structured data across various industries. However, when it comes to automating repetitive tasks, processing large datasets, or integrating Excel data into more complex workflows, manual interaction with Excel can quickly become cumbersome and inefficient. This is where the power of programming, specifically Python, steps in, and no library bridges the gap between Python and Excel quite as elegantly and robustly as OpenPyXL.
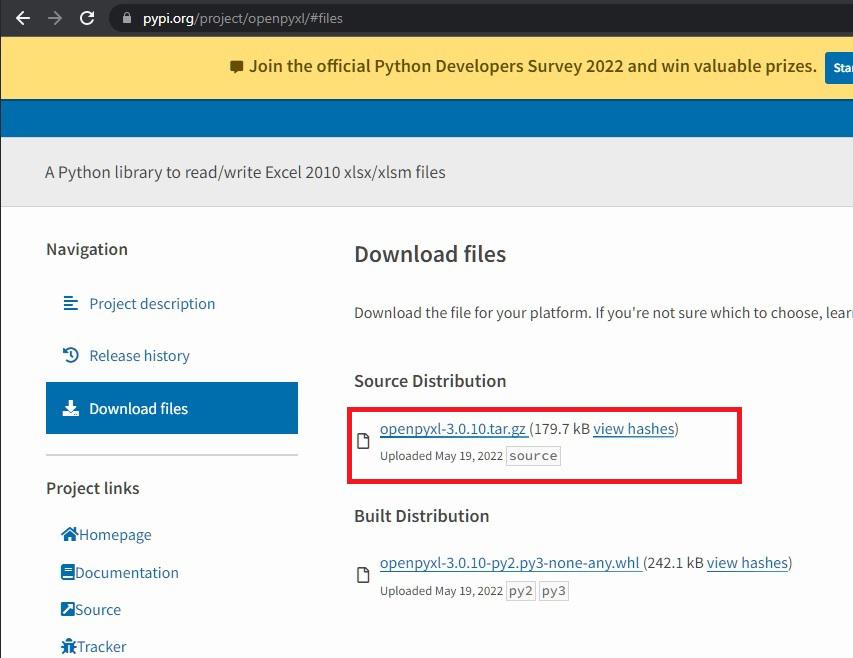
OpenPyXL is a Python library designed to allow programmers to read, write, and modify Excel 2010 xlsx/xlsm/xltx/xltm files. Unlike some older libraries that relied on COM automation, OpenPyXL is a pure Python solution, meaning it runs natively on any system that supports Python, without needing Excel itself to be installed. This makes it an incredibly versatile and powerful tool for developers, data scientists, and anyone looking to automate their Excel-related tasks. From generating reports and parsing financial statements to managing inventory or transforming data, OpenPyXL unlocks a new dimension of efficiency.
This comprehensive guide will walk you through the essential steps to install OpenPyXL, ensure your development environment is optimally configured, and provide a foundational understanding of its capabilities. By the end of this article, you’ll not only have OpenPyXL ready for action but also grasp the best practices for leveraging this library in your Python projects.
Understanding OpenPyXL: The Power Behind Python Excel Integration
Before diving into the installation process, it’s crucial to understand precisely what OpenPyXL offers and why it has become an indispensable tool in the modern developer’s arsenal, particularly for those working with data.
What is OpenPyXL?
At its core, OpenPyXL is a Python library that enables interaction with Excel files in the .xlsx format. This format is the default for Microsoft Excel versions 2007 and later. The “Open” in OpenPyXL refers to its ability to work with Open Office XML (OOXML) file formats, which is the underlying standard for .xlsx files. The library provides a complete API (Application Programming Interface) to access all components of an Excel workbook: worksheets, cells, rows, columns, styles, charts, images, and more. This means you can programmatically perform almost any action you would manually do within Excel itself, from creating a new spreadsheet from scratch to modifying an existing one cell by cell, or extracting specific data points.
It distinguishes itself from other Excel-related Python libraries by its focus on the modern .xlsx format and its pure Python implementation. This pure Python nature means it doesn’t require Microsoft Excel to be installed on the machine where the Python script is running, making it ideal for server-side processing, cloud deployments, or environments where Excel isn’t available.
Why OpenPyXL is Indispensable for Developers and Data Analysts
The utility of OpenPyXL extends across various professional roles and use cases:
-
Automation of Repetitive Tasks: Manually updating monthly reports, extracting data for analysis, or formatting spreadsheets can be incredibly time-consuming. OpenPyXL allows you to script these tasks, turning hours of manual work into a few seconds of execution.
-
Data Extraction and Transformation: Need to pull specific data from hundreds of Excel files? OpenPyXL can iterate through files, locate relevant cells, extract data, and even transform it before saving it to a database or another format.
-
Report Generation: Dynamically generate complex Excel reports populated with data from databases, APIs, or other sources. This is invaluable for financial reporting, business intelligence dashboards, or operational summaries.
-
Integration with Other Systems: Excel files often serve as data interchange formats. OpenPyXL enables seamless integration of Excel data with web applications, scientific computing tools, machine learning pipelines, and other data processing workflows.
-
Data Validation and Cleaning: Programmatically check Excel files for inconsistencies, missing data, or incorrect formats, and even apply corrections or highlight issues for human review.
-
Cross-Platform Compatibility: As a pure Python library, OpenPyXL works identically across Windows, macOS, and Linux environments, ensuring your scripts are portable.
In essence, OpenPyXL liberates users from the drudgery of manual Excel operations, empowering them to focus on higher-value analytical and developmental tasks. Its robust feature set and straightforward API make it an essential tool for anyone serious about data processing and automation with Python.
Essential Prerequisites and Setting Up Your Environment
Before you can install and begin using OpenPyXL, there are a few foundational elements and best practices to establish. A well-configured environment ensures a smooth installation process and prevents potential conflicts with other Python projects.
Ensuring Python is Ready
The absolute prerequisite for installing OpenPyXL is having Python installed on your system. OpenPyXL supports Python versions 3.7 and above. If you don’t have Python installed, or if your version is outdated, you’ll need to install it first.
-
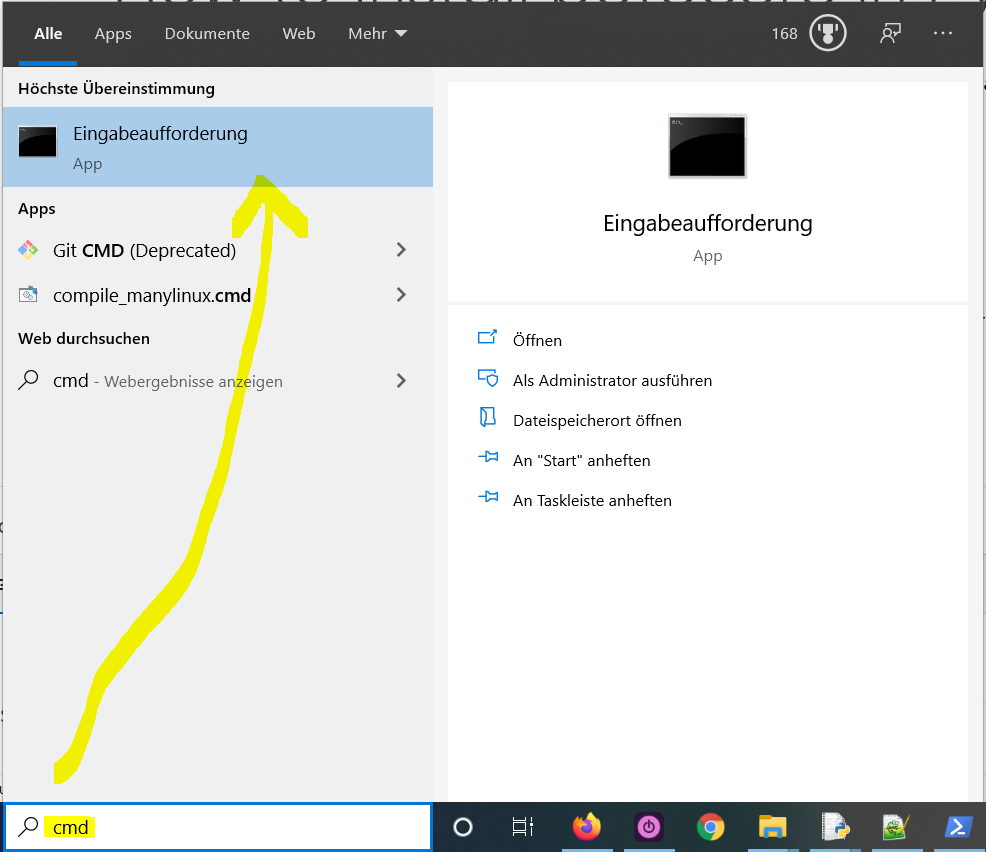
Check Python Version: Open your terminal or command prompt and type:
python --version

# or

python3 --version
If you see a version number like
Python 3.x.x(wherexis 7 or greater), you’re good to go. -
Install Python (if needed):
-
Windows: Download the official installer from python.org. During installation, make sure to check the box that says “Add Python to PATH” to make it easily accessible from the command line.
-
macOS: Python 3 often comes pre-installed, but it’s recommended to install the latest version via Homebrew (
brew install python3) or the official installer. -
Linux: Use your distribution’s package manager (e.g.,
sudo apt install python3on Debian/Ubuntu,sudo dnf install python3on Fedora,sudo pacman -S pythonon Arch).
-
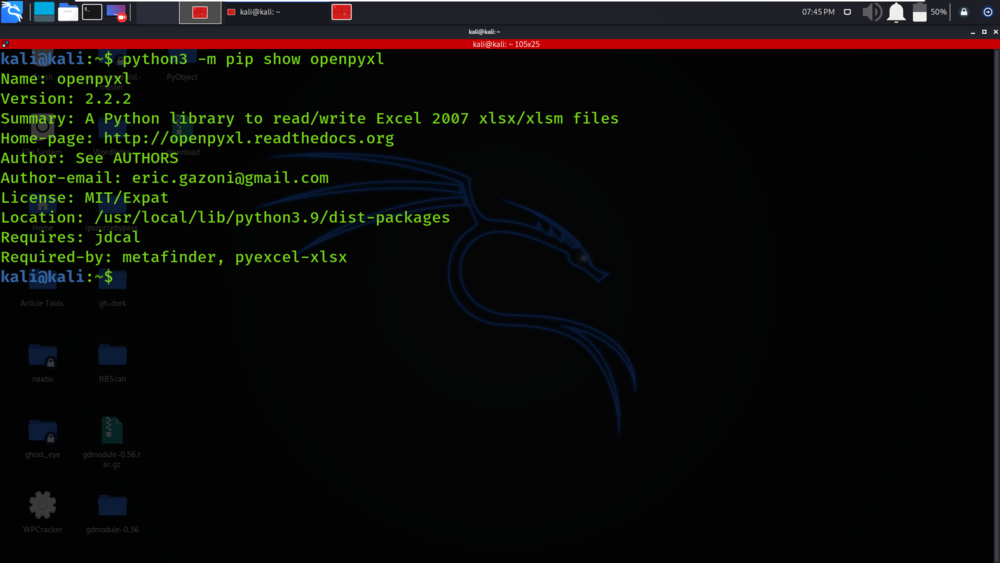
Python also comes with pip, its package installer, which is what we’ll use to install OpenPyXL. pip is usually installed automatically with Python 3. If you encounter issues with pip, you might need to update it: python -m pip install --upgrade pip.
The Importance of Virtual Environments
One of the most crucial best practices in Python development is the use of virtual environments. A virtual environment is an isolated Python environment that allows you to manage dependencies for different projects separately.
Why use virtual environments?
-
Dependency Management: Each Python project often requires specific versions of libraries. Without virtual environments, installing a new library for one project might update or downgrade a dependency that breaks another project.
-
Cleanliness: Keeps your global Python installation clean and avoids cluttering it with project-specific packages.
-
Reproducibility: Ensures that your project can be easily set up and run by others, as all dependencies are clearly defined within the environment.
While technically optional for a quick test, using a virtual environment is highly recommended for any serious development work.
Creating a Virtual Environment (Example Commands)
Let’s walk through creating and activating a virtual environment. We’ll use venv, the standard module for creating virtual environments, which is included with Python 3.
-
Navigate to your project directory: First, open your terminal or command prompt and change to the directory where you plan to store your Python project. If you don’t have one, create it.
mkdir my_excel_project cd my_excel_project -
Create the virtual environment: Once inside your project directory, run the following command. This will create a new directory (e.g.,
venvor.venv) containing the isolated Python installation and its associatedpip.python3 -m venv venv(You can name
venvanything you like, butvenvor.venvare common conventions.) -
Activate the virtual environment: After creation, you need to activate it. The activation command differs slightly based on your operating system and shell.
-
On Windows (Command Prompt):
venvScriptsactivate -
On Windows (PowerShell):
.venvScriptsActivate.ps1(You might need to adjust your execution policy if you get an error:
Set-ExecutionPolicy -ExecutionPolicy RemoteSigned -Scope CurrentUserthen try again.) -
On macOS and Linux (Bash/Zsh):
source venv/bin/activate
Once activated, your terminal prompt will usually change to indicate that you are inside the virtual environment (e.g.,
(venv) my_excel_project$). Now, any packages you install usingpipwill be confined to this specific environment. -
Step-by-Step Installation of OpenPyXL
With Python ready and your virtual environment activated, installing OpenPyXL is a straightforward process using Python’s package installer, pip.
Installing via Pip (Standard Method)
pip is the de facto package manager for Python and the easiest way to install third-party libraries like OpenPyXL. With your virtual environment activated, execute the following command:
pip install openpyxl
Explanation of the command:
-
pip: This invokes the Python package installer. Since your virtual environment is active, it uses thepipassociated with that environment, not your system’s globalpip. -
install: This tellspipto download and install a package. -
openpyxl: This is the name of the package you want to install from the Python Package Index (PyPI).
Upon execution, pip will download OpenPyXL and its dependencies (if any) and install them into your active virtual environment. You’ll see output indicating the progress of the download and installation, culminating in a message similar to “Successfully installed openpyxl-X.Y.Z”.
Verifying a Successful Installation
After installation, it’s good practice to verify that OpenPyXL is correctly installed and accessible within your Python environment. You can do this by attempting to import the library in a Python interpreter or by running a small script.
-
Using the Python Interpreter:
-
Ensure your virtual environment is still activated.
-
Type
python(orpython3) and press Enter to open the Python interactive shell. -
At the Python prompt (
>>>), type:import openpyxl print(openpyxl.__version__) -
If the import is successful and it prints the version number (e.g.,
3.1.2), then OpenPyXL is installed correctly. If you get anImportError, something went wrong. -
Type
exit()and press Enter to leave the interpreter.
-
-
Running a Simple Test Script:
-
Create a new file in your
my_excel_projectdirectory, namedtest_openpyxl.py. -
Add the following content to the file:
import openpyxl print(f"OpenPyXL version: {openpyxl.__version__}") # Optional: Try creating a dummy workbook try:wb = openpyxl.Workbook() ws = wb.active ws['A1'] = "Hello, OpenPyXL!" wb.save("hello_openpyxl.xlsx") print("Successfully created 'hello_openpyxl.xlsx'")except Exception as e:
print(f"Error creating workbook: {e}") -
Save the file and then run it from your terminal (with the virtual environment activated):
python test_openpyxl.py -
If you see the version number and the “Successfully created ‘hello_openpyxl.xlsx'” message, and find
hello_openpyxl.xlsxin your project directory, your installation is perfect.
-
Common Installation Hurdles and Solutions
While pip install openpyxl is generally smooth, you might occasionally encounter issues. Here are some common problems and their solutions:
-
ModuleNotFoundError: No module named 'openpyxl':-
Cause: This is the most common error and almost always means you’re trying to run your Python script without the virtual environment activated, or
openpyxlwas installed into a different environment. -
Solution: Ensure you’ve activated your virtual environment (e.g.,
source venv/bin/activateorvenvScriptsactivate) before running your Python script or opening the interpreter. If you installed it globally without a virtual environment, ensure your global Python’sScriptsdirectory is in your system’s PATH.
-
-
pip is not recognized as an internal or external command:-
Cause: Python’s
Scriptsdirectory (wherepipis located) is not in your system’s PATH environment variable. -
Solution: On Windows, reinstall Python and make sure to check “Add Python to PATH”. On Linux/macOS, ensure your PATH includes Python’s binary directories. Alternatively, you can explicitly call
pipusing the Python interpreter:python -m pip install openpyxl.
-
-
Permission deniederrors:-
Cause: You are trying to install packages globally without sufficient administrative privileges, or your Python installation itself has restrictive permissions.
-
Solution: Use a virtual environment! This is the primary reason for them. If you must install globally, use
sudo pip install openpyxlon Linux/macOS (not recommended), or run your command prompt/PowerShell as an administrator on Windows.
-
-
Internet Connection Issues:
-
Cause:
pipneeds to download packages from the internet. -
Solution: Ensure you have a stable internet connection. If you are behind a corporate proxy, you might need to configure
pipto use it (e.g.,pip install --proxy http://user:pass@proxy.server:port openpyxl).
-
-
Outdated
pip:-
Cause: An old version of
pipmight have bugs or compatibility issues. -
Solution: Upgrade
pipitself:python -m pip install --upgrade pip.
-
Addressing these common pitfalls will ensure a smooth and frustration-free installation experience, allowing you to quickly move on to harnessing OpenPyXL’s power.
Getting Started with OpenPyXL: A Glimpse into its Capabilities
Once OpenPyXL is successfully installed, you can immediately begin leveraging its capabilities to interact with Excel files. This section provides a rapid introduction to some fundamental operations: reading existing data, writing new data, and manipulating worksheets and cells.
Reading Data from an Excel Workbook
Extracting information from an Excel file is a common first step. OpenPyXL makes this process intuitive.
import openpyxl


# Load an existing workbook

# Replace 'example.xlsx' with your file path

try:

    workbook = openpyxl.load_workbook('example.xlsx')

    sheet = workbook.active  # Get the active sheet (the first one by default)


    # You can also get a sheet by its name:

    # sheet = workbook['Sheet1']


    print(f"Active sheet name: {sheet.title}")


    # Iterate through rows and print cell values

    print("Reading data from sheet:")

    for row in sheet.iter_rows(min_row=1, max_row=sheet.max_row, min_col=1, max_col=sheet.max_column):

        row_values = [cell.value for cell in row]

        print(row_values)


    # Access a specific cell's value

    cell_a1_value = sheet['A1'].value

    print(f"nValue of cell A1: {cell_a1_value}")


    # Access cell by row and column index (1-based)

    cell_b2_value = sheet.cell(row=2, column=2).value

    print(f"Value of cell B2: {cell_b2_value}")


except FileNotFoundError:

    print("Error: 'example.xlsx' not found. Please create one with some data.")

except Exception as e:

    print(f"An error occurred: {e}")
To test this, create a simple example.xlsx file in your project directory with some data, e.g., “Name” in A1, “Age” in B1, “Alice” in A2, “30” in B2.
Writing Data to a New Excel File
Creating new Excel files or adding data to existing ones is equally straightforward.
import openpyxl


# Create a new blank workbook

workbook = openpyxl.Workbook()


# Get the active sheet

sheet = workbook.active

sheet.title = "My New Data" # Rename the sheet


# Add headers

sheet['A1'] = "Product"

sheet['B1'] = "Quantity"

sheet['C1'] = "Price"


# Add data rows

data = [

    ("Laptop", 10, 1200),

    ("Mouse", 50, 25),

    ("Keyboard", 30, 75)

]


for row_data in data:

    sheet.append(row_data) # Appends a row after the last existing row


# Modify a specific cell

sheet['B4'] = 45 # Change quantity of 'Keyboard' if we added it last


# Save the workbook

output_filename = "my_new_excel_file.xlsx"

workbook.save(output_filename)

print(f"Successfully created '{output_filename}'")
Manipulating Worksheets and Cells
OpenPyXL provides granular control over worksheets and individual cells.
import openpyxl


workbook = openpyxl.Workbook()

sheet1 = workbook.active

sheet1.title = "Sales"


# Create a new sheet

sheet2 = workbook.create_sheet("Expenses")

sheet3 = workbook.create_sheet("Summary", 0) # Create at index 0 (first position)


print(f"Sheets in workbook: {workbook.sheetnames}")


# Access cells

sheet1['A1'] = "Region"

sheet1['B1'] = "Revenue"

sheet1['A2'] = "North"

sheet1['B2'] = 150000


# Merge cells (for headers or titles)

sheet1.merge_cells('A5:B5')

sheet1['A5'] = "Annual Totals"


# Unmerge cells

# sheet1.unmerge_cells('A5:B5')


# Set cell styles (requires a style object or direct attributes)

from openpyxl.styles import Font, Color, Alignment, Border, Side

sheet1['A1'].font = Font(bold=True, color="FF0000") # Red bold font

sheet1['B1'].font = Font(bold=True)

sheet1['A5'].alignment = Alignment(horizontal="center", vertical="center")


# Add a border

thin_border = Border(left=Side(style='thin'),

                     right=Side(style='thin'),

                     top=Side(style='thin'),

                     bottom=Side(style='thin'))

sheet1['A1'].border = thin_border


workbook.save("advanced_workbook_ops.xlsx")

print("Workbook with advanced operations saved as 'advanced_workbook_ops.xlsx'")
These examples barely scratch the surface, but they demonstrate the immediate utility of OpenPyXL for fundamental Excel interactions. With these basics, you’re well-equipped to start building scripts that automate your Excel tasks.
Beyond the Basics: Harnessing OpenPyXL’s Advanced Features and Best Practices
While the initial installation and basic usage provide a solid foundation, OpenPyXL’s true power lies in its comprehensive feature set for advanced manipulation and adherence to best practices for sustainable development.
Exploring Advanced Functionalities (Charts, Styles, Data Validation)
OpenPyXL isn’t just for reading and writing raw data; it allows for sophisticated control over Excel’s presentation and data integrity features.
-
Charts: You can programmatically create various types of charts (bar, line, pie, scatter) directly within your Excel worksheets using OpenPyXL. This is invaluable for generating dynamic, visually rich reports without manual chart creation. You define the chart type, data series, categories, titles, and even position the chart on the sheet.
-
Styling and Formatting: Beyond basic bolding, OpenPyXL offers extensive control over cell formatting. You can set fonts (size, color, name), colors (fill, foreground, background), borders (style, color), number formats (currency, date, percentage), and alignment (horizontal, vertical, wrap text). This ensures your programmatically generated reports look professional and are easy to read.
-
Data Validation: To ensure data quality, OpenPyXL allows you to apply data validation rules to cells. This includes creating dropdown lists (e.g., for selecting from predefined options), restricting input to specific data types (numbers, dates), and setting range constraints (e.g., numbers between 1 and 100).
-
Conditional Formatting: Highlight cells based on specific rules (e.g., values greater than a threshold, duplicate entries, top 10 items). This helps in visual data analysis and quick identification of key information or anomalies.
-
Images: Insert images into your worksheets at specified locations, useful for company logos or visual indicators in reports.
-
Formulas: Write Excel formulas directly into cells, and OpenPyXL will ensure they are correctly stored. When the file is opened in Excel, the formulas will calculate as expected.
These advanced features enable the creation of highly dynamic, professional, and interactive Excel workbooks entirely through Python scripts, vastly extending the automation possibilities.
Maintaining Your Environment and Keeping OpenPyXL Updated
Maintaining your Python environment and keeping your libraries updated is crucial for security, performance, and accessing the latest features.
-
Keeping OpenPyXL Updated: New versions of OpenPyXL often include bug fixes, performance improvements, and new features. To update OpenPyXL within your active virtual environment:
pip install --upgrade openpyxlIt’s a good habit to check for updates periodically, especially if you encounter unexpected behavior or need a specific new feature.
-
Managing Dependencies (
requirements.txt): For collaborative projects or deploying your scripts, it’s essential to list all project dependencies and their versions. After installing OpenPyXL and any other libraries in your virtual environment, generate arequirements.txtfile:pip freeze > requirements.txtThis file can then be used by others (or your deployment pipeline) to recreate the exact same environment:
pip install -r requirements.txtThis ensures reproducibility and avoids “works on my machine” problems.
-
Deactivating and Deleting Virtual Environments:
-
To deactivate an environment when you’re done working on a project:
deactivate(on macOS/Linux) orvenvScriptsdeactivate.bat(on Windows). -
To completely remove an environment (e.g., to free up space or start fresh): simply delete its directory (
rm -rf venvon macOS/Linux, or delete the folder via File Explorer on Windows).
-
Further Learning Resources
To truly master OpenPyXL, consider exploring its official documentation, which is exceptionally well-maintained and comprehensive:
- OpenPyXL Documentation: https://openpyxl.readthedocs.io/en/stable/
The documentation includes detailed guides, examples, and API references for every feature, from basic cell manipulation to complex chart creation and data validation rules. Online tutorials, courses, and community forums (like Stack Overflow) are also excellent resources for specific use cases and troubleshooting.
In conclusion, installing OpenPyXL is merely the first step on a journey toward powerful and efficient Excel automation with Python. By understanding its capabilities, following best practices for environment management, and continuously exploring its features, you can transform tedious manual processes into streamlined, robust, and intelligent Python-driven workflows.
aViewFromTheCave is a participant in the Amazon Services LLC Associates Program, an affiliate advertising program designed to provide a means for sites to earn advertising fees by advertising and linking to Amazon.com. Amazon, the Amazon logo, AmazonSupply, and the AmazonSupply logo are trademarks of Amazon.com, Inc. or its affiliates. As an Amazon Associate we earn affiliate commissions from qualifying purchases.