
Node.js has become an indispensable technology for modern web development, empowering developers to build scalable, high-performance network applications. Its ability to run JavaScript on the server-side, coupled with a vast ecosystem of modules via npm (Node Package Manager), makes it a popular choice for everything from real-time applications and APIs to microservices and command-line tools. Ubuntu, a widely used Linux distribution known for its stability, robust community support, and developer-friendly environment, provides an excellent platform for Node.js development.
This comprehensive guide will walk you through the various methods of installing Node.js on your Ubuntu system, ensuring you can choose the approach that best suits your development needs. We’ll cover everything from preparing your system to verifying your installation and adopting best practices, enabling you to harness the full potential of Node.js for your projects.
Understanding Node.js and Its Ecosystem
Before diving into the installation process, it’s crucial to grasp what Node.js is and why it has garnered such widespread adoption, particularly within the Ubuntu ecosystem.
What is Node.js?
At its core, Node.js is an open-source, cross-platform JavaScript runtime environment that executes JavaScript code outside a web browser. It’s built on Chrome’s V8 JavaScript engine, which is renowned for its speed and efficiency in compiling and executing JavaScript. Unlike traditional server-side technologies, Node.js uses an event-driven, non-blocking I/O model, making it exceptionally lightweight and efficient. This architecture makes Node.js ideal for data-intensive real-time applications that run across distributed devices, such as chat applications, streaming services, and online games. Its single-threaded nature, coupled with asynchronous operations, allows it to handle many concurrent connections with minimal overhead, leading to high throughput and scalability. Developers can leverage their existing JavaScript knowledge for both front-end and back-end development, streamlining the development process and fostering full-stack JavaScript expertise.
Why Ubuntu for Node.js Development?
Ubuntu stands out as a preferred operating system for Node.js development due to several compelling reasons. Firstly, its open-source nature aligns perfectly with the open-source philosophy of Node.js, fostering a vibrant community and a wealth of resources. Secondly, Ubuntu’s robust package management system (APT) simplifies the installation and management of software, including Node.js and its dependencies. Developers appreciate Ubuntu’s stability and security features, which provide a reliable foundation for deploying production-grade applications. Furthermore, Ubuntu’s widespread adoption in server environments means that development environments closely mirror production, reducing discrepancies and easing deployment. Its flexibility allows for extensive customization, while readily available documentation and a vast online community ensure that solutions to potential issues are often just a search away. This combination of ease of use, stability, and strong community support makes Ubuntu an ideal choice for both seasoned professionals and aspiring developers venturing into the world of Node.js.
The Role of npm (Node Package Manager)
npm, or Node Package Manager, is an essential component of the Node.js ecosystem. It is the default package manager for JavaScript and comes bundled with Node.js itself. npm serves two primary functions: it’s a command-line utility for interacting with the npm registry, and it’s a massive online repository of open-source Node.js packages. With npm, developers can effortlessly install, manage, and share reusable code modules (packages or libraries). These packages range from small utility functions to entire web frameworks, significantly accelerating development cycles and promoting code reuse. For instance, installing a web framework like Express.js or a utility library like Lodash is as simple as running npm install express or npm install lodash. npm also handles dependency management, ensuring that all required packages for a project are correctly installed and versioned, thereby maintaining project stability and integrity. Its ubiquity makes it an indispensable tool for any Node.js developer, streamlining project setup and simplifying the integration of third-party functionalities.
Preparing Your Ubuntu System for Node.js Installation
Before installing Node.js, it’s good practice to ensure your Ubuntu system is up-to-date and has the necessary tools to prevent potential conflicts or issues during the installation process.
Updating System Packages
Keeping your system’s package list and installed packages current is a fundamental step in maintaining system health and ensuring compatibility with new software. This process refreshes the list of available packages and upgrades any outdated packages to their latest versions, often resolving potential security vulnerabilities and performance issues.
To update your system, open your terminal (Ctrl+Alt+T) and execute the following commands:
sudo apt update

sudo apt upgrade -y
The sudo apt update command fetches the latest package information from the Ubuntu repositories, while sudo apt upgrade -y installs the newer versions of packages currently installed on your system. The -y flag automatically confirms the prompts, allowing the upgrade to proceed without manual intervention.
Prerequisites and Build Tools
Depending on the Node.js installation method you choose, or if you plan to compile certain native Node.js add-ons, you might need some additional development tools. These tools are typically part of a standard development environment and include compilers, libraries, and headers.
Install these essential build tools using the following command:
sudo apt install curl build-essential git -y
-
curl: A command-line tool for transferring data with URLs. It’s often used to download installation scripts from the web, particularly for methods like NVM or NodeSource PPA. -
build-essential: This meta-package includes compilers (like GCC), development libraries, and headers needed to compile software from source code. Many npm packages that contain C++ addons require these tools to be built successfully. -
git: While not strictly necessary for Node.js installation itself, Git is an essential version control system for almost any development workflow. It’s good practice to have it installed.
Having these prerequisites in place ensures a smoother installation experience and broader compatibility with various Node.js modules that might have native dependencies.
Methods to Install Node.js on Ubuntu
There are several reliable ways to install Node.js on Ubuntu, each offering distinct advantages depending on your specific requirements for version control, stability, or the latest features. We’ll explore three primary methods: using Ubuntu’s default repositories, leveraging the NodeSource PPA for newer versions, and employing NVM (Node Version Manager) for flexible version management.
Method 1: Installing Node.js from Ubuntu’s Default Repositories (Quick & Simple)
This is the simplest and quickest method to get Node.js up and running. Ubuntu’s default repositories contain a stable version of Node.js and npm.
-
Pros:
-
Ease of Use: Extremely straightforward installation with minimal commands.
-
Stability: The versions available in the default repositories are thoroughly tested and stable.
-
Reliability: Managed directly by Ubuntu, ensuring compatibility with the rest of your system.
-
-
Cons:
-
Older Versions: The Node.js version in the default repositories is often not the latest LTS (Long Term Support) or current release. This can be a significant limitation if your project requires newer features or specific versions.
-
Limited Flexibility: You can only install one version of Node.js, and switching between versions is not easily supported.
-
To install Node.js and npm using this method, execute the following command:
sudo apt install nodejs npm -y
After the installation completes, you can verify the installed versions:
node -v

npm -v
You might notice that the npm version installed this way is often older than the latest available. It’s a common practice to update npm globally after installation:
sudo npm install -g npm@latest
While convenient for basic needs, the default repository method is generally not recommended for active development where access to the latest features or specific Node.js versions is crucial.
Method 2: Installing Node.js using NodeSource PPA (Recommended for Latest Versions)
NodeSource maintains a dedicated Personal Package Archive (PPA) that provides more up-to-date versions of Node.js than the default Ubuntu repositories. This is the recommended method for developers who need current LTS or the latest stable releases for their projects.
-
Pros:
-
Latest Versions: Access to the most recent LTS and Current releases of Node.js and npm.
-
Reliable Source: NodeSource is an official and trusted source for Node.js binaries.
-
Easy Updates: Once added, subsequent
sudo apt update && sudo apt upgradecommands will keep Node.js updated.
-
-
Cons:
-
No Multi-Version Support: Like the default repository method, you can only install one version of Node.js at a time.
-
PPA Management: Requires adding an external PPA to your system.
-
To install Node.js using NodeSource PPA, you first need to add the specific PPA for the desired Node.js version. NodeSource provides PPAs for various LTS versions (e.g., v18.x, v20.x). We’ll use Node.js 20.x as an example (replace 20.x with 18.x or 21.x for other versions).
First, download and run the NodeSource setup script:
curl -fsSL https://deb.nodesource.com/setup_20.x | sudo -E bash -
This script will add the NodeSource PPA to your system’s package sources and update the apt cache. Once the PPA is added, you can install Node.js:
sudo apt install nodejs -y
Note that npm is automatically installed alongside nodejs with this method. Verify the installation:
node -v

npm -v
This method is ideal for development environments where you consistently work with the latest stable or LTS version of Node.js.
Method 3: Installing Node.js using NVM (Node Version Manager) (Best for Multiple Versions)
NVM, or Node Version Manager, is a script-based tool that allows you to easily install, manage, and switch between different versions of Node.js on the same machine. This is the most flexible method and is highly recommended for developers who work on multiple projects requiring different Node.js versions or who need to test their applications against various Node.js releases.
-
Pros:
-
Multi-Version Support: Install and switch between multiple Node.js versions effortlessly.
-
Flexibility: Ideal for testing applications across different Node.js environments.
-
No Root Privileges: Node.js and npm packages are installed in your user directory, avoiding
sudofor global package installations. -
Easy Updates: Simple commands to update or install new Node.js versions.
-
-
Cons:
-
Slightly More Complex Setup: Initial setup requires sourcing NVM into your shell.
-
Not System-Wide: Node.js installations are per-user, not system-wide.
-
Step 1: Install NVM
First, ensure curl and build-essential are installed (as covered in the “Prerequisites” section). Then, download and run the NVM installation script from its GitHub repository:
curl -o- https://raw.githubusercontent.com/nvm-sh/nvm/v0.39.7/install.sh | bash
(Note: Replace v0.39.7 with the latest stable version if a newer one is available on the NVM GitHub page.)
The script will clone the nvm repository to ~/.nvm and add the necessary lines to your ~/.bashrc, ~/.profile, or ~/.zshrc file to automatically load NVM when you open a new terminal session.
Step 2: Source NVM into your shell
After installation, close and reopen your terminal, or source your shell configuration file manually to start using NVM immediately:
source ~/.bashrc # Or ~/.zshrc if you use Zsh

You can verify NVM installation by typing:
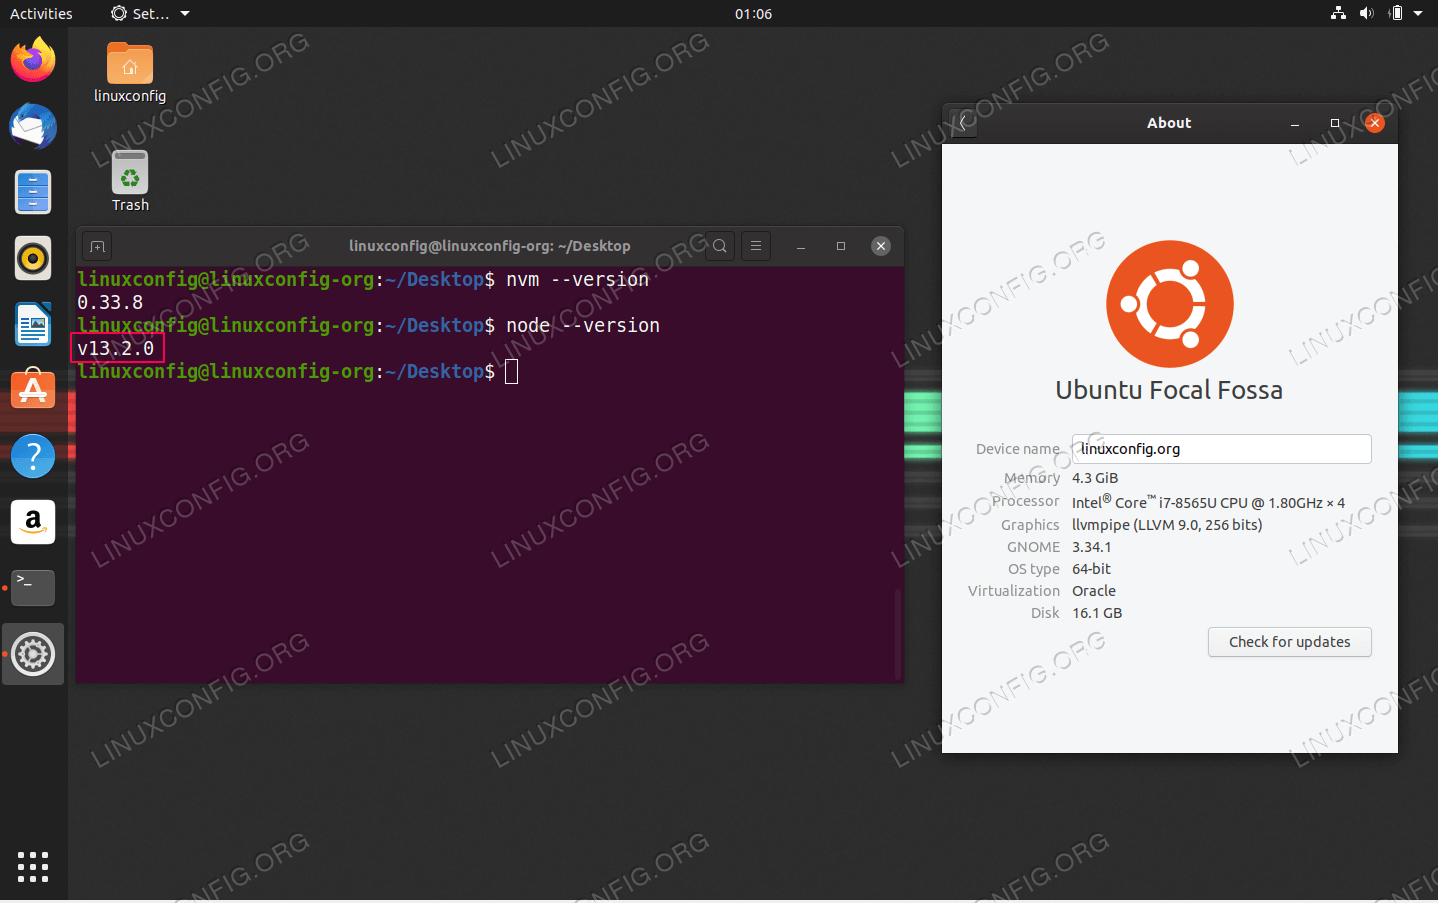
nvm --version
Step 3: Install Node.js versions using NVM
Now, you can install any Node.js version you need. To list available versions:
nvm ls-remote
To install the latest LTS version:
nvm install --lts
To install a specific version (e.g., Node.js 20.x):
nvm install 20
You can install multiple versions:
nvm install 18

nvm install 16
Step 4: Switch between Node.js versions
To use a specific installed version:
nvm use 20
To set a default Node.js version that will be used in new shell sessions:
nvm alias default 20
Step 5: Verify Node.js and npm
Check the currently active Node.js and npm versions:
node -v

npm -v
To list all installed Node.js versions managed by NVM:
nvm ls
NVM is the most powerful and flexible method for Node.js developers, especially those managing diverse projects or needing to test against various runtime environments.
Post-Installation and Best Practices
Once Node.js is successfully installed, there are a few important steps to take and best practices to follow to ensure a smooth and efficient development workflow.
Verifying Your Installation
Regardless of the method you chose, it’s crucial to confirm that Node.js and npm are correctly installed and accessible from your terminal. This is done by checking their versions:
node -v

npm -v
These commands should output the version numbers of Node.js and npm, respectively. If you receive an error like “command not found,” it indicates an issue with the installation or your shell’s PATH configuration. In such cases, retrace your installation steps carefully or consult NVM’s documentation if you used that method. A common issue with NVM is not properly sourcing the NVM script into your shell.
Updating npm
Even if you installed Node.js with a recent version of npm, npm itself receives frequent updates with new features, bug fixes, and performance improvements. It’s a good practice to keep npm updated to its latest version independently of Node.js.
To update npm globally, run:
npm install -g npm@latest
The -g flag ensures that npm is updated globally, making the new version available for all your Node.js projects.
Running Your First Node.js Application
To celebrate your successful installation, let’s create a simple “Hello World” Node.js application. This will confirm that Node.js is fully operational.
-
Create a new file named
app.jsin your desired directory:nano app.js(Or use your preferred text editor like
vimor VS Code) -
Add the following JavaScript code to
app.js:const http = require('http'); const hostname = '127.0.0.1'; const port = 3000; const server = http.createServer((req, res) => { res.statusCode = 200; res.setHeader('Content-Type', 'text/plain'); res.end('Hello Node.js World!n'); }); server.listen(port, hostname, () => { console.log(`Server running at http://${hostname}:${port}/`); }); -
Save the file and exit the editor.
-
Run your Node.js application from the terminal:
node app.jsYou should see the message:
Server running at http://127.0.0.1:3000/. -
Open your web browser and navigate to
http://127.0.0.1:3000/. You should see “Hello Node.js World!” displayed in your browser. This confirms that Node.js is correctly serving HTTP requests.
Permissions and Global Packages
When installing global npm packages (using npm install -g), you might encounter permission errors if you’re not using NVM. This is because npm tries to write to system-wide directories that require root privileges. While you can use sudo npm install -g <package>, this is generally discouraged due to potential security risks and complications with package updates.
The recommended solutions are:
-
Use NVM: As discussed, NVM installs Node.js and npm in your user’s home directory, eliminating the need for
sudofor global package installations. This is the preferred method. -
Fix npm’s permissions (less recommended): If you’re not using NVM, you can reconfigure npm to install global packages in a user-owned directory. Refer to npm’s official documentation on “Fixing npm permissions” for detailed steps.
By adopting NVM, you inherently avoid these permission issues, leading to a much smoother and more secure development experience.
Keeping Node.js Updated
The Node.js ecosystem evolves rapidly, with new features, performance improvements, and security patches being released regularly. Depending on your installation method, keeping Node.js updated is straightforward:
-
Default Repositories / NodeSource PPA: Regularly run
sudo apt update && sudo apt upgrade -yto fetch and apply updates. -
NVM: Use NVM commands to install newer versions (
nvm install <version>) and then switch to them (nvm use <version>). You can also update NVM itself by rerunning its installation script.
Staying updated ensures you have access to the latest capabilities and maintain the security posture of your applications.

Conclusion
Installing Node.js on Ubuntu is a foundational step for any developer aiming to build modern, high-performance web applications. We’ve explored three primary methods, each offering unique benefits: the simplicity of Ubuntu’s default repositories, the currency of the NodeSource PPA, and the unparalleled flexibility of NVM for managing multiple Node.js versions.
For most active developers, NVM is the unequivocally recommended choice, providing the agility to switch between Node.js versions, which is invaluable in a diverse project landscape. However, the NodeSource PPA offers a robust and current single-version solution for less complex requirements, while the default repositories serve as a quick entry point for basic experimentation.
By following this guide, you now have a fully operational Node.js environment on your Ubuntu system, ready to tackle any development challenge. Embrace the power of JavaScript on the server, explore the vast npm ecosystem, and begin building the next generation of innovative applications. The journey into Node.js development on Ubuntu is now officially underway.
aViewFromTheCave is a participant in the Amazon Services LLC Associates Program, an affiliate advertising program designed to provide a means for sites to earn advertising fees by advertising and linking to Amazon.com. Amazon, the Amazon logo, AmazonSupply, and the AmazonSupply logo are trademarks of Amazon.com, Inc. or its affiliates. As an Amazon Associate we earn affiliate commissions from qualifying purchases.