
In the dynamic world of PC hardware, enthusiasts and casual users alike are constantly seeking ways to optimize their systems for peak performance. While components like the CPU and GPU often grab the spotlight, the unsung hero of system responsiveness and speed is often the RAM (Random Access Memory). However, simply installing high-speed RAM modules doesn’t automatically guarantee that your system will run them at their advertised speeds. This is where XMP, or Extreme Memory Profile, comes into play, primarily configured within your computer’s BIOS (Basic Input/Output System) or UEFI (Unified Extensible Firmware Interface).
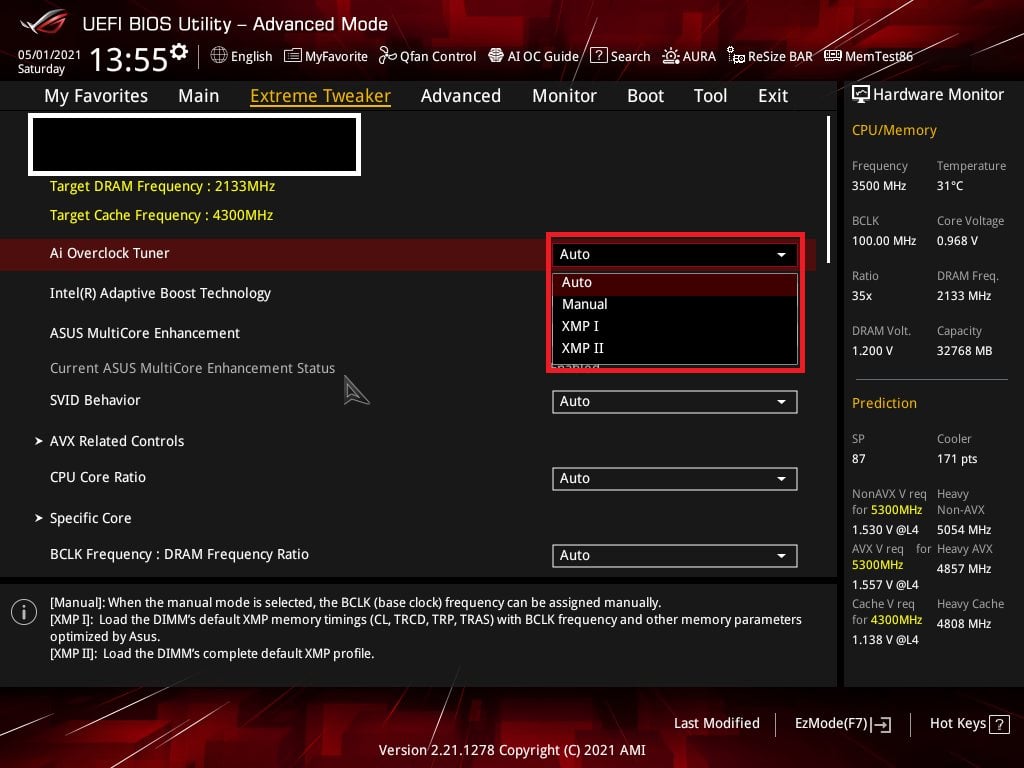
XMP is a technology developed by Intel that allows users to easily “overclock” their RAM to run at speeds beyond the standard JEDEC specifications without manual tweaking. Essentially, XMP profiles contain pre-defined, tested, and certified settings for memory modules, including clock speed, timings, and voltage, ensuring stability and optimal performance. For anyone building a new PC or looking to get the most out of their existing memory, understanding and enabling XMP in the BIOS is a crucial step towards unlocking your system’s full potential, transforming what might otherwise be underperforming high-speed RAM into a true powerhouse.
Understanding RAM Speed and Timing
Before delving deeper into XMP, it’s essential to grasp the fundamentals of how RAM operates and why specialized profiles like XMP are necessary. RAM modules are not just about capacity; their speed and timings play an equally vital role in how quickly your CPU can access and process data.
The JEDEC Standard and Its Limitations
The Joint Electron Device Engineering Council (JEDEC) is an independent semiconductor engineering trade organization that develops open standards for microelectronics, including memory modules. When you purchase RAM, it comes with a JEDEC-compliant profile that dictates its default operating parameters. These JEDEC profiles are conservative by design, ensuring universal compatibility across a wide range of motherboards and CPUs. For instance, a DDR4-3200MHz RAM kit might default to a JEDEC profile of DDR4-2133MHz or DDR4-2400MHz with higher latencies when first installed. This is a safety measure to ensure the system boots up successfully, regardless of the system’s specific hardware configuration.
While beneficial for broad compatibility, this conservatism means that high-speed RAM modules, like those advertised at 3200MHz, 3600MHz, or even higher, will not run at their rated speeds out of the box. They will instead operate at a lower, more universal JEDEC speed, leaving a significant amount of potential performance on the table.
The Need for Overclocking and Optimization
To achieve the advertised, higher speeds of premium RAM, some form of “overclocking” is required. Traditionally, manually overclocking RAM involves navigating complex BIOS settings to adjust frequency, timings (like CAS Latency, tRCD, tRP, tRAS), and voltage. This process is often time-consuming, requires a deep understanding of memory architecture, and comes with the risk of system instability if parameters are set incorrectly. For many users, this level of manual intervention is daunting and inaccessible.
This is precisely where XMP steps in. It automates this complex process by providing a pre-validated, manufacturer-tested “overclock” profile. Instead of manually inputting dozens of settings, users can select a single profile, and the motherboard BIOS automatically configures the RAM to its advertised optimal performance. This brings the benefits of memory optimization to a much broader audience, simplifying a once-daunting task.
What Exactly is XMP? Unpacking Extreme Memory Profiles
XMP, or Extreme Memory Profile, is a technology developed by Intel, first introduced with DDR3 memory, and carried forward to DDR4 and DDR5. It’s essentially a set of pre-configured, tested, and certified memory profiles stored directly on the RAM modules themselves. These profiles contain all the necessary parameters—speed, timings, and voltage—required for the memory to operate optimally, often at speeds much higher than the default JEDEC standard.
How XMP Profiles Work
When you purchase high-speed RAM, such as a DDR4-3600MHz kit, it typically includes one or more XMP profiles programmed into an SPD (Serial Presence Detect) chip on each module. SPD is a standard feature on RAM modules that allows the BIOS to read information about the memory, such as its manufacturer, part number, and default JEDEC speed. XMP extends this by adding extra “overclocked” profiles.
When you enable XMP in your BIOS, the motherboard reads these specific XMP profiles from the RAM’s SPD chip. It then applies the parameters defined within the chosen profile, overriding the default JEDEC settings. This tells the system to run the RAM at its advertised higher frequency with optimized timings and the correct voltage, all without requiring manual input for each individual setting. This ensures stability and performance by using settings that the RAM manufacturer has already validated.
The Role of Motherboard BIOS/UEFI
The motherboard’s BIOS or UEFI firmware acts as the central control panel for enabling XMP. It’s the interface through which you access and activate these profiles. Modern motherboards, especially those designed for enthusiasts or gaming, offer user-friendly UEFI interfaces that make selecting an XMP profile a matter of a few clicks. The BIOS communicates with the RAM to read the available profiles and then applies the chosen settings to the memory controller (which is integrated into the CPU).
It’s important to note that while XMP is an Intel-developed technology, AMD platforms also support it. AMD often refers to its equivalent as DOCP (Direct Overclock Profile) or, more recently with DDR5, EXPO (Extended Profiles for Overclocking). Functionally, DOCP and EXPO serve the exact same purpose as XMP: providing easy-to-enable, pre-validated overclocking profiles for RAM. Regardless of whether you have an Intel or AMD system, the principle remains the same.
The Benefits of Enabling XMP
Enabling XMP is one of the most straightforward and impactful performance upgrades available to PC users, especially those who have invested in high-speed RAM. The benefits extend beyond mere bragging rights, translating into tangible improvements across various computing tasks.
Unlocking True RAM Potential
The most immediate and significant benefit of XMP is that it allows your high-speed RAM to operate at its full, advertised potential. Without XMP, even the most expensive 3600MHz DDR4 or 6000MHz DDR5 modules will likely run at a conservative JEDEC speed (e.g., 2133MHz or 4800MHz, respectively). This is akin to buying a sports car and only driving it in second gear. XMP ensures that your investment in premium memory is fully utilized, allowing the memory controller in your CPU to access data at much faster rates.
Performance Gains in Gaming and Productivity

The impact of faster RAM, achieved through XMP, can be felt across a wide range of applications.
-
Gaming: While often overshadowed by the GPU, faster RAM can significantly improve minimum frame rates and frame pacing, leading to a smoother, more consistent gaming experience. This is particularly noticeable in CPU-intensive games or scenarios where the CPU is bottlenecked by slow memory access. Games can load faster, and in-game assets can stream more efficiently.
-
Content Creation & Productivity: Applications such as video editing suites (e.g., Adobe Premiere Pro, DaVinci Resolve), 3D rendering software, CAD programs, and even complex data analysis tools heavily rely on fast memory access. XMP can reduce rendering times, speed up compilation processes, and improve overall responsiveness in memory-intensive tasks. Multitasking also benefits, as the system can more efficiently swap data between different applications.
-
General System Responsiveness: Beyond specific applications, the entire operating system feels snappier and more responsive. Launching applications, loading web pages, and navigating through large files can all see subtle but noticeable improvements.
System Stability and Compatibility
One of the key advantages of XMP over manual overclocking is its emphasis on stability. XMP profiles are created by the RAM manufacturers and are rigorously tested to ensure they work reliably at their advertised speeds and timings. This means that when you enable XMP, you’re not guessing at settings; you’re applying a validated configuration designed to be stable with compatible hardware. This significantly reduces the risk of system crashes, bluescreens, or other instability issues that can plague poorly configured manual overclocks. Furthermore, the standardization provided by XMP ensures better compatibility between various motherboards and CPU combinations, simplifying the setup process for users.
How to Enable XMP in Your BIOS
Enabling XMP is a relatively straightforward process, though the exact steps and nomenclature might vary slightly depending on your motherboard manufacturer (e.g., ASUS, MSI, Gigabyte, ASRock) and BIOS version.
Accessing Your BIOS/UEFI Settings
The first step is to enter your system’s BIOS/UEFI interface. This is typically done by pressing a specific key immediately after powering on your computer. Common keys include Del (Delete), F2, F10, or F12. You’ll usually see a message on your screen during boot-up indicating which key to press. If you miss it, you might need to restart your computer.
Modern UEFI interfaces are often graphical and support mouse input, making navigation easier than older, text-based BIOS versions. Many motherboards offer both an “EZ Mode” (simplified interface) and an “Advanced Mode.” You’ll likely need to switch to Advanced Mode to find the XMP settings.
Locating the XMP/DOCP/EXPO Option
Once in the BIOS/UEFI, navigate through the menus to find the memory or overclocking settings. Common locations include:
-
AI Tweaker / OC Tweaker / Extreme Tweaker: Often found on ASUS motherboards.
-
M.I.T. / Tweaker: Common on Gigabyte motherboards.
-
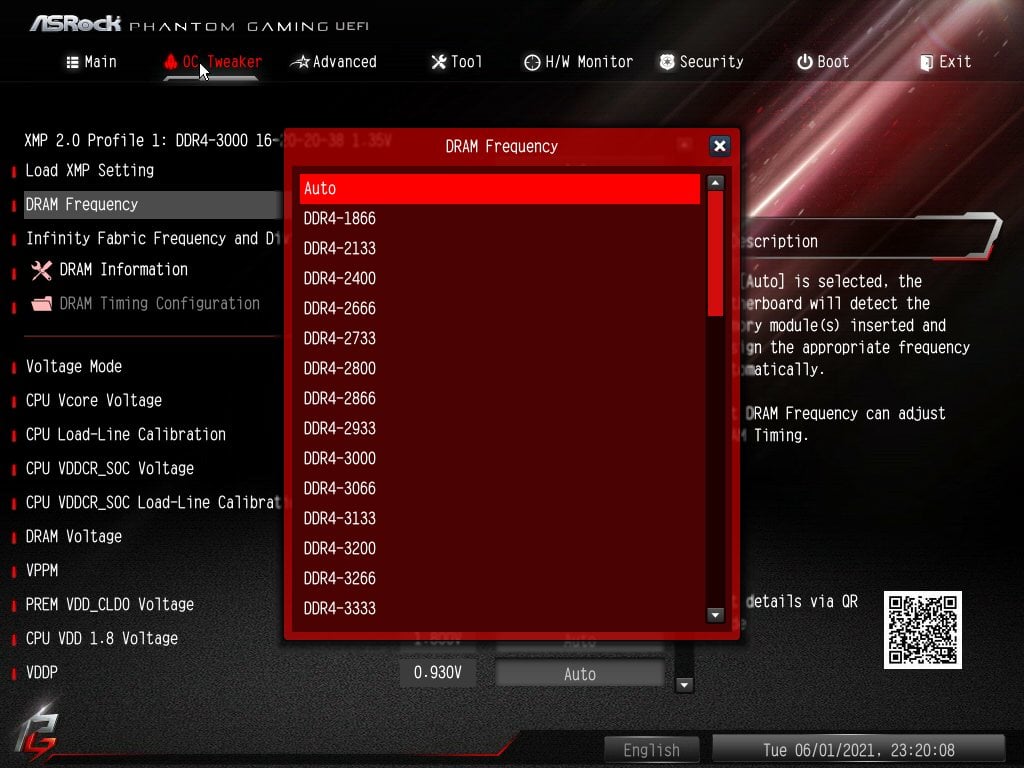
OC (Overclocking) / Advanced DRAM Configuration: Frequently seen on MSI and ASRock boards.
Within these sections, you’ll look for an option related to “Memory Profile,” “DRAM Profile,” “A-XMP,” “Extreme Memory Profile,” “DOCP,” or “EXPO.” This option is usually a dropdown menu. Select the XMP profile (often “Profile 1” or “Profile 2” if multiple are available) that corresponds to your RAM’s advertised speed. If your RAM is rated for 3600MHz, ensure the selected profile shows 3600MHz as the target frequency.
Saving Settings and Booting Up
After selecting the desired XMP profile, it’s crucial to save your changes and exit the BIOS. This is typically done by navigating to an “Exit” or “Save & Exit” tab and confirming your decision. Your system will then reboot.
Upon rebooting, your RAM should now be running at the higher speeds defined by the XMP profile. You can verify this in a few ways:
-
Task Manager (Windows): Open Task Manager (Ctrl+Shift+Esc), go to the “Performance” tab, and select “Memory.” It will display the current speed (e.g., 3600MHz).
-
CPU-Z: A free third-party utility, CPU-Z, provides detailed information about your system components, including RAM speed and timings under the “Memory” tab.
Potential Pitfalls and Considerations
While enabling XMP is generally safe and beneficial, there are a few scenarios and considerations to keep in mind to ensure a smooth experience.
System Instability and Troubleshooting
In rare cases, enabling XMP might lead to system instability, such as failure to boot, random crashes, or bluescreen errors. This usually happens due to:
-
Insufficient Power Delivery: The motherboard’s VRM (Voltage Regulator Module) might not be robust enough to consistently power both the CPU and the overclocked memory.
-
CPU Memory Controller Limitations: Some CPUs have better integrated memory controllers than others. An older or lower-end CPU might struggle to maintain stability with very high memory speeds.
-
Motherboard Compatibility: While most modern motherboards support XMP, there might be specific RAM kits that aren’t fully optimized for certain motherboard models or chipsets.
-
Faulty RAM Module: Although rare, a defective RAM module could cause instability when pushed beyond JEDEC speeds.
If you encounter instability, the first step is to revert to the default JEDEC settings by disabling XMP in the BIOS. You can then try updating your motherboard’s BIOS firmware, which often includes improved memory compatibility and stability fixes. Sometimes, manually increasing the DRAM voltage slightly (e.g., from 1.35V to 1.36V or 1.37V, with caution) can stabilize an otherwise problematic XMP profile. However, manual voltage adjustments should only be done by experienced users.
Motherboard and CPU Compatibility
It’s crucial to ensure that your motherboard and CPU are compatible with the high speeds offered by your RAM’s XMP profiles.
-
Motherboard: Not all motherboards are created equal. Entry-level motherboards, especially those with non-Z series chipsets (for Intel) or A-series chipsets (for AMD), may have limitations on the maximum supported memory frequency. Always check your motherboard’s QVL (Qualified Vendor List) or specifications to confirm the maximum RAM speed it officially supports.
-
CPU: The integrated memory controller (IMC) within your CPU also plays a vital role. While modern CPUs generally handle high memory speeds well, older generations or budget CPUs might struggle with extremely fast RAM.
Warranty Implications
Activating XMP is technically considered “overclocking” by some manufacturers. While it’s a manufacturer-validated overclock, there’s a theoretical risk that it could void the warranty of your RAM, CPU, or motherboard if hardware failure occurs due to extreme settings or voltage. However, in practice, XMP is widely accepted and used, and genuine warranty claims related solely to enabling XMP are exceedingly rare, especially for the RAM modules themselves, which are designed for XMP operation. Most reputable RAM manufacturers test and warranty their modules at their XMP speeds.
In conclusion, XMP is an indispensable feature for anyone looking to maximize their PC’s performance, especially if they’ve invested in high-speed RAM. By transforming a complex manual tuning process into a simple BIOS setting, XMP democratizes memory optimization, allowing users to unlock significant performance gains in gaming, content creation, and general system responsiveness with confidence and stability. Understanding its function and how to enable it is a fundamental step in building or optimizing a high-performance computer system.
aViewFromTheCave is a participant in the Amazon Services LLC Associates Program, an affiliate advertising program designed to provide a means for sites to earn advertising fees by advertising and linking to Amazon.com. Amazon, the Amazon logo, AmazonSupply, and the AmazonSupply logo are trademarks of Amazon.com, Inc. or its affiliates. As an Amazon Associate we earn affiliate commissions from qualifying purchases.