
In an increasingly digital world, the convenience of carrying your entire wallet on your smartphone or smartwatch has become not just a luxury, but a growing expectation. Google Wallet stands at the forefront of this revolution, offering a secure and seamless way to manage everything from credit cards and loyalty programs to transit passes and digital IDs. Yet, for many, the initial question remains: “Where exactly do I find Google Wallet, and how do I get started?”
This guide will demystify Google Wallet, taking you from its conceptual roots to its practical application. We’ll explore its evolution, detail precisely where to download and install it across different devices, walk you through the setup process, and reveal how to unlock its full potential for a truly paperless, cashless experience. If you’re looking to consolidate your physical wallet into a powerful digital tool, you’ve come to the right place.
Understanding Google Wallet’s Evolution and Purpose
Before diving into the “how-to,” it’s crucial to understand what Google Wallet is and how it fits into Google’s broader ecosystem. This perspective helps clarify its functionalities and distinguishes it from previous iterations or related services.
From Google Pay to Google Wallet: A Brief History
The journey to the current Google Wallet has seen several transformations, often leading to some confusion among users. Initially, Google offered “Google Wallet” primarily for peer-to-peer payments and online purchases, distinct from “Android Pay,” which focused on contactless in-store payments. In 2018, Google consolidated these services under the “Google Pay” brand. Google Pay then served as a unified platform for online, in-app, and in-store payments, as well as peer-to-peer transfers, and storing loyalty cards and tickets.
However, recognizing the growing need for a comprehensive digital wallet that extends beyond just payments, Google reintroduced “Google Wallet” in 2022. This rebrand aimed to differentiate the core digital wallet functionality—storing cards, passes, keys, and IDs—from the broader Google Pay ecosystem, which continues to handle the underlying payment processing. Think of it this way: Google Wallet is now your digital container for all things financial and identity-related, while Google Pay is the engine that powers transactions within that container and across the web. This distinction is vital, especially when searching for the app, as the name “Google Wallet” is now the primary identifier for the mobile application.
More Than Just Payments: The Multifaceted Role of Google Wallet
While contactless payment remains a cornerstone of Google Wallet’s utility, its ambition stretches far beyond simple tap-to-pay. Google Wallet is designed to be a comprehensive digital hub for a wide array of personal credentials and assets, aiming to truly replace your physical wallet.
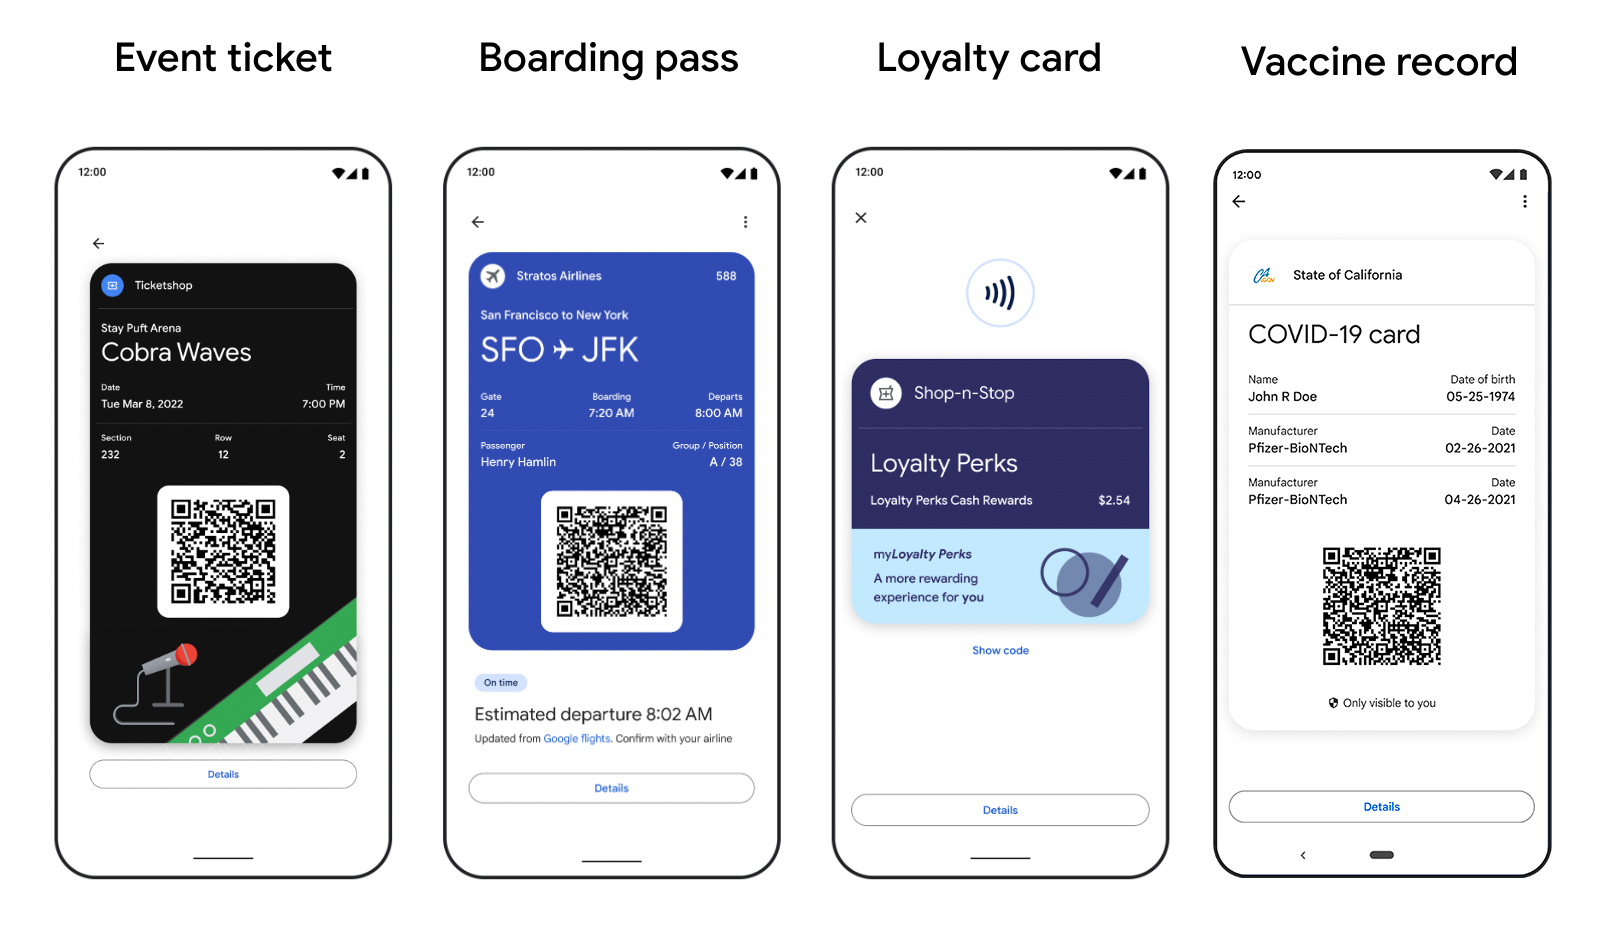
Beyond securely storing your credit and debit cards for seamless in-store, in-app, and online transactions, Google Wallet excels at managing various digital passes. This includes loyalty cards for your favorite retailers, transit passes for public transportation systems, event tickets for concerts and sports, and even digital boarding passes for air travel. The app’s ability to consolidate these disparate items into one easily accessible location significantly streamlines daily interactions and travel. Looking ahead, Google Wallet is also embracing the future of digital identification, with ongoing rollouts in various regions allowing users to store digital driver’s licenses and state IDs directly within the app, further cementing its role as a true replacement for its leather counterpart. This expansion into digital IDs brings significant convenience but also underscores the robust security measures built into the platform.
Pinpointing Google Wallet: Where to Download and Install
Finding Google Wallet is straightforward, but the exact steps can vary slightly depending on your device’s operating system. Understanding these nuances ensures a smooth installation process.
Android Devices: The Native Home
For Android users, Google Wallet is deeply integrated into the operating system, making it incredibly accessible. Many newer Android smartphones come with Google Wallet (or its predecessor, Google Pay) pre-installed. You might find it directly on your home screen, in your app drawer, or by swiping down from the top of your screen to access quick settings (where a “Wallet” or “Google Pay” tile might reside).
If it’s not pre-installed or you need to update it, the most reliable place to find Google Wallet is the Google Play Store.
Step-by-step Installation for Android:
-
Open the Google Play Store: Tap the Play Store icon on your device.
-
Search for “Google Wallet”: Use the search bar at the top of the Play Store.
-
Identify the Official App: Look for the app published by “Google LLC” with the familiar Google Wallet icon (a colorful ‘W’ symbol). Be cautious of similarly named apps from other developers.
-
Tap “Install”: Once you’ve found the correct app, tap the “Install” button.
-
Open the App: After installation, tap “Open” directly from the Play Store or find the new Google Wallet icon in your app drawer or on your home screen.
Ensure your Android device meets the minimum operating system requirements (typically Android 7.0 or newer) for optimal performance and security features. You’ll also need a stable internet connection for download and setup.
iOS Devices: Bridging the Ecosystem Gap
While Apple Pay is the native contactless payment solution for iPhones, Google Wallet is also available for iOS users, allowing them to leverage Google’s ecosystem for payments and passes, especially useful for those who use Google services extensively. It’s important to note that while Google Wallet on iOS provides many features, Apple’s stringent security architecture means it cannot function as the default contactless payment method in the same integrated way Apple Pay does for native hardware interaction. However, it still offers robust functionality for storing cards, loyalty programs, tickets, and online payments where Google Pay is accepted.
Step-by-step Installation for iOS:
-
Open the Apple App Store: Tap the App Store icon on your iPhone.
-
Search for “Google Wallet”: Use the search tab (magnifying glass icon) at the bottom right and type “Google Wallet” into the search bar.
-
Verify the Official App: Look for the app published by “Google LLC” with the distinct Google Wallet icon.
-
Tap “Get” (and Authenticate): Tap the “Get” button next to the app. You may need to authenticate with Face ID, Touch ID, or your Apple ID password to confirm the download.
-
Open the App: Once downloaded, tap “Open” from the App Store or locate the Google Wallet icon on your home screen.
Web Access and Associated Services
It’s important to distinguish that Google Wallet itself is primarily a mobile application. However, its functionalities are deeply intertwined with your Google Account, which you can manage via any web browser. For instance, you can manage payment methods associated with your Google Account for online purchases through the Google Pay website (pay.google.com). While this isn’t “Google Wallet on the web,” it’s the web interface for managing the underlying payment infrastructure that Google Wallet utilizes.
Additionally, Google Wallet extends its reach to smartwatches running Wear OS. If you have a Wear OS device, Google Wallet (or Google Pay) can be installed directly onto your watch via the Play Store on the watch or through the Wear OS companion app on your phone, enabling convenient tap-to-pay functionality right from your wrist.
Setting Up Your Google Wallet for Optimal Use
Once installed, setting up Google Wallet is an intuitive process designed to get you ready for digital transactions and pass management quickly.

Adding Payment Methods: Cards, Accounts, and More
The first and most crucial step for many is adding their payment cards. Google Wallet supports most major credit and debit cards from banks worldwide.
Steps to Add a Card:
-
Open Google Wallet: Launch the app on your device.
-
Tap the “+” button or “Add to Wallet”: This option is typically prominent on the main screen.
-
Select “Payment card”: Choose this option to add a credit or debit card.
-
Scan or Manually Enter Card Details: You can usually hold your card within the camera’s frame for automatic scanning of the card number, expiry date, and potentially your name. Alternatively, you can type in the card number, expiration date, CVV, and your name manually.
-
Verify Your Card: For security, your bank will typically require verification. This often involves receiving a code via SMS or email, a phone call to the bank, or using your bank’s mobile app. Follow the on-screen prompts to complete this step.
-
Set as Default (Optional): Once verified, you can choose to make this card your primary payment method.
Google Wallet employs tokenization, which means your actual card number is never shared with merchants during transactions. Instead, a unique, encrypted “token” is used, significantly enhancing security.
Integrating Digital Passes and IDs
Beyond payment cards, Google Wallet truly shines in its ability to consolidate various passes and documents.
Steps to Add Passes:
-
Open Google Wallet: Launch the app.
-
Tap the “+” button or “Add to Wallet.”
-
Select the Type of Pass: Options typically include “Loyalty program,” “Transit pass,” “Event ticket,” “Gift card,” or “Digital ID.”
-
Follow Specific Instructions:
-
Loyalty Cards: You might scan a physical barcode, enter a membership number, or select from a list of popular programs.
-
Transit Passes: Some transit agencies have direct integrations allowing you to add and even top up your balance within Google Wallet. Others might require you to add it via their specific app.
-
Event Tickets/Boarding Passes: Often, these can be added directly from an email (look for an “Add to Google Wallet” button), from a partner app, or sometimes by taking a screenshot which the app can then parse.
-
Digital IDs: This feature is currently rolling out in select regions. When available, the process usually involves a secure verification process, often linked to your government’s digital services.
-
The ease of adding these items reduces clutter in your physical wallet and ensures you always have them on hand when needed.
Security Features and Privacy Controls
Security is paramount for any digital wallet. Google Wallet is built with multiple layers of protection to safeguard your financial information and personal data.
-
Tokenization: As mentioned, your actual card number is replaced with a unique, encrypted token during transactions.
-
Screen Lock Requirement: To use Google Wallet for contactless payments, your phone must be unlocked, usually with a PIN, pattern, fingerprint, or face unlock. This prevents unauthorized access if your phone is lost or stolen.
-
Remote Wipe: If your device is lost or stolen, you can remotely locate, lock, or erase its data via Google’s Find My Device service, securing your Wallet contents.
-
Privacy Controls: Within your Google Account settings, you can review and manage data related to your transactions and usage of Google Pay services, allowing you to control your privacy preferences.
Maximizing Your Google Wallet Experience
With Google Wallet set up, you’re ready to unlock its full potential and enjoy a more streamlined digital life.
Seamless Contactless Payments
The most frequently used feature of Google Wallet is contactless payment. To use this, your phone must have Near Field Communication (NFC) enabled, which is standard on most modern smartphones.
How to Pay In-Store:
-
Wake and Unlock Your Phone: For smaller transactions, you might only need to wake your screen. For larger amounts, you’ll need to fully unlock your device.
-
Hold Your Phone Near the Terminal: Look for the contactless payment symbol (four curved lines) on the payment terminal. Hold the back of your phone near it.
-
Confirm Payment: A checkmark on your screen indicates a successful transaction. If you have multiple cards, you can typically select your preferred card before tapping.
For online purchases, look for the “Google Pay” button at checkout on websites or within apps. This allows for quick and secure payments without re-entering card details.
Leveraging Loyalty Programs and Offers
Google Wallet isn’t just for spending; it’s also for saving. By storing your loyalty cards, you ensure that you never miss out on points, rewards, or discounts. When paying at a merchant where you have a loyalty card stored, Google Wallet can often automatically apply your loyalty information, or prompt you to do so, before completing the payment. Some versions of the app may also feature a “Discover” tab where you can find personalized offers and promotions from various retailers.
Travel and Transit Made Easy
Whether you’re commuting daily or embarking on a long journey, Google Wallet significantly simplifies the experience. With compatible transit systems, you can simply tap your phone or watch at the turnstile, just as you would with a physical card. For air travel, having your boarding pass readily available in Google Wallet means no more fumbling with paper printouts or struggling with emails at the gate. The app can even provide real-time updates and gate changes for your flights.
Troubleshooting and Support
While Google Wallet is designed for ease of use, occasional issues can arise.
-
“NFC not working” / “Card declined”: Check if NFC is enabled in your phone settings. Ensure your card is verified and active. Sometimes, a quick restart of the phone or app can resolve glitches.
-
“App crashes”: Ensure your app and device OS are up to date. Clearing the app’s cache (in Android settings) can often help.
-
“Cannot add card”: Double-check card details. If problems persist, contact your bank as they might have security measures preventing card tokenization.
For comprehensive support, Google provides extensive online documentation and troubleshooting guides accessible through the Google Pay Help Center (support.google.com/pay) or directly within the Google Wallet app under settings/help.

Conclusion
Finding Google Wallet and integrating it into your daily life is a straightforward process that unlocks a world of convenience, security, and efficiency. From its intuitive setup for payment cards and digital passes to its robust security features and seamless user experience across Android, iOS, and Wear OS devices, Google Wallet is designed to be your indispensable digital companion. By following this guide, you should now feel confident in locating, installing, and maximizing the potential of Google’s powerful digital hub. Embrace the future of personal management—your wallet is now just a tap away.
aViewFromTheCave is a participant in the Amazon Services LLC Associates Program, an affiliate advertising program designed to provide a means for sites to earn advertising fees by advertising and linking to Amazon.com. Amazon, the Amazon logo, AmazonSupply, and the AmazonSupply logo are trademarks of Amazon.com, Inc. or its affiliates. As an Amazon Associate we earn affiliate commissions from qualifying purchases.