
In the ever-evolving landscape of PC gaming and content creation, keeping your software up-to-date is not merely a recommendation – it’s a necessity. For millions of users worldwide, NVIDIA graphics cards are the backbone of their digital experiences, powering everything from graphically intensive AAA games to complex AI workloads and professional rendering tasks. At the heart of managing this powerful hardware lies the NVIDIA App, a unified platform designed to streamline driver updates, optimize game settings, and provide access to a suite of creative tools.
This guide will walk you through the critical importance of keeping your NVIDIA App updated and provide detailed, step-by-step instructions on how to ensure you’re always running the latest version. We’ll delve into why these updates matter, explore different methods for obtaining them, troubleshoot common issues, and offer best practices for maintaining a healthy NVIDIA software ecosystem. Whether you’re a seasoned PC enthusiast or a new user, mastering the update process for your NVIDIA App is fundamental to unlocking the full potential of your hardware and ensuring a smooth, secure, and cutting-edge experience.
Why Keeping Your NVIDIA App Updated is Crucial
The NVIDIA App is more than just a utility; it’s the central nervous system for your NVIDIA GPU’s software capabilities. Its continuous development brings a multitude of enhancements that directly impact your user experience. Neglecting updates can lead to a cascade of problems, from suboptimal performance to critical security vulnerabilities. Understanding the specific benefits reinforces the importance of regular maintenance.
Enhancing Performance and Stability
One of the primary reasons to keep your NVIDIA App updated is to benefit from ongoing performance optimizations. NVIDIA engineers are constantly refining their software stack, identifying bottlenecks, and tweaking algorithms to squeeze more frames per second (FPS) out of your games and accelerate creative applications. New drivers, delivered through the app, often include game-ready optimizations for the latest titles, ensuring you get the best possible experience from day one. Beyond raw performance, updates also address bugs and stability issues that might cause crashes, stuttering, or unpredictable behavior, leading to a much smoother and more reliable system.
Unlocking New Features and Optimizations
The NVIDIA App is an evolving platform. Updates frequently introduce entirely new features or significant enhancements to existing ones. This could range from advanced game optimization profiles, new RTX capabilities like DLSS (Deep Learning Super Sampling) or Frame Generation, to improved broadcasting tools and AI-powered enhancements for content creation. For example, the NVIDIA App itself is a relatively recent evolution, designed to consolidate and improve upon the functionalities previously offered by GeForce Experience and other NVIDIA tools. By keeping it updated, you ensure you have access to these cutting-edge innovations that can significantly upgrade your workflow or gaming enjoyment.
Bolstering Security Against Vulnerabilities
In an age where digital security is paramount, software vulnerabilities pose a constant threat. Like any complex software, the NVIDIA App and its underlying drivers can sometimes contain security flaws that, if exploited, could compromise your system. NVIDIA regularly releases security patches and fixes to address these vulnerabilities. Keeping your app updated ensures you’re protected against known threats, safeguarding your system from potential exploits and maintaining your privacy and data integrity. It’s a critical layer of defense that complements your antivirus and firewall solutions.
Ensuring Compatibility with Latest Games and Software
The gaming and software industries move at a rapid pace. New game engines, operating system updates, and application versions are released constantly. Your NVIDIA App, particularly its integrated drivers, acts as the bridge between your hardware and these new software environments. Outdated drivers can lead to compatibility issues, preventing new games from launching, causing graphical glitches, or even leading to crashes in professional applications. Regular updates ensure your GPU is fully compatible with the latest software titles, guaranteeing a seamless and trouble-free experience across your entire digital library.
Navigating the NVIDIA App Ecosystem
Before diving into the update process, it’s helpful to understand what the NVIDIA App is and where it fits within the broader NVIDIA software suite. This perspective clarifies its role and how it interacts with other components of your system.
Understanding the NVIDIA App’s Role (and Evolution from GeForce Experience)
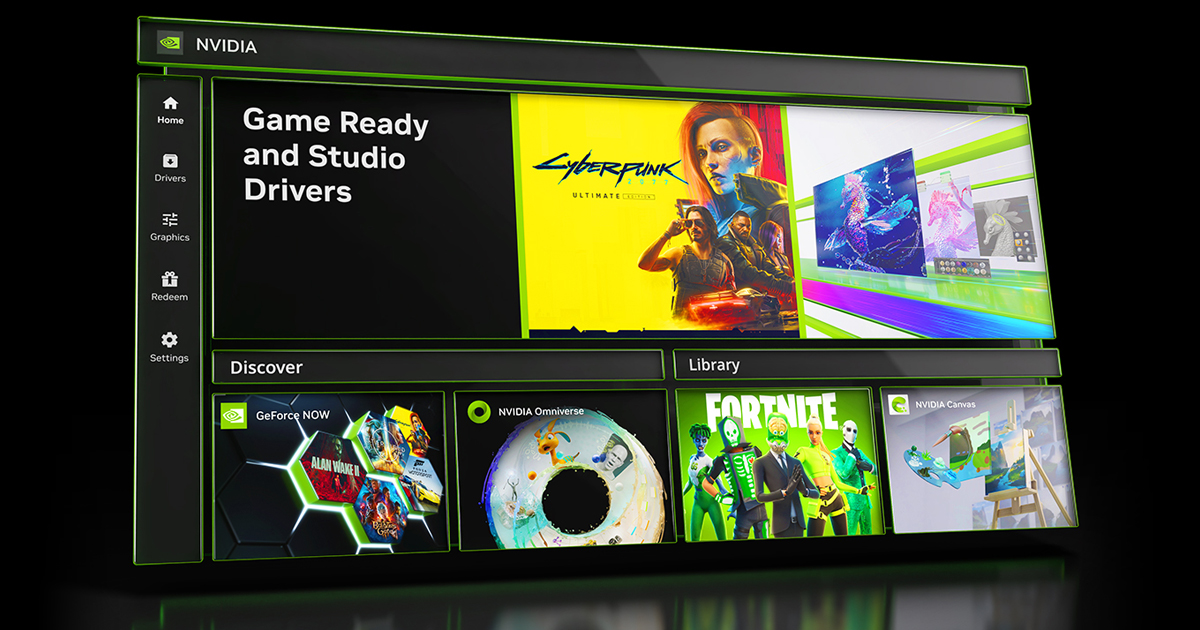
The NVIDIA App represents a significant step in NVIDIA’s software strategy. It’s designed to be a modern, unified platform that consolidates functionalities previously spread across different applications, most notably GeForce Experience. While GeForce Experience primarily focused on game optimization, driver updates, and ShadowPlay (in-game overlay for recording/streaming), the new NVIDIA App aims for a more comprehensive approach. It offers a refreshed user interface, a streamlined experience for driver management, integrated game and application optimization, and powerful tools for creative professionals, all under one roof. Its goal is to provide a single, intuitive hub for managing your NVIDIA GPU experience.
Initial Setup and Basic Interface Overview
When you first install the NVIDIA App, you’ll typically go through a brief setup process. This usually involves logging in with an NVIDIA account (optional but recommended for certain features like rewards), scanning for games, and potentially configuring initial settings. The app’s interface is generally divided into several key sections:
-
Home: A dashboard showing recommended drivers, recent games, and key features.
-
Drivers: The core section for checking for, downloading, and installing new graphics drivers.
-
Graphics: Where you can optimize game settings and manage game profiles.
-
Settings: For managing app preferences, account details, and update behaviors.
Familiarizing yourself with these sections will make navigating the update process much smoother.
Step-by-Step Guide to Updating Your NVIDIA App
Keeping your NVIDIA App updated is a straightforward process, but there are a few methods you can employ, depending on your preference and situation. We’ll cover the most common and recommended approaches.
Method 1: Automatic Updates (The Simplest Approach)
For most users, enabling automatic updates is the most convenient way to ensure your NVIDIA App and its associated drivers stay current.
How to Enable/Verify Automatic Updates
-
Launch the NVIDIA App: Open the application from your desktop shortcut or the Windows Start menu.
-
Navigate to Settings: In the NVIDIA App, look for the ‘Settings’ icon (often a gear icon) typically located in the left-hand navigation pane or the top right corner. Click on it.
-
Find Driver & Updates: Within the settings menu, you should find a section related to “Drivers” or “Driver & Updates.” Click on this.
-
Configure Automatic Downloads: Look for an option that allows you to “Automatically download driver updates” or similar. Ensure this setting is toggled “On.” You may also have an option to “Notify me when a new driver is available” or “Install automatically.” For minimal intervention, selecting automatic download and installation is ideal, though some users prefer to be notified and install manually.
-
Save Changes (if applicable): Some apps require you to click a “Save” or “Apply” button after changing settings.
With automatic updates enabled, the NVIDIA App will periodically check for new driver versions in the background, download them, and notify you when they are ready to install, or even install them silently depending on your configuration.
Method 2: Manual Update Through the App Itself
Even with automatic updates enabled, you might occasionally want to manually check for and initiate an update, perhaps if you hear about a critical new driver release or if automatic updates seem to be delayed.
Accessing the Settings/Update Section
-
Open the NVIDIA App: As before, launch the application.
-
Go to the Drivers Section: On the left-hand side navigation, click on the “Drivers” tab. This is your central hub for all driver-related information.

Initiating the Update Process
-
Check for Updates: In the “Drivers” section, the app will typically display your current driver version and notify you if a new version is available. There should be a prominent button like “Check for Updates” or “Download Driver.” Click this button.
-
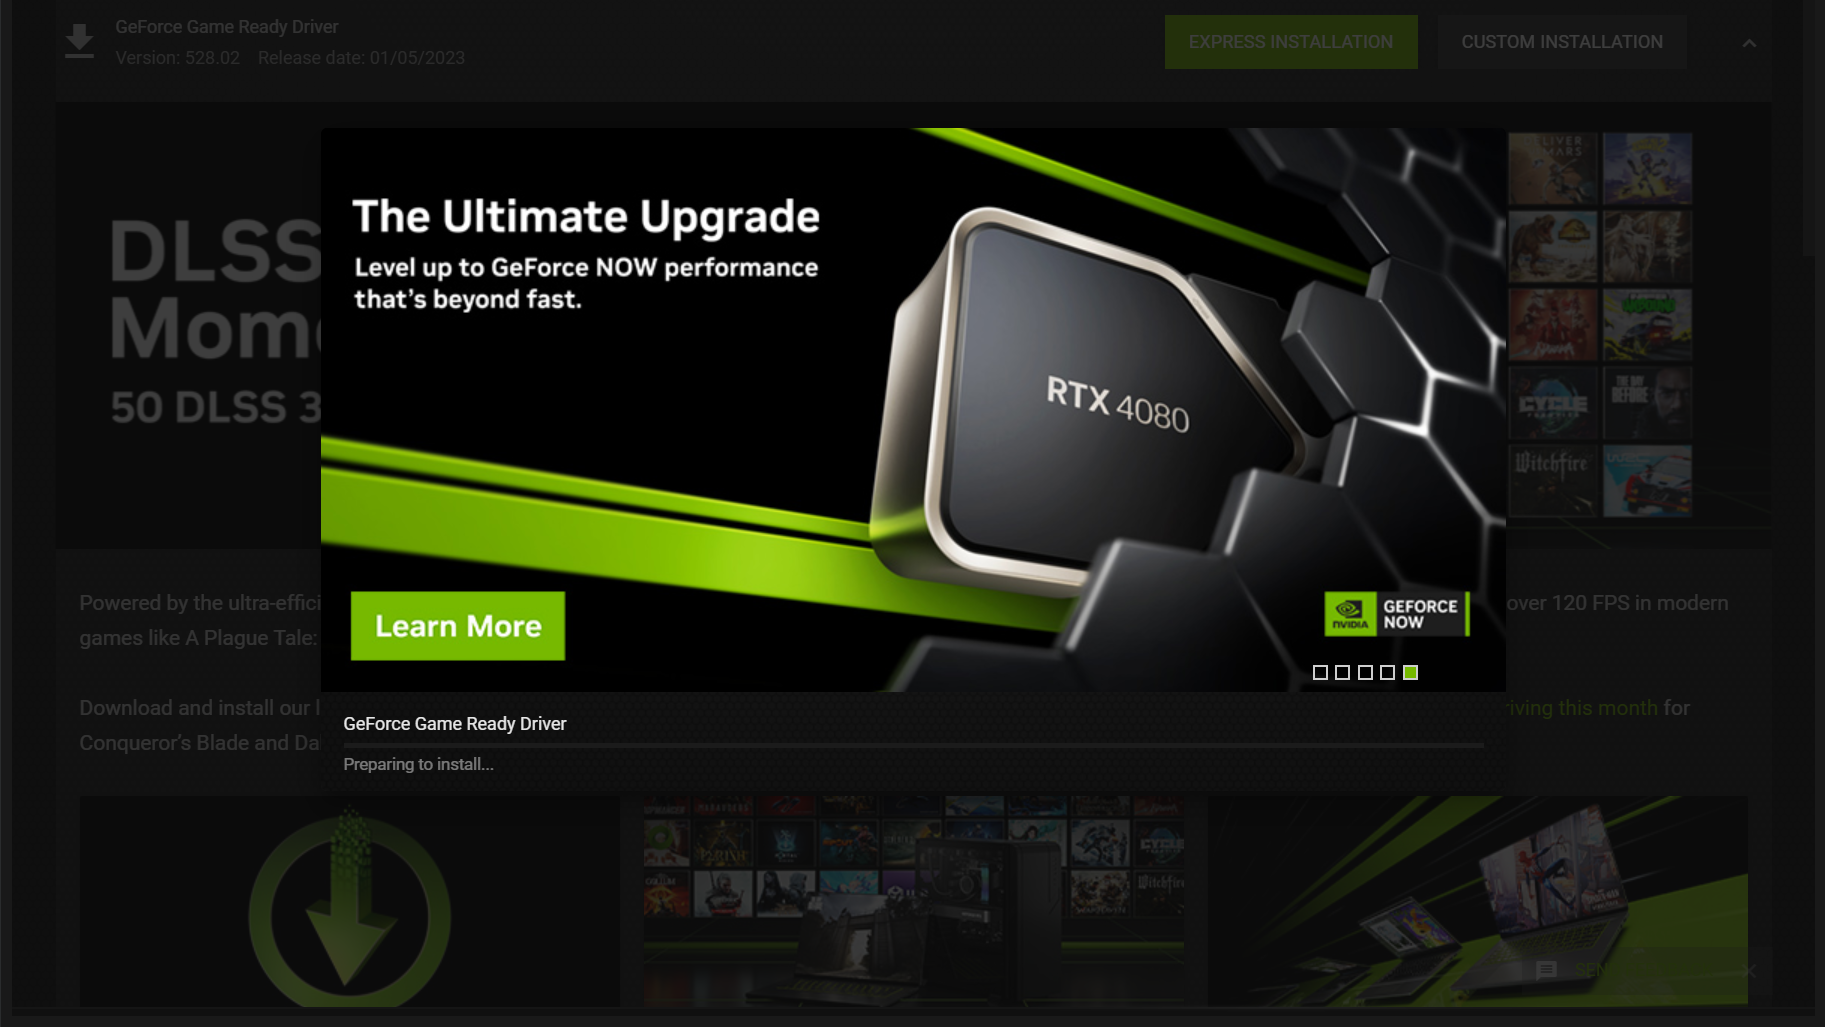
Download the Driver: If a new driver is found, the app will begin downloading it. You’ll usually see a progress bar indicating the download status.
-
Choose Installation Type: Once the download is complete, you’ll be prompted to choose an installation type.
-
Express Installation: This is the recommended option for most users. It automatically installs all components without requiring extensive user input.
-
Custom Installation: This option allows you to select specific components to install (e.g., just the graphics driver, without NVIDIA PhysX or HD Audio drivers). It also offers a “Perform a clean installation” checkbox, which is useful for resolving potential issues by removing all previous NVIDIA driver files before installing the new ones. For general updates, Express is fine; for troubleshooting or major version jumps, Custom + Clean Installation is often preferred.
-
-
Follow On-Screen Prompts: The installer will guide you through the rest of the process. Your screen may flicker or go black momentarily as the graphics driver is updated.
-
Restart (if prompted): While not always necessary, it’s good practice to restart your computer after a driver installation, especially if prompted, to ensure all changes are fully applied.
Method 3: Downloading from NVIDIA’s Official Website (Clean Installation)
Sometimes, you might prefer to download the driver directly from NVIDIA’s website. This is particularly useful for a completely clean installation, which can resolve stubborn issues, or if you’re setting up a new system and don’t yet have the NVIDIA App installed.
Locating the Official Download Page
-
Open Your Web Browser: Go to the official NVIDIA driver download page. The URL is typically
www.nvidia.com/drivers. -
Select Your Product: Use the dropdown menus to accurately select your NVIDIA Graphics Card series, product (e.g., GeForce RTX 40 Series, RTX 4090), your operating system (Windows 10, Windows 11), and the download type (Game Ready Driver or Studio Driver).
-
Search for Drivers: Click the “Search” button to find the latest available drivers for your configuration.
Downloading and Running the Installer
-
Download the Driver: On the search results page, click “Download” next to the latest driver version. Save the executable file to a location you can easily find (e.g., your Downloads folder).
-
Run the Installer: Once the download is complete, locate the downloaded file and double-click it to start the installation process.
-
Accept License Agreement: Review and accept the NVIDIA Software License Agreement.
-
Choose Installation Type: Similar to the in-app manual update, you’ll be prompted to choose between “Express Installation” and “Custom (Advanced).” For a clean installation, always select Custom (Advanced).
-
Perform a Clean Installation: On the Custom Installation Options screen, make sure to check the box that says “Perform a clean installation” (it might be labeled slightly differently depending on the installer version). This will remove all previous NVIDIA drivers and settings before installing the new ones, ensuring a fresh start.
-
Select Components (if Custom): If you chose Custom, select the components you wish to install (typically all of them unless you have specific reasons not to).
-
Complete Installation and Restart: Follow the remaining on-screen prompts. Your screen will likely flicker. Once the installation is finished, restart your computer to finalize the process.
Troubleshooting Common Update Issues
While NVIDIA updates are generally smooth, you might occasionally encounter issues. Here are some common problems and their solutions.
“Download Failed” or Interrupted Updates
-
Check Internet Connection: Ensure your internet connection is stable. A fluctuating connection can interrupt downloads.
-
Free Up Disk Space: Make sure you have enough free space on your drive for the download and installation.
-
Disable Antivirus/Firewall (Temporarily): Your security software might be interfering. Temporarily disable it during the download and installation, then re-enable it immediately afterward.
-
Try Official Website Download: If the in-app download fails repeatedly, try downloading the full installer from NVIDIA’s official website as described in Method 3.
Installer Errors and Compatibility Problems
-
Restart Your PC: A simple restart can often clear temporary glitches that cause installer errors.
-
Run as Administrator: Right-click the installer executable and select “Run as administrator.”
-
Clean Installation: If you’re experiencing persistent issues, performing a clean installation (Method 3, Custom Installation with “Perform a clean installation” checked) is often the most effective solution. This removes corrupt or conflicting old driver files.
-
Check OS Compatibility: Ensure the driver version you’re trying to install is compatible with your specific Windows version (e.g., Windows 10 vs. Windows 11, 64-bit).
-
Verify GPU Model: Double-check that you’ve selected the correct NVIDIA GPU model for your drivers.
Post-Update Performance Glitches
-
Restart Again: Sometimes, a second restart can resolve minor post-installation issues.
-
Revert to Previous Driver: If the new driver causes significant problems, you can use Windows Device Manager to “Roll Back Driver” to the previous version. Alternatively, download and install an older, known-stable driver version from NVIDIA’s website.
-
Check Game/App Settings: New drivers might reset some game or app-specific settings. Verify your in-game graphics settings are still configured as desired.
-
Submit Feedback: If problems persist, consider providing detailed feedback to NVIDIA through their official channels or forums.
Driver-Related Conflicts (and how the App handles them)
The NVIDIA App is designed to manage driver installations, but conflicts can still arise, especially if you have other graphics solutions (e.g., integrated Intel graphics) or if previous installations were incomplete. The “clean installation” option is your best friend here, as it minimizes the chances of old driver remnants clashing with new ones. If you have both integrated and dedicated GPUs, ensure both have their latest drivers, and that your system is correctly prioritizing the NVIDIA GPU for demanding tasks.
Best Practices for Maintaining Your NVIDIA Software
Beyond simply updating, adopting a few best practices can significantly enhance your long-term experience with NVIDIA software.
Regular Checks and Timely Updates
While automatic updates are convenient, a quick manual check in the NVIDIA App once every few weeks can ensure you’re aware of the latest releases. Don’t delay updates, especially if they are labeled “Game Ready” for a title you plan to play, or if they address critical security issues. Timely updates mean you spend less time troubleshooting and more time enjoying your PC.
Understanding Driver vs. App Updates
It’s important to distinguish between updates for the NVIDIA App itself and updates for the graphics drivers it manages. The NVIDIA App often updates independently to introduce new features or improve its interface. The graphics drivers, however, are the core components that directly communicate with your GPU and are released much more frequently, often coinciding with new game releases or major performance enhancements. Both are important, but driver updates typically have a more immediate impact on performance and compatibility.
Providing Feedback to NVIDIA
NVIDIA provides channels for user feedback, usually through their forums or dedicated feedback tools within the app. If you encounter bugs, have suggestions for new features, or experience performance issues after an update, taking a moment to report them can contribute to future improvements. Your input helps NVIDIA refine their software for the entire user base.
Leveraging Other NVIDIA Tools (e.g., NVIDIA Control Panel)
While the NVIDIA App is a unified hub, the NVIDIA Control Panel still plays a crucial role for advanced users. It allows for granular control over display settings, 3D settings (like anisotropic filtering or anti-aliasing overrides), multi-GPU configurations, and more. Familiarize yourself with both tools to gain complete mastery over your NVIDIA experience. The NVIDIA App streamlines the most common tasks, while the Control Panel offers deeper customization.
Conclusion
Keeping your NVIDIA App and its underlying graphics drivers updated is a fundamental aspect of owning an NVIDIA GPU. It’s a proactive step that safeguards your system, enhances performance, unlocks new features, and ensures compatibility with the latest software. By following the comprehensive steps outlined in this guide – whether through automatic updates, manual in-app installation, or a clean installation from the official website – you empower yourself to maintain a cutting-edge, stable, and secure computing environment.
Embrace the routine of checking for updates, understanding their benefits, and knowing how to troubleshoot potential issues. This commitment to software maintenance will not only extend the life and utility of your hardware but will also significantly elevate your overall gaming, creative, and general computing experience. Your NVIDIA GPU is a powerful piece of technology; ensure its software is just as formidable by keeping it always up-to-date.
aViewFromTheCave is a participant in the Amazon Services LLC Associates Program, an affiliate advertising program designed to provide a means for sites to earn advertising fees by advertising and linking to Amazon.com. Amazon, the Amazon logo, AmazonSupply, and the AmazonSupply logo are trademarks of Amazon.com, Inc. or its affiliates. As an Amazon Associate we earn affiliate commissions from qualifying purchases.